

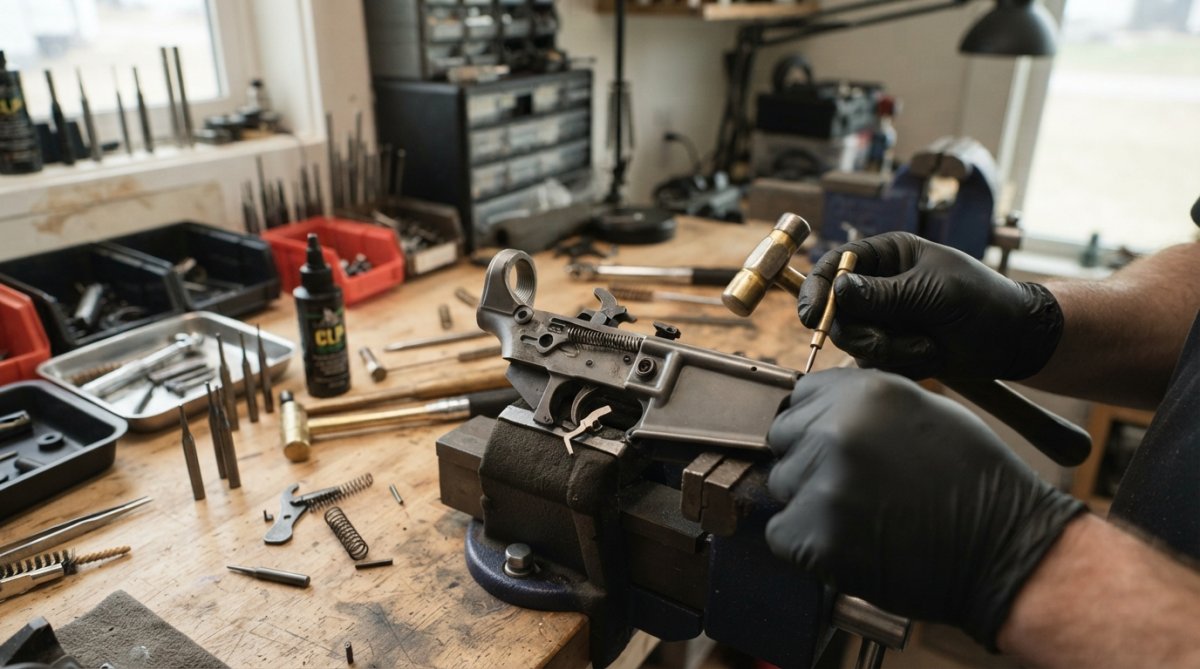
Table of Contents
- What Causes Firearm Trigger Failure?
- Step 1: Master Trigger Control Fundamentals
- Step 2: Follow a Firearm Trigger Maintenance Schedule
- Step 3: How to Clean a Firearm Trigger Group
- Step 4: Troubleshooting Trigger Reset Issues
- Step 5: Diagnose Mechanical Failure vs. Operator Error
- Step 6: Handle Misfires and Malfunctions Safely
- Step 7: Use Safety Devices and Proper Storage
- Frequently Asked Questions
Last Updated: September 5, 2026
Most firearm owners focus on grip, stance, and sight alignment, yet a single trigger failure can undo all of it in a fraction of a second. Preventing firearm trigger failure issues requires understanding that most problems fall into two camps: operator technique and mechanical condition. Trigger failure is any interruption between your trigger press and the hammer or striker falling, and it can stem from a dirty trigger group, a broken sear, or a flinch you did not realize you had. This guide walks through a seven-step system to diagnose, fix, and prevent trigger problems before they cost you a match or compromise your safety.
The core insight is simple: you cannot fix what you do not understand. Below, we will show you exactly how to separate human error from hardware failure, clean a trigger group correctly, and handle malfunctions without panic.
What Causes Firearm Trigger Failure?
Trigger failure is the interruption of the firing sequence, where the trigger press does not reliably release the sear to drop the hammer or striker. The causes split cleanly into two categories: mechanical failure and operator error. Mechanical failures include a broken trigger return spring, a worn sear edge, debris in the trigger group, or a disconnector that has lost its timing. Operator errors include trigger slap, milking the trigger (squeezing your whole hand instead of just the trigger finger), and thumbing error, where the support thumb rides the slide or safety.
A common mistake is blaming the gun when the shooter is the variable. If the failure happens only during live fire but never during dry fire, the problem is almost certainly flinch or anticipation, not the trigger mechanism. The reverse is also true: a trigger that feels gritty or inconsistent during dry fire points to a mechanical issue that needs attention before you trust it in competition.
Step 1: Master Trigger Control Fundamentals
The most common trigger failure is not a broken part; it is inconsistent pressure applied by the shooter. Trigger control is the ability to move the trigger straight to the rear without disturbing sight alignment, and it requires isolating the trigger finger from the rest of the hand.
Start with your grip pressure. A firm grip with the support hand, roughly 60-70 percent of your total pressure, lets the firing hand stay relaxed enough for a clean press (uspsa.org). The pad of your index finger should contact the trigger at the same spot every time, and your finger should move independently of the other fingers. A common failure is trigger slap, where the shooter jerks the trigger rearward, pulling the muzzle off target. Instead, apply consistent pressure, slowly increasing until the shot breaks. If the trigger fails to reset because you have relaxed your grip mid-string, you have introduced a new malfunction by breaking the firing grip.
Trigger slap and milking the trigger do not just cause missed shots. They can cause an involuntary discharge when the shooter, expecting a bang that does not come, slaps harder and the trigger finally breaks while the muzzle has drifted off target.
Step 2: Follow a Firearm Trigger Maintenance Schedule
A firearm trigger maintenance schedule is the single most effective way to prevent mechanical trigger failure, yet most owners clean the barrel and bore and ignore the trigger group entirely. Carbon fouling, unburnt powder, and old lubricant harden into a gritty paste that slows the trigger and can prevent full reset. Set a schedule based on round count, not calendar dates. A practical baseline is a full trigger group inspection every 1,000 to 1,500 rounds, with a detail strip and clean every 3,000 rounds for competition guns (nra.org).
For carry or self-defense firearms, inspect the trigger group every six months even if you have not shot it, since lubricants break down and dust migrates. For a competition gun that sees weekly live fire, move that inspection to every 500 rounds. The key is consistency. A trigger that feels fine at round 200 can be dangerously sluggish by round 800 if you never clean it.
| Maintenance Task | Recommended Interval | Primary Benefit |
|---|---|---|
| Wipe down trigger group exterior | Every 500 rounds | Prevents grit buildup |
| Inspect springs and sear engagement | Every 1,000-1,500 rounds | Catches worn parts early |
| Detail strip and clean trigger group | Every 3,000 rounds | Restores consistent pull weight |
| Function check after cleaning | Every cleaning session | Confirms safe operation |
Step 3: How to Clean a Firearm Trigger Group
Cleaning a trigger group is a precision task, and how to clean a firearm trigger group correctly is the difference between a crisp trigger and a ruined sear. The most common mistake is spraying solvent directly into the trigger group, which washes out the factory grease and can leave a residue that attracts carbon. Instead, remove the trigger group from the receiver following your firearm’s manual, then work on a clean, well-lit bench.
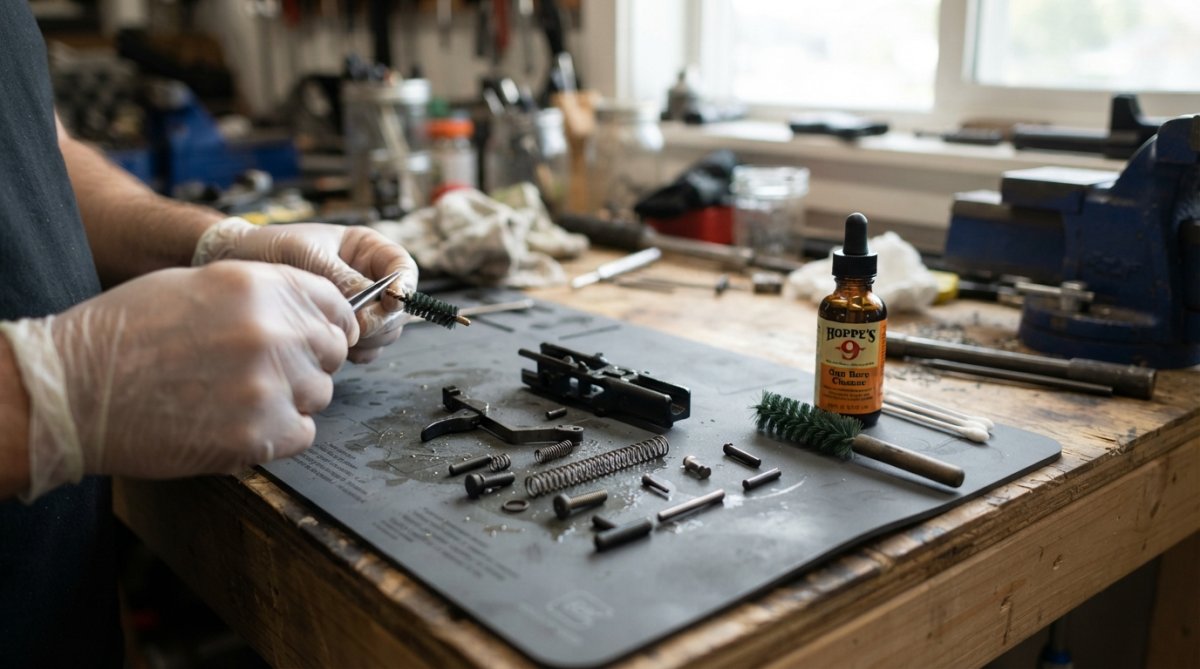
Use a nylon brush and a quality solvent to remove carbon from the sear, trigger bar, and disconnector. Do not use a metal brush on the sear engagement surfaces; even light scratching will accelerate wear and change the trigger pull weight. After cleaning, apply a thin coat of grease to the contact points, not an oil that will run into the firing pin channel. A common mistake is over-lubricating, which attracts dust and turns into a grinding paste. When reassembling, verify the trigger return spring is seated correctly and the trigger moves freely through its full range of motion before reinstalling the group.
Step 4: Troubleshooting Trigger Reset Issues
Troubleshooting trigger reset issues starts with identifying whether the trigger is failing to reset mechanically or whether the shooter is failing to release it far enough. A proper trigger reset is the tactile and audible click you feel when the trigger moves forward after a shot, re-engaging the sear. If you do not feel that click, the trigger will not fire on the next press.
Mechanical causes include a weak or broken trigger return spring, debris blocking the trigger bar, or a disconnector that is not sliding properly. Operator causes are equally common: shooters who shoot fast often short-stroke the trigger, releasing it only halfway and never allowing the sear to re-engage. For striker-fired pistols, a failure to reset can also be a sign of a worn striker safety plunger. Test the reset during dry fire by pressing the trigger, holding it to the rear, cycling the slide, and then slowly releasing the trigger until you feel the reset click. If the click is absent or inconsistent, strip the trigger group and inspect the return spring before your next live fire session. maintaining tactical equipment.
For aftermarket triggers, a failure to reset is often a sign of an improperly installed trigger return spring. Compare your spring orientation against the manufacturer’s diagram before assuming the trigger itself is defective.
Step 5: Diagnose Mechanical Failure vs. Operator Error
Diagnosing whether a trigger issue is mechanical failure or operator error requires a controlled test that removes the shooter from the equation. The most effective method is the “two-hand test”: have a second shooter fire the firearm, or use a shooting rest to fire it without your hands on the grip. If the malfunction disappears, the problem was your technique.
Operator errors are predictable. A flinch causes the muzzle to dip just before the shot breaks. Milking the trigger, where the shooter squeezes the whole hand, pulls the muzzle to the support side. Thumbing error, where the support thumb presses against the slide, can slow slide cycling and cause failures to feed. Mechanical failures are equally specific. A hammer-fired gun that fails to fire but shows a light primer strike points to a weak hammer spring. A trigger that feels like it has a “double stage” when it should be a single stage often has a worn sear or a bent trigger bar.
If the malfunction happens only with one magazine, suspect the magazine, not the trigger. If it happens with every magazine but only during rapid fire, suspect the disconnector timing. The diagnostic table below summarizes the most common failure patterns and their likely causes.
| Symptom | Likely Cause | Correction |
|---|---|---|
| Trigger feels gritty | Carbon buildup in trigger group | Detail strip and clean |
| No reset click after firing | Weak trigger return spring | Replace spring |
| Light primer strike | Weak hammer or striker spring | Check spring tension |
| Malfunction only during live fire | Shooter flinch or anticipation | Dry fire practice |
| Failure to feed after trigger press | Thumbing error slowing slide | Adjust support hand grip |
Step 6: Handle Misfires and Malfunctions Safely
A misfire is a failure of the cartridge to fire after the trigger is pressed, and how you handle it determines whether it stays a range annoyance or becomes a trip to the emergency room. The cardinal rule is to keep the firearm pointed in a safe direction for at least 30 seconds after a misfire (saami.org). This waiting period covers the possibility of a hang fire, where the primer ignites slowly and the round fires late.
If the round does not fire, keep the muzzle pointed downrange, remove the magazine, and lock the slide or bolt open. Eject the unfired cartridge and inspect the primer. A light primer strike indicates a mechanical issue with your hammer or striker spring. A deep primer strike with no ignition indicates a bad primer or a firing pin issue. Do not immediately eject a misfired round; some ammunition can fire several seconds after the first strike. Beyond misfires, a failure to feed or failure to eject is usually a cycling issue, not a trigger issue, and is often caused by a weak recoil spring or a dirty chamber. Always clear a malfunction with the muzzle pointed in a safe direction and your finger off the trigger.
Step 7: Use Safety Devices and Proper Storage
The final layer of preventing firearm trigger failure issues is controlling the environment where the firearm sits when you are not shooting. Proper storage prevents debris, moisture, and unauthorized handling from creating a mechanical failure later. For long-term storage, use a gun lock or a locked safe, and store the firearm with the action open or with a chamber flag inserted so there is no possibility of an accidental discharge.
For firearms stored for home defense, a quick-access safe with a push-button lock balances security with speed. A common mistake is storing a firearm with the trigger group heavily lubricated, which attracts dust and can gum up the mechanism over months of inactivity. Store the firearm clean and lightly oiled, and cycle the action every few months to keep springs from taking a set. If you use a trigger lock, ensure it does not put pressure on the trigger itself, which can bend the trigger bow over time. A mechanical failure that happens after months of storage is almost always a maintenance failure, not a parts failure.
Trigger reliability comes down to consistent technique, a clean action, and honest diagnosis when something goes wrong. Most trigger failures are preventable with a regular maintenance schedule and disciplined dry fire practice. At Polymer Pew, we build our drop-in triggers and super safety kits with hardened stainless steel internals and anodized aluminum housings, so they hold consistent pull weight round after round, and we test them for compatibility across common platforms. Whether you are upgrading a budget build or tuning a competition gun, start with a clean trigger group and verify your fundamentals before you change parts. Get your Flatties here and put a trigger in your build that you can trust.
Frequently Asked Questions
What are the most common causes of firearm trigger failure?
The most common causes are operator error, like jerking or slapping the trigger, and mechanical issues from carbon buildup, debris, or lack of lubrication. A dirty trigger group is a frequent culprit, as is a worn or broken trigger return spring. Regular cleaning and following a maintenance schedule will prevent most of these problems.
How can I tell if my trigger mechanism needs professional gunsmithing?
If you have trigger reset issues that persist after cleaning and lubrication, or if a safety function check fails, it is time to see a gunsmith. Other signs include a trigger pull weight that feels inconsistent, a gritty feeling that cleaning does not fix, or visible damage to parts. Do not try to fix a suspected mechanical failure yourself if you are not trained.
Does improper lubrication lead to trigger failure?
Yes, both too little and too much lubrication can cause problems. Too little oil creates friction and wear, while too much can attract carbon and debris, turning into a gritty paste that slows the trigger reset. Use a small amount of quality firearm lubricant on the contact points and keep the trigger group clean to ensure reliable function.
How do I perform a basic safety function check on my trigger?
First, ensure the firearm is unloaded and point it in a safe direction. With the safety on, try to pull the trigger; it should not move. Then, with the safety off, pull the trigger and hold it back while cycling the slide. Release the trigger and listen for a click, which indicates a proper reset. Repeat this process to confirm the trigger resets consistently every time.
This article was written using GrandRanker

