

Table of Contents
- Understanding Firearm Clone Trigger Problems
- Step 1: Identify Your Trigger Control Issue
- Step 2: Perform a Firearm Trigger Safety Inspection
- Step 3: Measure Trigger Pull Weight with a Gauge
- Step 4: Inspect Sear Engagement and Hammer Notch
- Step 5: Lubrication and Maintenance for Consistent Reset
- Step 6: Adjust Set Screws and Test Function
- Upgrading with Aftermarket Trigger Kits
Last Updated: August 12, 2026
Understanding Firearm Clone Trigger Problems
A firearm clone trigger pull issue can stem from mechanical failure, improper setup, or shooter technique. The distinction matters because the fix depends entirely on identifying the root cause. Whether you’re dealing with inconsistent reset, creep, overtravel, or gritty feel, systematic diagnosis saves time and money.
Trigger problems frustrate builders because they’re not always obvious. A trigger that feels wrong might have a mechanical binding point you can’t see. It might have tolerance stacking issues where multiple small gaps compound into a larger problem. Or it might be perfectly fine mechanically, but the shooter’s grip or finger position is creating the sensation of a bad trigger.
This guide walks you through systematic troubleshooting of firearm clone trigger pull problems. You’ll learn how to distinguish between mechanical failure and shooter error, perform a proper safety inspection, measure trigger pull weight accurately, and make adjustments that stick.
Before disassembling anything, document the exact problem. Does [the trigger](/shop/hk-and-clones/mp5-polymer-housing/mp5-trigger-housing/) reset slowly? Does it feel gritty? Does the pull weight vary shot to shot? Does it have excessive overtravel? Write it down. This becomes your diagnostic baseline.
Step 1: Identify Your Trigger Control Issue
The first step in troubleshooting firearm clone trigger pull problems is naming exactly what you’re experiencing. "Bad trigger" covers too much ground. You need precision.
Common trigger issues include inconsistent pull weight (varies between shots), creep (gradual movement before break), overtravel (excessive movement after the break), reset problems (trigger doesn’t return fully), gritty feel (rough or binding sensation), or slow reset (audible or tactile delay returning to ready).
Each of these points to different mechanical causes. Creep suggests sear engagement problems. Overtravel suggests the trigger lever hitting the receiver. Gritty feel suggests binding or lubrication issues. Slow reset suggests weak spring tension or binding in the reset path.
Distinguishing Mechanical Failure from Shooter Error
Not every trigger problem is mechanical. Shooter technique accounts for more perceived trigger issues than actual hardware failure.
A light, crisp trigger requires proper finger placement and grip discipline. If your finger is on the trigger too far forward or too far back, the trigger will feel inconsistent. If your grip shifts during the shot, you’ll feel movement that isn’t actually happening in the trigger mechanism itself. If you’re applying lateral pressure while pressing the trigger, you’ll introduce binding that doesn’t exist during a proper press.
Test this: Have someone else operate the trigger while the firearm is in a vise or secure rest. If the trigger feels consistent and smooth when operated by hand without the variables of grip and finger position, your problem is technique-based, not mechanical.
If the trigger still feels wrong in the vise, you have a mechanical issue. Document exactly what it feels like. This is your starting point for the next steps.
The fastest way to eliminate shooter error: isolate the trigger mechanically and operate it by hand. If it feels fine in isolation, focus on grip and technique. If it still feels wrong, proceed to mechanical inspection.
Step 2: Perform a Firearm Trigger Safety Inspection
A proper trigger safety inspection requires disassembling the trigger group safely and visually examining key engagement surfaces. This is where you identify binding points, wear, or tolerance issues.
Start with safety. Ensure the firearm is unloaded. Verify three times. Remove the magazine. Rack the slide or bolt. Look into the chamber. Do it again. Only then proceed to disassembly.
Remove the trigger group according to your firearm’s manual. For most clones, this means removing the lower receiver from the upper, then removing the trigger assembly from the lower. Work slowly. Note the position of each spring and pin.
Visual Inspection and Diagnostic Approach
Once the trigger group is out, examine the sear engagement surface and hammer notch under bright light. The sear engagement is where the sear lever contacts the hammer to hold it cocked. This surface should be clean and smooth. Look for wear marks, gouges, or discoloration indicating binding or rubbing.
Check the hammer notch where the sear engages. This should have a clean, defined edge. If it’s rounded, worn, or has visible scratches, the engagement surface has degraded and may not hold the sear properly.
Inspect the trigger lever and all pins for alignment. Pins should be straight and flush. Bent pins create binding. Loose pins allow movement that shouldn’t exist.
Look at the magazine safety lever if your firearm has one. This lever should move freely and return to its resting position without binding. Binding here creates inconsistent trigger feel.
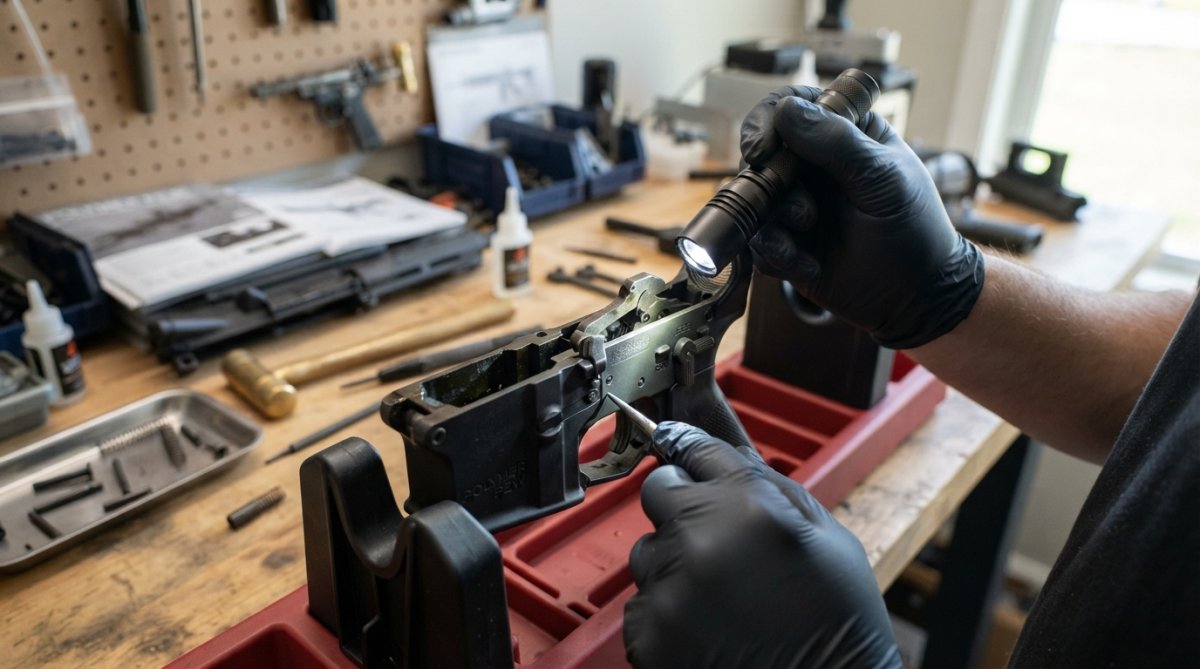
Check the frame slot where the trigger lever moves. Look for burrs, rough edges, or debris. A rough frame slot creates drag that feels like creep or gritty trigger.
Once you’ve visually inspected everything, manually cycle the trigger and hammer through their full range of motion. Feel for binding, catching, or resistance. Note where resistance occurs. This guides your next steps.
Step 3: Measure Trigger Pull Weight with a Gauge
Measuring trigger pull weight with a trigger pull weight gauge gives you objective data. This matters because perceived trigger feel is subjective, but actual pull weight is measurable.
A trigger pull weight gauge is a simple tool. It has a hook that engages the trigger and a scale that measures the force required to break the trigger. Most gauges measure in pounds or ounces. They cost between modest and moderate amounts depending on precision.
Using a Trigger Pull Weight Gauge Correctly
Mount the firearm securely in a vise or rest. The firearm must not move during measurement. Attach the gauge hook to the trigger. Ensure the hook is centered on the trigger face. Apply slow, steady pressure perpendicular to the trigger. The gauge will register the pull weight when the trigger breaks.
Measure three times. Record all three measurements. Consistency across measurements indicates a stable trigger. Wide variation indicates a problem with sear engagement, spring tension, or binding.
Compare your measurements to the firearm’s specification. Most clone triggers are spec’d between 4.5 and 5.5 pounds for duty use, though competition triggers run lighter. If your measurements are significantly higher or lower than spec, or if they vary widely, you’ve identified a mechanical issue.
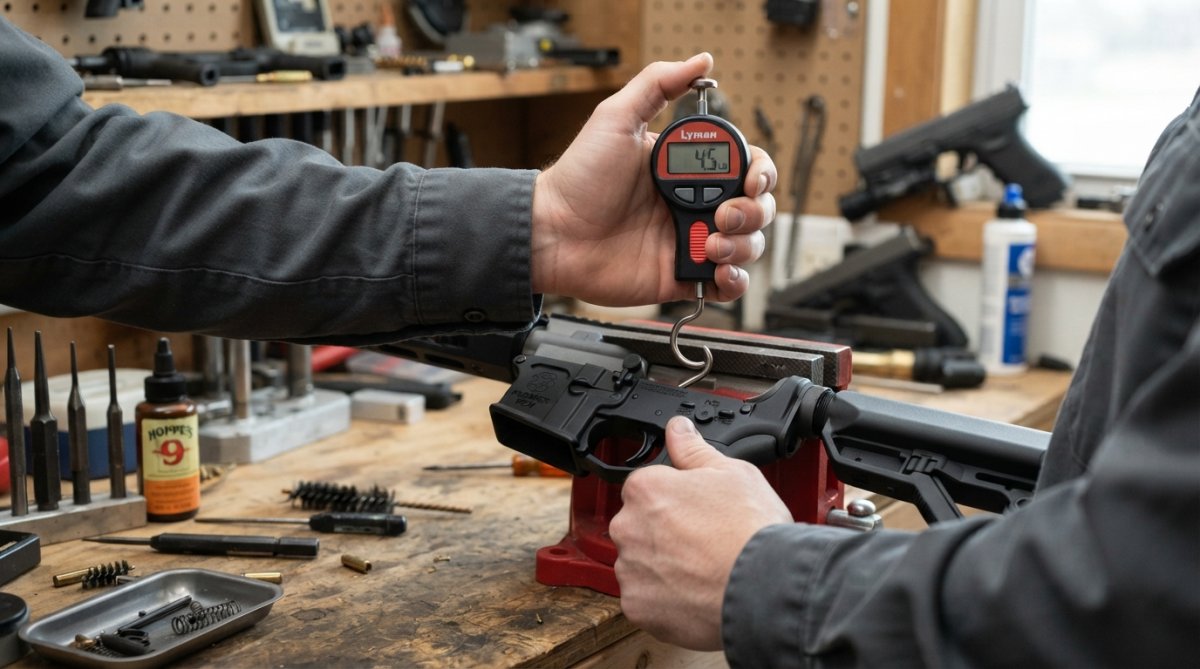
If pull weight is too high, suspect spring tension issues or binding in the trigger lever or sear. If pull weight is inconsistent, suspect sear engagement issues or binding that varies with trigger position. If pull weight is too light, suspect worn sear engagement surfaces.
Document these measurements. You’ll reference them after any adjustments to confirm the fix worked.
Never use a trigger pull weight gauge on a loaded firearm. Always ensure the firearm is unloaded and the chamber is clear before measuring. Improper gauge use can cause accidental discharge.
Step 4: Inspect Sear Engagement and Hammer Notch
Sear engagement is the mechanical relationship between the sear lever and the hammer notch. When the sear is properly engaged, it holds the hammer cocked until trigger pressure breaks the connection. Poor engagement creates inconsistent trigger feel.
The sear should engage the hammer notch with a clean, defined contact point. If the engagement surface is rounded, worn, or has only partial contact, the sear can slip or bind. This creates creep, gritty feel, or inconsistent pull weight.
Inspect the hammer notch for wear. A worn notch has rounded edges instead of sharp, defined contact points. Worn sear surfaces look shiny or polished from repeated contact. Both indicate the firearm clone trigger pull problem originates in sear engagement.
Clone-Specific Tolerance Variations
Clone firearms often have tighter tolerances or different material specifications than original designs. This creates compatibility issues with aftermarket parts and can introduce sear engagement problems.
Some clones use hardened steel sears and hammers. Others use softer materials. The hardness difference affects engagement surface wear rates. A soft sear against a hard hammer wears quickly. A hard sear against a soft hammer can bind.
Clone lower receivers sometimes have frame slots that are slightly out of spec. This creates binding that doesn’t exist in tighter tolerance builds. The trigger lever drags against the frame, creating resistance that feels like creep or a gritty trigger.
Check your firearm’s documentation for material specifications. If your clone uses softer sear or hammer materials, expect faster wear and more frequent maintenance. If the frame slot is out of spec, you may need to polish or slightly enlarge it to reduce binding.
Polymer Pew’s aluminum MKE lowers are tested for tolerance compatibility with common clone trigger groups, reducing the risk of frame slot binding. If you’re building with a lower from a different manufacturer, verify that the trigger group fit is snug but not tight before assuming the trigger is the problem.
Step 5: Lubrication and Maintenance for Consistent Reset
Lubrication affects trigger feel more than most builders realize. A dry trigger feels gritty and slow to reset. Properly lubricated triggers feel smoother and reset faster.
The correct approach is targeted lubrication, not flooding. Apply a thin film of gun oil to the sear engagement surface, hammer notch, trigger lever pivot, and frame slot. Use a small brush or applicator to place oil precisely. Excess oil collects dust and creates drag.
After lubrication, cycle the trigger 50 times. This distributes the oil and allows you to feel whether the problem improves. Measure trigger pull weight again. Many gritty triggers become smooth with proper lubrication.
Allow the firearm to sit for 24 hours after lubrication. Oil needs time to penetrate and settle. Then measure trigger pull weight again. You’re looking for consistency. If measurements are now consistent and the trigger feels smooth, lubrication solved your problem.
If lubrication didn’t solve it, the problem is mechanical binding or engagement surface wear, not just dry friction.
Step 6: Adjust Set Screws and Test Function
Many clone trigger groups include adjustable set screws that control sear engagement depth or trigger lever position. These adjustments are sensitive. Small changes create large effects.
Locate the set screws on your trigger group. Consult your firearm’s manual for their function. Common adjustments include sear engagement depth, trigger lever overtravel, and reset position.
Safety-First Adjustment Procedures
Before adjusting anything, mark the current position of each set screw with a marker or tape. If an adjustment makes things worse, you can return to the starting point.
Make one adjustment at a time. Change a single set screw by a quarter turn. Reassemble the trigger group. Test the trigger. Measure pull weight. Document the result. If the change helped, continue in that direction. If it made things worse, return to the starting position and try the other direction.
Never force a set screw. If it’s stuck, apply penetrating oil and wait. Forcing a stuck screw strips the threads and ruins the adjustment mechanism.
After each adjustment, perform a function test. Ensure the trigger resets, the hammer falls reliably, and the safety functions properly. A trigger adjustment that breaks another function is worse than the original problem.
Builders with mechanical experience and access to a vise, gauge, and appropriate tools. If you’re uncomfortable with trigger adjustments, consult a gunsmith. A single mistake can create a safety issue.
Upgrading with Aftermarket Trigger Kits
If troubleshooting and adjustment don’t resolve the problem, an aftermarket trigger kit may be necessary. Quality trigger kits solve tolerance and engagement issues by replacing worn or out-of-spec components.
Aftermarket kits typically include a new sear, trigger lever, hammer, springs, and pins. They’re engineered to tighter tolerances than many clone originals. Installing a quality kit often transforms a mediocre trigger into a reliable, consistent one.
Compatibility and Installation Considerations
Not all trigger kits fit all clones. Before purchasing, verify that the kit is compatible with your specific firearm platform and lower receiver type. Some kits require minor frame modifications like polishing the frame slot or enlarging pin holes.
Installation requires the same disassembly and reassembly skills you’ve already practiced during troubleshooting. The process is straightforward: remove the old trigger group, install the new kit following the manufacturer’s instructions, then test function thoroughly.
After installation, measure trigger pull weight and confirm it matches the kit’s specification. Cycle the firearm 100 times to ensure the new components settle. Measure again. Consistency indicates a successful installation.
Polymer Pew offers tested trigger kits designed for clone compatibility. Our flat trigger options and super safety kits are engineered for reliability and consistent performance across common clone platforms.
Firearm clone trigger pull problems frustrate builders because they’re not always obvious, but systematic troubleshooting works. Start by identifying the exact problem, then inspect mechanically. Measure pull weight, check sear engagement, lubricate properly, and adjust carefully. If the original components are worn or out of spec, a quality aftermarket kit solves the problem permanently. Get your flat trigger upgrades from Polymer Pew and eliminate trigger issues with components engineered for clone compatibility and consistent performance.
Frequently Asked Questions
What causes inconsistent trigger pull in firearm clones?
Inconsistent pull weight typically stems from tolerance stacking across clone components, inadequate lubrication, or sear engagement issues. Clone receivers often have wider manufacturing tolerances than OEM parts, causing the trigger lever, sear pin, and hammer notch to have variable contact points. Dry internal surfaces increase friction unpredictably, while worn or improperly seated disconnector springs prevent reliable reset. A trigger pull weight gauge reveals whether variation exceeds acceptable limits (typically 0.5 pounds between shots).
How do I safely test my trigger pull weight?
Use a dedicated trigger pull weight gauge designed for firearms. Ensure the firearm is unloaded, pointed in a safe direction, and the chamber is clear. Place the gauge hook on the trigger face and pull straight back at a 90-degree angle to the trigger until it breaks. Record the weight and repeat five times to check consistency. Variation exceeding 0.5 pounds indicates mechanical issues requiring inspection of the sear engagement surface, spring tension, or housing alignment.
Can aftermarket trigger kits solve clone trigger problems?
Aftermarket trigger kits address many clone trigger issues by replacing worn or out-of-spec components with tighter tolerances and better surface finishes. However, kit compatibility depends on your specific clone platform and receiver. Before installing, verify pin alignment, housing fit, and that the kit accommodates your bolt carrier type. Poor installation can create new binding points or reset failures. Always test function dry fire and live fire in a safe environment after installation.
When should I stop troubleshooting and contact a gunsmith?
Seek professional help if: the trigger exhibits creep or spasm that adjustment cannot eliminate, you suspect firing pin or bolt carrier damage, sear engagement surfaces show visible pitting or wear, or you feel unsafe disassembling the mechanism. Gunsmiths have specialized tools to measure engagement depth and can refinish worn surfaces. If your clone has frame slot damage or receiver warping, professional assessment prevents further damage and ensures safe function.
This article was written using GrandRanker

