

Table of Contents
- What You’ll Need Before Starting
- Step 1: Prepare the Lower Receiver and Parts
- Step 2: The Clevis Pin Trick for Pivot Pin Installation
- Step 3: The Household Tool Method Without a Clevis Pin
- The AR-15 Pivot Pin Detent Spring Installation Trick
- Troubleshooting AR-15 Pivot Pin Fitment Issues
- Common Mistakes and How to Avoid Them
- Final Checks and Preventative Maintenance
- Frequently Asked Questions
Installing an AR-15 lower receiver pivot pin is the most frustrating step in a build for most DIY enthusiasts, largely because the detent spring launches the tiny detent across the room the moment you slip with a punch. The good news is that you can complete this install cleanly without buying a dedicated armorer’s tool. This guide covers methods for a clean installation.
The pivot pin is the hinge point that connects the upper and lower receivers. The difficulty isn’t the pin itself; it is compressing the detent spring inside the receiver hole while simultaneously sliding the pin into place. Most guides overcomplicate this, but the fix is a simple matter of geometry and a little grease.
What You’ll Need Before Starting
The proper installation of an AR-15 pivot pin requires controlling the spring tension on the detent. You need the receiver, the pivot pin, the takedown detent, the detent spring, and a method to compress them.
- A clevis pin (the hero of this guide) or a paper clip
- A roll of masking tape or painter’s tape
- A small allen wrench or a standard punch for alignment
- Gun grease to hold the detent in the receiver hole
Never use excessive force to hammer the pivot pin into place. If the pin does not slide easily, the detent is not fully compressed. Forcing it can mar the finish on an [aluminum lower receiver](/affordable-aluminum-lower-receiver-upgrades-ar15/) or bend the pin.
Step 1: Prepare the Lower Receiver and Parts
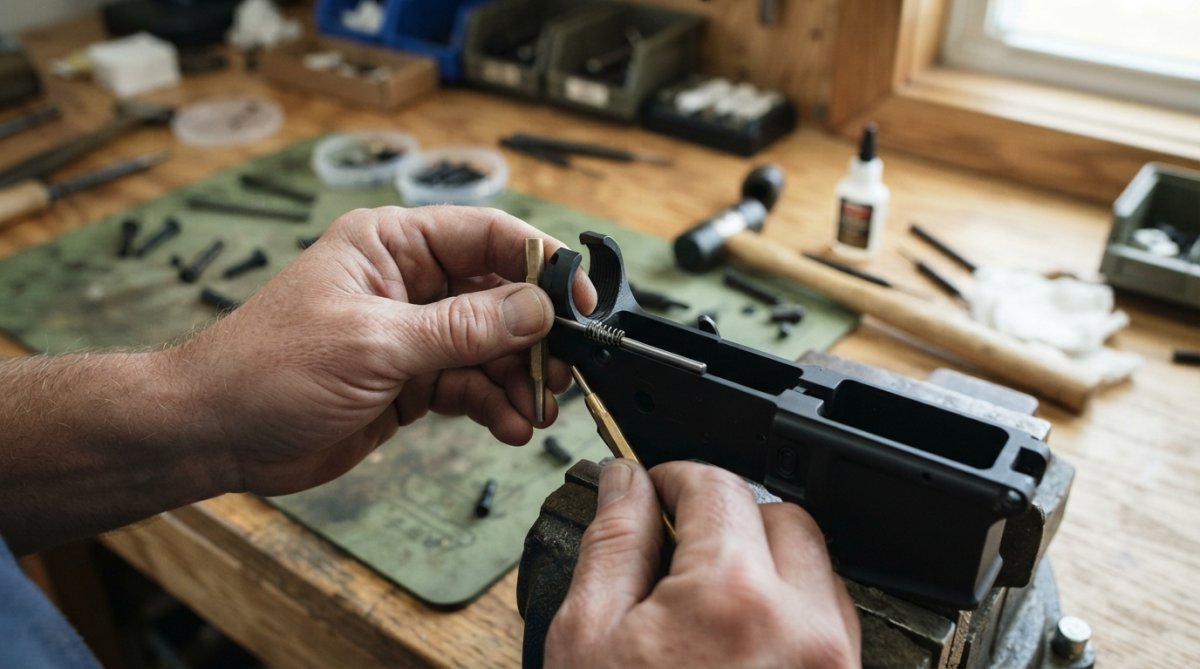
Start by securing the lower receiver in a vise with soft jaws or on a stable workbench. Apply a small dab of gun grease to the detent and the spring. This helps the detent slide smoothly, and the tackiness helps hold the small parts in place while you work.
Insert the detent spring into the small receiver hole at the front of the lower receiver, followed by the detent. The spring goes in first, with the detent sitting on top. You want the detent to sit flush or slightly below the surface of the receiver lug. Keep your thumb over the hole as you seat them.
Step 2: The Clevis Pin Trick for Pivot Pin Installation
A clevis pin is the ideal improvised tool because its U-shape allows you to trap the detent without blocking the pivot pin channel. Slide the clevis pin over the receiver lug so the legs straddle the detent hole. The crossbar presses down on the detent, compressing the spring and holding everything in place.
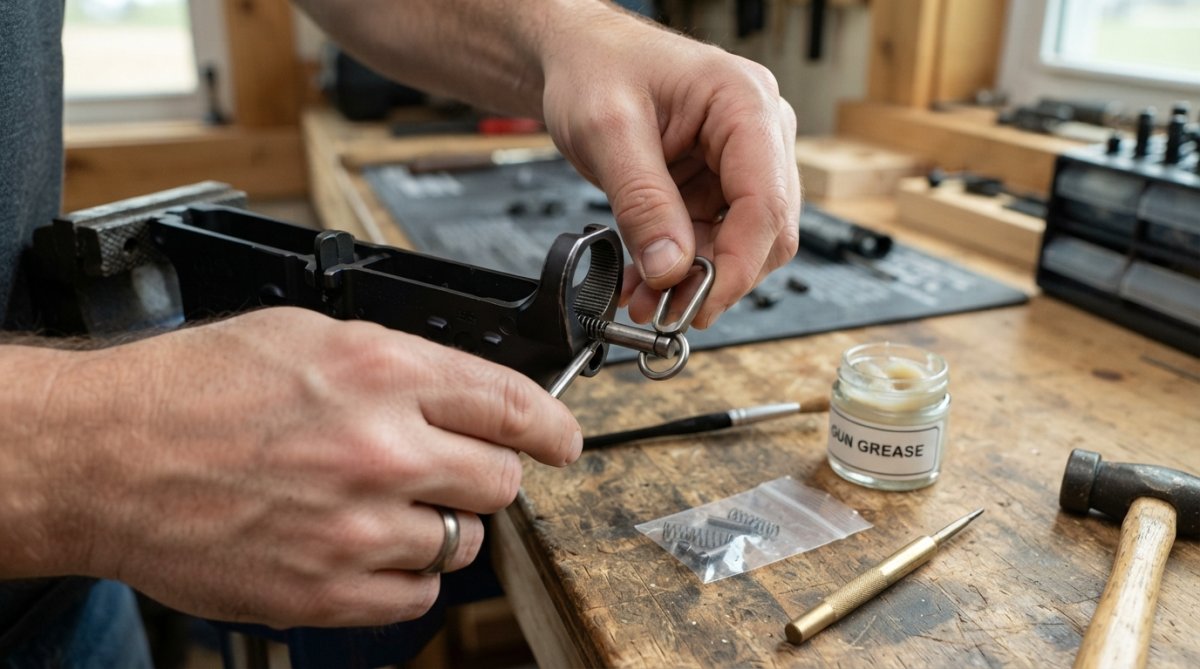
With the detent compressed, align the pivot pin with the receiver hole and slide it through. The pin should push the clevis pin legs apart slightly or slide under the crossbar, depending on the clearance. Once the pivot pin is halfway through, you can remove the clevis pin. Push the pivot pin the rest of the way until it clicks past the detent.
Step 3: The Household Tool Method Without a Clevis Pin
If you don’t have a clevis pin, a heavy-duty paper clip works almost as well. Straighten the paper clip and bend it into an L-shape. Insert the short end into the receiver hole on top of the detent, using it to push the detent down and hold it against the spring tension.
This method requires a third hand or a bit of tape. Use a strip of masking tape to hold the paper clip in place against the side of the receiver. With the detent compressed, slide the pivot pin in from the opposite side. Keep the paper clip pressed firmly until the pin has passed the detent’s location.
The AR-15 Pivot Pin Detent Spring Installation Trick
This is the trick that saves the most time. Instead of fighting the spring inside the receiver, use the pivot pin itself as the compression tool. Place the detent spring and detent into their hole, then angle the pivot pin so the groove on the bottom catches the detent.
Rotate the pivot pin slightly to compress the detent, then push the pin forward into the receiver hole. The rotation allows the pin to slide over the detent rather than push against it. This method requires a bit of finesse, but once you feel the detent drop into the pin’s groove, the pin is essentially locked in place. This technique is closely related to the AR-15 assembly guides from the National Shooting Sports Foundation, which emphasize proper parts handling during DIY builds.
Apply a thin layer of grease to the detent before attempting this rotation trick. The grease prevents the detent from catching on the pin’s edge and makes the final slide much smoother.
Troubleshooting AR-15 Pivot Pin Fitment Issues
Most fitment problems trace back to one of three root causes: the detent spring is binding, the detent is not seated in the pin’s groove, or a burr on the receiver lug is catching the spring. Here is how to diagnose each, plus the recovery drill for the most common catastrophe, the launched detent.
The Launched Detent: A Visual Recovery Drill
The moment the detent escapes, stop moving your feet. The part is small enough to bounce into a boot cuff or a floor crack, and the worst thing you can do is shuffle around and grind it into the concrete. Instead, follow this sequence:
- Kill the light source. Turn off bright overhead light and use a flashlight held at a low angle parallel to the floor. The detent’s polished steel surface will glint against most garage floors, making it far easier to spot.
- Sweep in concentric circles. Start at your feet and work outward in a spiral, using a strong neodymium magnet (a cheap magnetic pickup tool from an auto parts store works well) passed slowly over the floor. The detent is typically 0.154 inches in diameter and weighs less than a gram, so check a 6-foot radius.
- Check the classic traps. The detent often lands in the receiver’s trigger guard opening, inside the magazine well, or on top of the workbench under a rag. If you used a vise, check the soft jaws and the floor directly beneath the bench.
- If it is gone, do not improvise. A detent that is slightly out of round or has a flattened edge from a floor impact will cause the pivot pin to bind or walk out. Order a replacement detent and spring kit, they cost a few dollars and are sold by every major parts distributor, rather than risking a malfunction.
Diagnosing Spring Binding and Burrs
If the pivot pin stops halfway and will not budge, the detent spring is likely binding inside the receiver hole. This happens when the spring’s coils catch on a machining burr left at the hole’s edge. A forged lower receiver is more prone to this than a billet receiver because the forging process can leave a slight lip at the hole entry. survival gear guide.
To check, remove the pivot pin and detent spring entirely. Look through the hole with a bright light, if you see a shiny edge or a raised lip, dress it with a fine file or 400-grit sandpaper wrapped around a wooden dowel. Work slowly and check frequently; removing too much material will make the detent spring fit loosely, which causes the detent to rattle and the pin to walk.
The Groove Alignment Check
The detent must seat into the pivot pin’s circumferential groove, the recessed ring near the pin’s end, to hold the pin in place. If the pin feels gritty or resists rotation after installation, the detent is riding on the pin’s shaft rather than in the groove. This usually means the pin was not pushed fully forward before the detent was released. To fix it, compress the detent with a clevis pin or paper clip, push the pivot pin fully forward until it clicks, then release the detent. You should feel a positive snap as the detent drops into the groove.
If the pin requires more than light thumb pressure to seat, stop. Forcing the pin with a mallet can peen the detent’s tip, creating a burr that will cause permanent binding. Remove the pin and re-check the detent spring compression before proceeding.
Material-Specific Fitment Notes
Billet lower receivers typically have tighter tolerances than forged receivers (pewpewtactical.com). If you are installing a pivot pin into a billet lower, expect a snugger fit on the first few cycles. The detent hole on a billet receiver may also have a sharper edge, which can catch the spring more readily. A light chamfer with a countersink tool or a fine file, just one or two turns, will smooth this without compromising the hole’s dimensions. Forged receivers, by contrast, usually have slightly more clearance, so the pin slides easier but the detent may feel less positive when it clicks into the groove. This is normal and does not indicate a defect.
If the pin binds only when the upper receiver is attached, the issue is likely not the detent but the pin’s interaction with the upper’s lug. Check for burrs on the upper receiver’s pivot pin ears and dress them the same way. A drop of lubricant on the pin’s shaft before mating the receivers will help identify the friction point, if the pin moves freely without the upper but binds with it, the upper’s lug is the culprit.
Common Mistakes and How to Avoid Them
Most installation failures come down to losing the detent or scratching the receiver. Here is a quick reference to keep your build clean:
| Mistake | Why It Happens | The Fix |
|---|---|---|
| Detent launches across the room | Spring tension releases unexpectedly | Use grease to hold the detent in place |
| Pivot pin won’t slide | Detent not fully compressed | Use a clevis pin or paper clip for compression |
| Scratches on receiver lug | Metal tools slipping under pressure | Tape the receiver or use a plastic punch |
| Pin binds halfway | Detent not aligned with the groove | Rotate the pin slightly to guide the detent |
Final Checks and Preventative Maintenance
Once the pivot pin is seated, your work is not done. A pivot pin that functions perfectly on the bench can develop problems after a few hundred rounds if you skip the final checks and ignore the maintenance habits that keep the detent and spring working together.
The Three-Point Function Check
Before you declare the install complete, run this three-point check:
- Rotation test. The pivot pin should rotate freely with light finger pressure, about the same effort it takes to spin a coin on a table. If it is stiff, the detent is not fully seated in the groove, or the pin’s shaft is binding on the receiver lug. Re-compress the detent and reseat the pin.
- Swing test. With the upper receiver attached, the action should swing open and closed under its own weight when you tilt the rifle. Any friction or catching indicates the pin is not aligned with the upper’s lug holes.
- Walk-out test. Push the pivot pin from both sides with moderate thumb pressure. It should not move more than 1/16 inch in either direction. If it slides freely, the detent is not engaging the groove properly, pull the pin and re-check the detent spring tension.
Preventing Pin Walk-Out Without Aftermarket Parts
The most common long-term issue is the pivot pin gradually walking out of the receiver during firing, which happens when the detent spring loses tension or the detent’s tip wears down. You do not need a specialized anti-walk pin to prevent this. The fix is routine:
- Check spring tension at every cleaning. After each range session, press the pivot pin from the left side. It should resist movement and snap back when released. If it moves easily, the spring has fatigued. Replace the detent spring, they are inexpensive and wear out faster than most shooters expect, especially in rifles with high round counts.
- Inspect the detent tip for flat spots. The detent’s tip is what locks into the pin’s groove. Over time, it can develop a flat spot from repeated engagement, which reduces its holding power. If you see a shiny flat area on the tip, replace the detent. A new detent will cost less than a box of ammunition and takes two minutes to swap.
- Keep the groove clean. Carbon and old grease accumulate in the pivot pin’s groove, filling the recess and preventing the detent from seating fully. During routine disassembly, wipe the groove with a cotton swab dipped in solvent, then apply a fresh, thin layer of grease.
Lubrication: What to Use and What to Avoid
A light coat of standard gun grease on the detent and the pin’s groove is sufficient. Avoid heavy oils or greases that attract carbon, they will turn into a gritty paste inside the receiver hole and cause the detent to bind. Aerosol solvents are also a poor choice because they wash away the grease and leave the spring dry, which accelerates wear.
For most builds, a single drop of grease on the detent and a thin film on the pin’s shaft is all you need. The grease lubricates the sliding contact between the detent and the groove, and it prevents corrosion on the spring, which is often the first part to fail in humid environments.
A pivot pin that is properly installed and maintained should last the life of the rifle. The detent spring is the only wear item, check it at every cleaning and replace it at the first sign of fatigue. This routine takes less than a minute and eliminates the need for aftermarket anti-walk pins entirely.
When to Replace Parts vs. When to Adjust
If the pivot pin walks out despite a fresh spring and a clean groove, the receiver hole itself may be worn or out of spec. This is rare but happens on high-round-count rifles or lowers that were assembled with excessive force. Measure the detent hole diameter with a pin gauge, mil-spec is 0.154 inches. If the hole measures larger, the receiver is out of spec and the correct fix is a new lower receiver, not a thicker detent. Most practitioners find that a properly maintained mil-spec lower will never reach this point, but knowing the threshold helps you avoid chasing a problem that cannot be fixed with lubrication alone.
Frequently Asked Questions
Can you install a pivot pin with a razor blade or clevis pin?
Yes. A clevis pin is one of the best improvised tools because its slot holds the detent and spring compressed while you slide the pivot pin into place. A razor blade can work but offers less control and a higher risk of scratching the receiver or launching the detent. For a safer, more stable install, a 1/8-inch clevis pin is the recommended household alternative.
How do you keep the detent spring from flying out during installation?
The spring launches because it’s under compression with nothing holding it. Grease the detent and spring before placing them in the receiver hole; the tackiness holds them in place. Then use a clevis pin or thin punch to maintain compression while you slide the pivot pin over the top. Work inside a clear plastic bag to catch parts if something slips.
My AR-15 pivot pin won’t come out. What can I do?
First, verify the takedown detent isn’t engaged. Push the takedown detent down with a punch to relieve pressure on the pivot pin. If it’s still stuck, tap the pin out gently with a brass punch and light hammer. Never force it with excessive pressure, as this can damage the receiver. If the pin is deformed or burred, replace it before reinstalling.
What is the diameter of the pivot pin on an AR-15?
The AR-15 pivot pin measures 0.245 inches in diameter at the main body. The detent that locks it in place is smaller, typically 0.115 inches in diameter. When selecting a clevis pin or punch as an improvised tool, choose one close to 1/8 inch so it fits into the detent channel without binding.
Installing the pivot pin is a rite of passage for any AR-15 builder, and it doesn’t require a bench full of specialty tools. With a clevis pin, a little grease, and the techniques above, you can complete this step in minutes without losing a single part. When you’re ready to start your next build or upgrade, check out the drop-in kits and precision-engineered components from Polymer Pew to keep your platform running reliably. Get your Flatties here.
This article was written using GrandRanker

