

Table of Contents
- Understanding Firearm Build Fitment and Tolerance Standards
- Essential Gunsmithing Tools for Beginners
- Receiver and Barrel Selection for Your Build
- Trigger Group Installation and Sear Engagement
- Best Budget Firearm Upgrade Kits for Drop-in Performance
- How to Troubleshoot Firearm Cycling Issues
- Safety Protocols and Legal Compliance in DIY Builds
- Precision Measurement Techniques for Fitment Verification
Last Updated: August 20, 2026
Understanding Firearm Build Fitment and Tolerance Standards
Firearm build fitment refers to the precise alignment and mechanical compatibility of components assembled into a functional firearm platform. The difference between a reliable build and one that malfunctions comes down to respecting tolerance windows. Every component, receiver, barrel, trigger group, bolt carrier group, has acceptable dimensional ranges. Stay within those ranges, and your firearm cycles reliably. Exceed them, and you’re looking at feeding failures, extraction problems, or worse.
Drop-in vs. Hand-fitted Components
Drop-in components are manufactured to tight tolerances that allow them to function in standard receivers without modification. They save time and reduce user error risk. However, drop-in quality varies widely. Hand-fitted components give you control over sear engagement, trigger pull weight, and clearance, but require skill and precision measurement instruments.
Most builders starting out should prioritize drop-in components. Once you’ve successfully built one platform and understand how components interact, hand-fitting becomes viable.
Tolerance Specifications and Headspace Basics
Headspace is the distance from the breech face of the receiver to the shoulder of the chamber. This measurement determines whether a cartridge seats properly, fires reliably, and extracts cleanly. Headspace that’s too short prevents cartridge seating; headspace that’s too long causes extraction failures and dangerous pressure conditions.
Federal specifications define go-gauge and no-go gauge standards for headspace verification. A go-gauge should enter the chamber and close the bolt easily. A no-go gauge should prevent bolt closure. If your headspace falls between these two measurements, you’re within acceptable tolerance.
Tolerance stacking occurs when multiple components, each within acceptable individual tolerance, combine to create an out-of-spec assembly. A receiver with maximum allowable bore diameter plus a barrel with maximum allowable outside diameter can result in binding or misalignment. Quality manufacturers account for coating thickness during design; budget manufacturers sometimes don’t, which is why cheap components often require hand-fitting.
Essential Gunsmithing Tools for Beginners
You don’t need a full gunsmithing shop to build a firearm correctly. You do need precision instruments that allow you to measure, verify, and adjust components with confidence.
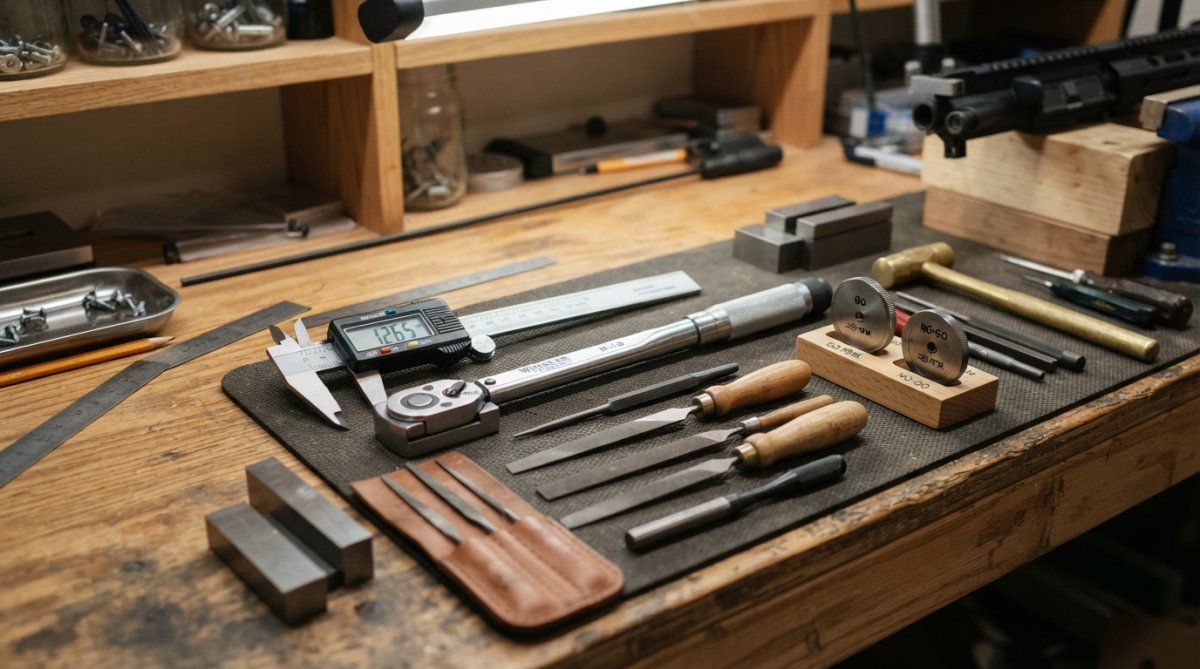
Precision Measurement Instruments
A quality digital caliper reads to 0.01 inches and costs under $30. Use it to measure receiver bore diameter, barrel outside diameter, and component wall thickness. Go-gauges and no-go gauges are specific to your caliber and platform. Budget roughly $40-60 for a quality set per caliber.
A depth micrometer measures internal dimensions like receiver bore depth and chamber length. Expect to spend $30-50 on a basic model. A torque wrench prevents over-tightening barrel nuts and gas blocks. A quality inch-pound torque wrench runs $40-80.
Hand Tools for Receiver and Barrel Work
A file set with bastard cut, smooth, and fine grades handles material removal during hand-fitting. Start with smooth or fine cuts until you understand removal rates. A basic set costs $25-40.
A brass or plastic mallet prevents marring finished surfaces when tapping components into place. Pin punches in various diameters facilitate trigger group installation and receiver disassembly. A set of six runs $15-30.
A receiver vise block holds your receiver securely during assembly without damaging it. Quality blocks run $40-80 but are reusable across multiple builds.
Receiver and Barrel Selection for Your Build
Your receiver is the foundation. Everything else bolts, fits, or slides into it. Selecting a receiver means evaluating material quality, dimensional consistency, and compatibility with your intended barrel and components.
Aluminum receivers offer weight savings and cost efficiency. Forged aluminum is stronger than cast aluminum. Anodized aluminum resists corrosion and wears better than bare metal. Polymer receivers offer even greater weight savings, but polymer tolerances are tighter because the material doesn’t machine as precisely as metal.
Polymer Pew manufactures aluminum MKE lower receivers tested for compatibility across multiple platform variants. This testing confirms that the receiver’s tolerances align with common barrel, trigger group, and furniture options, so you buy with confidence that fitment won’t require hand-fitting surprises.
Evaluating Receiver Compatibility
Verify that your receiver matches your intended barrel platform. An AR-15 receiver won’t accept an AR-10 barrel. Check bore diameter against your barrel’s outside diameter. A 0.750-inch barrel in a receiver with a 0.735-inch bore will bind; a 0.750-inch barrel in a receiver with a 0.765-inch bore will rattle.
Inspect the receiver’s trigger group pocket for dimensional consistency. Sloppy pockets cause trigger groups to shift during firing, affecting sear engagement and trigger reset. Run your finger inside the pocket; it should feel smooth without rough edges or dimensional variation.
Barrel Nut Torque and Chamber Alignment
Barrel nut torque specifications vary by platform and manufacturer. Under-torquing leaves the barrel loose, causing accuracy loss and potential failure. Over-torquing warps the receiver and strips threads. Most AR-pattern barrels require 80-160 inch-pounds of torque. Consult your barrel manufacturer’s specifications rather than guessing.
Chamber alignment affects how the bolt seats the cartridge. Misaligned chambers cause feeding failures or uneven pressure. Use a chamber reaming tool if you’re hand-fitting a barrel, or verify chamber alignment with a go-gauge after installation. The bolt should close smoothly with no binding or excessive play.
Trigger Group Installation and Sear Engagement
The trigger group is where precision fitment directly impacts function. Poor trigger group fitment causes binding, inconsistent pull weight, and premature wear.
Sear engagement is the mechanical relationship between the hammer sear and the trigger sear. Proper engagement holds the hammer reliably under spring tension but releases cleanly when the trigger breaks. Too much engagement and the trigger feels heavy and creepy. Too little and the hammer can slip off the sear under recoil.
Spring Tension and Pull Weight Consistency
Spring tension determines trigger pull weight. Consistency matters more than absolute weight. A trigger that pulls 4.5 pounds on the first shot, 5.2 pounds on the second, and 3.8 pounds on the third is unreliable. A trigger that consistently pulls 4.5 pounds is trustworthy.
Measure pull weight with a trigger scale. Place the scale hook under the trigger, apply steady pressure, and note the weight at which the hammer releases. Test multiple times to identify inconsistency. If pull weight varies by more than 0.5 pounds, the trigger group needs adjustment.
Spring preload washers allow fine-tuning of pull weight without replacing entire springs. A single washer might reduce pull weight by 0.3-0.5 pounds, giving you adjustment range without committing to a new spring.
Hand-fitting Trigger Components
Hand-fitting a trigger group requires understanding which surfaces control sear engagement. The hammer sear surface and trigger sear surface must mate perfectly. Even small deviations cause binding or inconsistent engagement.
Lapping, the process of polishing mating surfaces with progressively finer abrasives, creates perfect contact. Use 220-grit sandpaper, then 400-grit, then 600-grit, checking fit after each step. Filing removes material quickly but risks going too far. Use a smooth file and make light passes, checking fit frequently.
Best Budget Firearm Upgrade Kits for Drop-in Performance
Drop-in kits solve the fitment problem by pre-assembling components that have already been tested together. You install the kit into a compatible receiver, and it functions. This approach minimizes the risk of user error and reduces assembly time.
Budget kits prioritize cost without sacrificing reliability. They use quality materials, hardened stainless steel internals, anodized aluminum housings, but eliminate premium finishes and hand-fitting. loading stiff magazines.
Evaluating Drop-in Kit Quality and Durability
Examine the kit’s internal components. Hardened stainless steel internals resist wear better than soft steel. Anodized aluminum housings protect against corrosion. Check that all components are included: trigger, hammer, disconnector, springs, pins, and any safety components.
Test fit the kit in your receiver before assembly. Drop it in without fastening anything. The trigger group should sit flush without binding or excessive play. If it feels tight, you might need hand-fitting. If it feels loose, clearance issues will develop under recoil.
Polymer Pew’s drop-in kits feature full metal construction with anodized aluminum housings and stainless steel internals. They’re tested across multiple receiver variants to ensure compatibility without modification.
Cost-effective Component Sourcing
Buying components individually versus as a kit affects total cost. A complete kit bundles parts at a discount compared to buying each piece separately. Source from manufacturers with established reputations. A $15 trigger from an unknown brand is a gamble; a $25 trigger from a known maker is an investment that pays dividends in reliability and resale value.
How to Troubleshoot Firearm Cycling Issues
Cycling failures are frustrating and dangerous. They indicate that something in your assembly isn’t functioning as designed. Most cycling issues fall into three categories: feeding failures (rounds don’t chamber), extraction failures (spent cases don’t eject), or function failures (trigger doesn’t reset or hammer doesn’t fall).
Diagnosing Feed Ramp and Bolt Carrier Group Problems
Feed ramp geometry guides rounds from the magazine into the chamber. A damaged or misaligned feed ramp causes rounds to nose-dive into the magazine rather than chamber smoothly. Inspect the feed ramp for burrs, dents, or rough machining.
The bolt carrier group must travel smoothly through the receiver. Binding indicates either a tolerance problem or a lubrication issue. Cycle the bolt by hand without firing. It should move freely with minimal friction. If it sticks at any point, identify where and why. Magazine compatibility affects feeding. Try a different magazine to isolate whether the problem is the magazine or the firearm.
Clearance, Friction, and Lubrication Fixes
Clearance problems manifest as tight spots during cycling. Use a bore light and inspect the receiver interior for high spots or burrs. Light filing removes minor burrs. Polishing the bolt carrier group and receiver rails reduces friction and improves cycling reliability.
Lubrication is critical. A dry receiver causes binding and wear. Apply a thin coat of quality gun oil to all moving surfaces. Wipe away excess; over-lubrication attracts dirt and creates buildup. Test cycling after each adjustment by manually cycling the bolt 10-15 times to identify remaining problems.
Safety Protocols and Legal Compliance in DIY Builds
Building a firearm carries legal and safety responsibilities. Federal law, state law, and local ordinances all apply. Violating any of them creates criminal liability. Understanding the legal landscape before you build is non-negotiable.
Serialization is required for firearms built for personal use in most jurisdictions. A firearm without a serial number is illegal to possess in many states. Some states allow personal builds without serialization under specific conditions. Know your local laws before assembling anything.
Federal firearms regulations and manufacturing requirements
Function Testing and Headspace Verification
Function testing confirms that your build operates safely before you fire it. This is not optional.
Verify headspace with go-gauges and no-go gauges before any live fire. A go-gauge should close smoothly. A no-go gauge should not close. If a no-go gauge closes, your headspace is dangerously long and you must correct it before firing.
Dry fire the firearm 10-15 times to verify that the trigger resets, the hammer falls reliably, and the safety functions. Load a single round and verify chambering. The round should seat smoothly without forcing. Load three rounds and cycle them through without firing. Observe feeding, extraction, and ejection. All three should occur smoothly. If any step binds or feels rough, identify and correct the problem before live fire.
Serialization and Federal Compliance
Federal law requires that firearms manufactured for personal use be marked with a serial number. The serial number must be at least 0.003 inches deep and located on the frame or receiver where it’s visible without disassembly. Serial numbers can be stamped, engraved, or etched. They must be permanent and tamper-resistant.
Some states prohibit manufacturing firearms entirely without a federal firearms license. Other states allow personal builds under specific conditions. Verify your state and local laws before beginning your build. Document your build process and keep receipts for all components.
ATF guidelines on firearm manufacturing and serialization
Precision Measurement Techniques for Fitment Verification
Precision measurement separates guesswork from confidence. You’re not trying to hit exact specifications; you’re trying to confirm that your assembly falls within acceptable tolerance windows. Measurement accuracy depends on instrument quality, technique, and understanding of what you’re measuring.
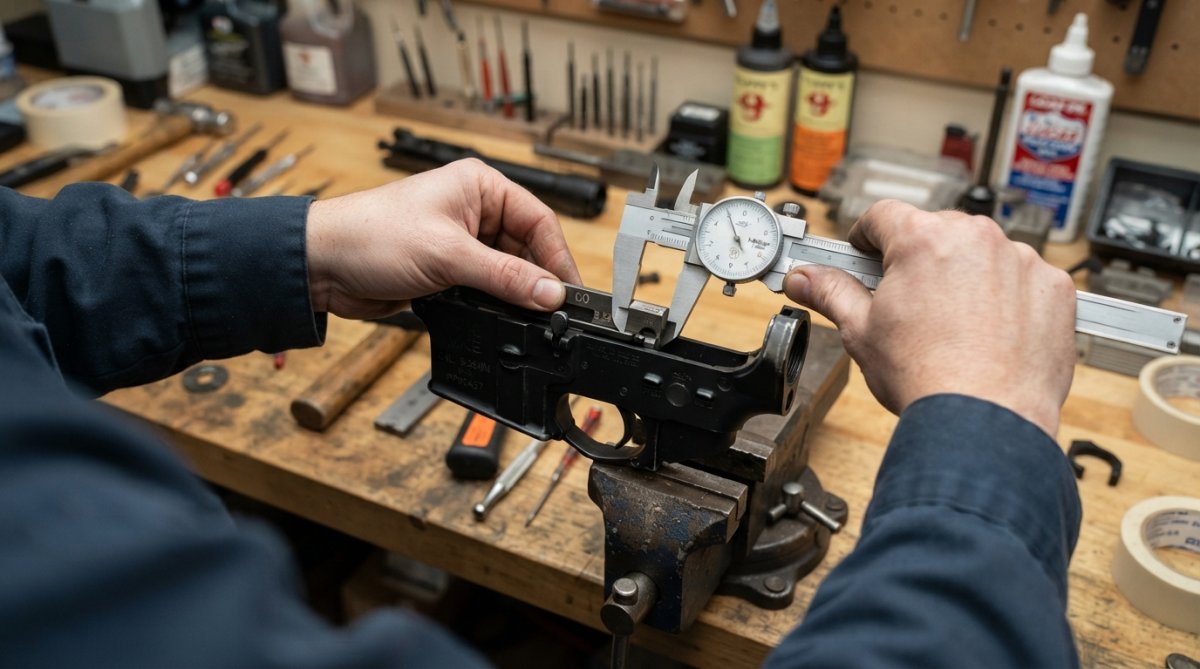
Go-gauge and No-go Gauge Standards
Go-gauges and no-go gauges are calibrated to specific tolerances for specific calibers. A go-gauge for 5.56 NATO is dimensionally different from a go-gauge for 7.62×39. They’re not interchangeable.
A go-gauge should close smoothly and easily. If you have to force it, your headspace might be too short. A no-go gauge should not close. If it closes, your headspace is too long and unsafe. Test headspace multiple times and store gauges carefully in a protective case.
Lapping, Reaming, and Material Finishing
Lapping creates perfect contact between mating surfaces by removing microscopic high spots. Use 220-grit sandpaper to start, then progress to 400-grit and 600-grit. Between each grit, clean the surfaces thoroughly to remove previous grit particles.
Reaming enlarges holes or chambers to precise dimensions. Reamers are expensive and require proper setup to avoid damaging the workpiece. If you’re not experienced with reamers, have a professional handle this step. Polishing final surfaces improves appearance and reduces friction while protecting against corrosion and wear.
Building a firearm with precision requires patience, the right tools, and respect for tolerance windows. The difference between a reliable build and a problem build often comes down to understanding where components need to fit tight and where they need clearance. Polymer Pew’s precision-engineered components, from aluminum MKE lower receivers to specialized trigger kits, eliminate fitment uncertainty by testing compatibility across multiple platform variants. Get your Flatties here!!!
Frequently Asked Questions
What's the difference between drop-in kits and hand-fitted components in a firearm build?
Drop-in kits are pre-machined parts designed to fit without modification, offering faster assembly but less customization. Hand-fitted components require filing, lapping, and reaming to achieve proper tolerance and clearance for your specific receiver. Hand-fitting takes longer but delivers superior fitment and performance. Most DIY builders start with drop-in parts for reliability, then progress to hand-fitted upgrades as they develop precision measurement skills.
What essential gunsmithing tools do beginners need for a DIY firearm build?
Start with a quality caliper for tolerance checking, go-gauge and no-go gauge sets for headspace verification, a torque wrench for barrel nut specifications, and basic hand tools like files and polishing compounds. A function test kit and safety checklist are critical. As you advance, add precision measuring instruments like dial indicators and lapping compounds. Budget-conscious builders can source these tools incrementally rather than purchasing everything upfront.
How do I troubleshoot cycling issues after assembling my firearm build?
Start by checking feed ramp clearance and bolt carrier group alignment. Inspect for friction points where components bind, then apply appropriate lubrication. Verify spring tension in the buffer tube and trigger group, weak springs cause feeding failures. Test with multiple ammunition types to isolate compatibility issues. If problems persist, examine the receiver-to-barrel alignment and ensure proper headspace using go-gauges. Document which ammunition cycles reliably to identify ammunition-specific issues versus assembly problems.
What are the legal requirements for serialization in a DIY firearm build?
Federal law requires any firearm manufactured for personal use to have a serial number before it leaves your possession. The ATF does not mandate a specific format, but the number must be permanently affixed to the receiver in a location that cannot be easily removed or obliterated. Many builders engrave serial numbers using a pneumatic engraver or stamp set. Keep documentation of your build date and serial number assignment. State laws vary, so verify your local regulations before beginning assembly.
How do I verify proper headspace and tolerance in my custom build?
Use go-gauge and no-go gauge sets specific to your caliber. A go-gauge should chamber easily without forcing; a no-go gauge should not chamber at all. If a no-go gauge chambers, your headspace is excessive and unsafe. Measure barrel nut torque specifications using a calibrated torque wrench, under-torquing causes alignment issues, over-torquing damages threads. Check receiver-to-barrel concentricity with a dial indicator. These precision measurements prevent dangerous malfunctions and ensure reliability.
Are budget firearm upgrade kits reliable for precision builds, or do I need premium components?
Budget kits from reputable manufacturers offer solid performance when properly fitted and tested. The key difference is often fit tolerance and material consistency rather than fundamental design. Budget components may require minor hand-fitting, filing for clearance, polishing feed ramps, or lapping surfaces. Premium kits arrive closer to spec but cost significantly more. For a first build, quality budget kits save money while teaching you fitment skills. Test thoroughly before using in competition or critical applications.
What common mistakes should I avoid when assembling a DIY firearm build?
Avoid over-torquing barrel nuts, which damages threads and causes misalignment. Don't skip headspace verification using proper gauges, this is non-negotiable for safety. Never assume drop-in parts fit without checking clearances; even minor binding causes cycling failures. Neglecting lubrication or using incorrect lubricant types leads to wear and malfunction. Skip the function test, and you risk discovering problems at the range. Finally, don't assemble without understanding your receiver type and variant, incompatible parts waste money and time.
How do I know if your MKE lowers will fit my build without requiring modifications?
MKE lowers are precision-engineered for broad variant compatibility, but fitment depends on your specific upper receiver and parts selection. We recommend checking receiver-to-barrel alignment and trigger group clearances before final assembly. Our documentation includes tolerance specifications and compatibility notes. If you experience binding or clearance issues, our support team can guide you through minor hand-fitting. Most builders report drop-in compatibility; modifications are rare when proper measurement techniques are used.
This article was written using GrandRanker

