

Table of Contents
- What You Get When You Order Custom MKE Lower Receiver Parts
- Complete Lower Parts Kits vs. Individual Component Selection
- AR-15 Lower Parts Kit Compatibility: What Actually Fits
- Essential Tools for Lower Receiver Assembly
- How to Install an AR-15 Lower Parts Kit: Step-by-Step
- Trigger Group Upgrades and Fire Control Performance
- Why Custom MKE Lower Receiver Parts Outperform Stock Options
- Conclusion
Last Updated: August 13, 2026
What You Get When You Order Custom MKE Lower Receiver Parts
When you order custom MKE lower receiver parts, you’re acquiring the foundation of a precision-engineered firearm platform. The lower receiver is the legally regulated component that defines your build, it’s where the fire control group, trigger assembly, and stock assembly connect. Ordering custom parts means you can specify exact specifications: trigger pull weight, safety selector type, grip angle, and compatibility with your chosen upper receiver and ammunition platform.
Custom MKE lower receiver parts from Polymer Pew come tested for variant compatibility. Unlike generic kits, these components are engineered to work seamlessly across different firearm clones and platform configurations. You’re not guessing whether a part will fit, you’re selecting from components that have been vetted through real-world builds.
The typical custom order includes your choice of lower receiver, fire control group components, buffer tube assembly, stock hardware, grip, and specialized upgrades like flat triggers or super safety kits. Each piece arrives ready for assembly, with hardened stainless steel internals and anodized aluminum housings designed to withstand extended use and repeated firing cycles.
Most builders choose custom orders because they want control over performance characteristics. A stock mil-spec lower performs adequately, but it won’t give you the crisp trigger break, ergonomic improvements, or reliability enhancements that come from selecting each component individually. Custom orders let you build exactly what your shooting discipline demands, whether that’s precision rifle work, competitive shooting, or general-purpose reliability.
Complete Lower Parts Kits vs. Individual Component Selection
The choice between a complete kit and individual components comes down to your build timeline, budget flexibility, and performance priorities.
A complete lower parts kit bundles everything you need: trigger group, safety selector, magazine release, bolt catch, takedown pins, detents, springs, and hardware. These kits are pre-assembled or pre-sorted, which means less time spent sourcing individual pieces. The advantage is convenience and guaranteed compatibility, all components were selected to work together. The trade-off is that you get whatever trigger pull weight, safety style, and grip configuration the kit designer chose, not necessarily what you wanted.
Individual component selection gives you granular control. You pick your exact trigger type (flat trigger, curved trigger, specific pull weight), safety selector (ambi, standard, super safety kit), grip angle, magazine release style, and every other detail. This approach takes more research and planning, but it results in a build tailored to your specific needs. A competitive shooter might select a 2.5-pound flat trigger and ambi safety. A clone builder might match mil-spec components for authenticity. A budget builder might mix premium trigger components with standard hardware elsewhere.
The cost difference is minimal if you’re strategic. A quality complete kit and a custom build using individual components often land in the same price range. The real cost difference appears when you’re upgrading later, individual selection means you don’t pay for components you’ll immediately replace.
Polymer Pew offers both approaches. Their complete kits provide tested compatibility across MKE lower receiver variants. Their individual component options let you assemble exactly what you need, with the confidence that each piece has been validated for fit and function.
For first-time builders, a complete kit reduces decision fatigue. For experienced builders or those with specific performance goals, individual selection is worth the extra planning.
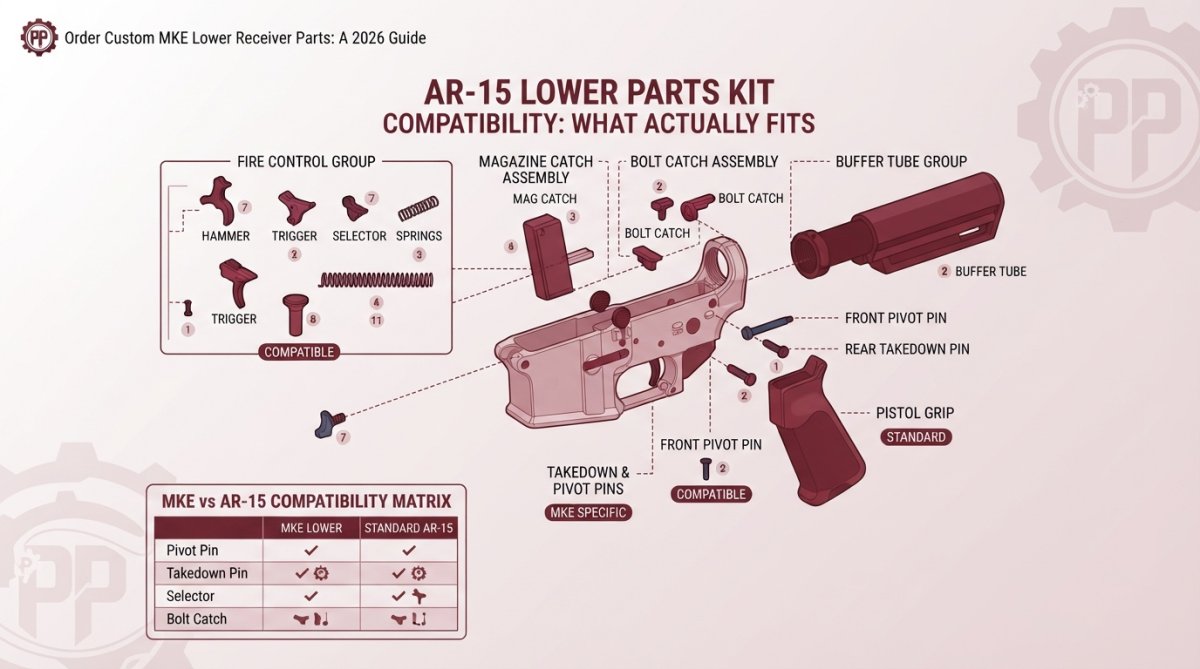
AR-15 Lower Parts Kit Compatibility: What Actually Fits
AR-15 lower parts kit compatibility is more nuanced than most guides suggest. Not every mil-spec component fits every lower receiver, and clone-pattern lowers introduce additional variables.
The baseline standard is mil-spec: components manufactured to military specification dimensions. A mil-spec lower receiver accepts mil-spec trigger groups, safeties, magazine releases, and grip panels. This is the safe assumption for generic AR-15 builds. However, MKE lower receivers, which are cloned from specific military platforms, sometimes have subtle dimensional differences that affect fit.
Common compatibility issues arise with:
- Trigger group width: Some clone-pattern triggers are slightly wider or narrower than mil-spec, causing binding or excessive play in the lower receiver pocket
- Safety selector diameter: Clone-pattern safeties sometimes have different detent hole spacing, requiring different springs or detents
- Magazine release button: Some MKE variants use a slightly different button profile or spring tension
- Bolt catch dimensions: Certain clone patterns have a slightly different bolt catch pin hole location
- Grip screw hole spacing: Less common, but some MKE lowers have non-standard grip attachment points
The solution is verification before assembly. Check the specific MKE variant you’re building, whether it’s a Zenith, Zastava, or other clone pattern, against the component specifications you’ve selected. Polymer Pew’s custom MKE lower receiver parts are tested across variants, which means the guesswork is eliminated.
A practical approach: order from a supplier that explicitly tests their components against your specific lower receiver type. Cheap kits that claim "universal compatibility" often create binding issues, safety selector problems, or magazine release failures that only surface during assembly.
Essential Tools for Lower Receiver Assembly
Assembling a lower receiver requires specific tools. Using wrong tools, or improvising, leads to stripped detent holes, bent springs, and damaged components.
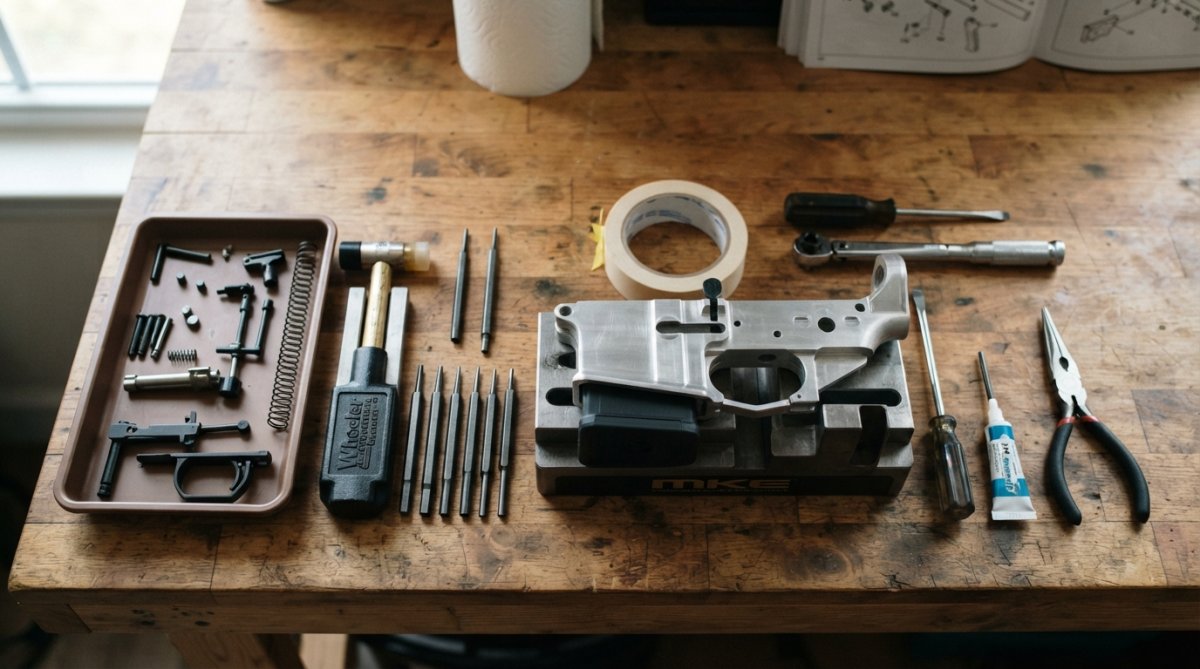
The essential toolkit includes:
- Pivot pin punch tool: A specialized punch designed to start the pivot pin without damaging the lower receiver. Standard punches are too wide and can slip, stripping the receiver pocket.
- Takedown pin spring tool: A small tool that compresses the takedown pin spring while you insert the pin. Without this, the spring launches across the room or gets bent.
- Detent removal tool or small punch set: For removing and installing the safety detent, hammer detent, and trigger detent without dropping them into unreachable places.
- Roll pin punch set: Includes appropriately sized punches for the hammer pin and trigger pin. Too large and you’ll bend the pin; too small and you’ll miss.
- Small hammer: A 4-8 ounce hammer for tapping pins into place. A full-sized hammer gives you no control.
- Armorers wrench or castle nut wrench: For tightening the buffer tube castle nut to proper torque spec.
- Torque wrench (optional but recommended): For setting castle nut torque to specification, typically 39-50 foot-pounds depending on your platform.
- Workbench or vise: A stable surface to hold the lower receiver while you work. A vise with soft jaws prevents marring the receiver.
- Magnetic parts tray: Springs and detents disappear. A magnetic tray keeps them contained and visible.
Common mistake: using a full-sized punch or a nail instead of a proper roll pin punch. This bends the pin, strips the hole, or drives the pin at an angle, creating binding issues that won’t surface until you’re at the range.
Quality tools cost less than replacing a damaged lower receiver. Polymer Pew includes detailed assembly documentation with their custom orders, which specifies exact tool requirements for each component.
How to Install an AR-15 Lower Parts Kit: Step-by-Step
Assembly follows a logical sequence that minimizes the risk of losing small parts or damaging components. The process typically takes 45-90 minutes for someone doing it for the first time.
Before You Start: What to Check
Inspect all components before assembly. Look for manufacturing defects, bent springs, cracked plastic, or damaged threads. Verify that your lower receiver matches the kit specifications, check the receiver type (mil-spec, clone-pattern, ambi safety compatible) against your component list. Lay out all parts in order: lower receiver, trigger group components, safety, magazine release, grip, buffer tube assembly, and hardware.
Read the assembly instructions specific to your lower receiver variant. MKE lower receivers have subtle differences depending on the clone pattern. Polymer Pew provides variant-specific documentation with their custom orders, which clarifies any non-standard steps.
Common Assembly Mistakes to Avoid
The most frequent mistakes occur during trigger group installation. Builders forget to install the hammer detent before the hammer pin, resulting in a hammer that falls freely when the trigger is pulled. The detent spring must be compressed and held in place while the hammer pin is driven through, this is where the detent tool becomes essential.
Another common error is over-tightening the castle nut on the buffer tube. This crushes the receiver extension, misaligns the stock, or creates tension that prevents the bolt carrier from cycling smoothly. Torque to specification, typically 39-50 foot-pounds, and stop.
Magazine release installation causes problems when the spring is installed backwards or the button is seated incorrectly. The spring should be compressed smoothly when you press the button; if it feels gritty or binds, the spring is installed wrong.
Safety selector installation varies by kit. If you’re using a super safety kit, follow the specific instructions for that variant. Standard mil-spec safeties use a detent and spring; some clone patterns use different detent sizing, which requires the correct spring from your kit.
Trigger group binding is usually caused by trigger or hammer pins that are slightly bent or misaligned. If the trigger doesn’t move smoothly after installation, remove the pins, inspect them for bending, and reinstall. Never force a trigger, binding means something is wrong.
Trigger Group Upgrades and Fire Control Performance
The trigger group is where custom builds diverge most from stock configurations. Upgrading from a mil-spec trigger to a precision trigger changes the shooting experience fundamentally.
A mil-spec trigger typically has a 5-7 pound pull weight, with noticeable creep and overtravel. The break is mushy, making precise shot placement difficult. A precision trigger, especially a flat trigger, reduces pull weight to 2.5-3.5 pounds, eliminates creep, and provides a crisp, predictable break. The difference in accuracy is measurable: tighter groups, faster follow-up shots, and better control in competitive shooting.
Trigger pull weight matters for your specific discipline. Precision rifle shooters often select 2.5-3 pound triggers for maximum control. Competitive shooters might prefer 3.5-4 pounds for safety margin. General-purpose builders often choose 4-5 pounds as a balance between control and safety.
Flat triggers versus curved triggers is personal preference. Flat triggers provide more use and control, which is why competitive shooters prefer them. Curved triggers are slightly safer for users with lighter trigger fingers, as they’re harder to accidentally engage. Both are reliable when properly installed.
The fire control group also includes the hammer and sear. Precision-engineered hammers have tighter tolerances, which means more consistent hammer strikes and more reliable ignition. Sear geometry affects the trigger break quality, a properly shaped sear provides a clean break with minimal overtravel.
Polymer Pew’s trigger upgrades are tested for pull weight consistency. A common frustration with budget triggers is that pull weight varies significantly between shots, sometimes 2.5 pounds, sometimes 4 pounds. Precision triggers maintain consistency across hundreds of rounds, which matters if you’re competing or hunting where shot placement is critical.
Why Custom MKE Lower Receiver Parts Outperform Stock Options
Stock mil-spec lowers use standard components that prioritize cost and broad compatibility over performance. Custom MKE lower receiver parts are selected for specific performance goals, which creates measurable advantages.
A stock lower receiver paired with mil-spec components has inherent limitations. The trigger is mushy. The safety selector requires significant force to manipulate. The magazine release is stiff. The buffer tube assembly uses standard springs and buffers that create more recoil than necessary. These aren’t defects, they’re design compromises made to keep costs down and ensure reliability across all user skill levels.
Custom builds eliminate these compromises. You select a trigger that matches your shooting discipline. You choose a safety selector that’s ambi if you’re left-handed, or super safety if you want extra security. You pick a buffer tube assembly with springs and buffers tuned for your specific upper receiver and ammunition platform. You choose a grip angle and ergonomics that match your hand size and shooting style.
The result is a lower receiver that performs exactly as you intended. Recoil management improves because you’ve selected the right spring rate. Trigger control improves because you’ve chosen a trigger with the right pull weight and break quality. Manipulation becomes faster because your safety and magazine release are optimized for your hand position.
Polymer Pew’s custom MKE lower receiver parts reflect this philosophy. Each component is selected for compatibility and performance, not just cost. The anodized aluminum housings resist corrosion better than cheaper finishes. The stainless steel internals maintain consistent spring tension over thousands of cycles. The tested compatibility across MKE variants means you’re not gambling on fit, you’re assembling a precision platform.
This level of customization costs more than stock options, but the performance gain is real. A builder investing in a quality upper receiver and optic should match it with a lower receiver that performs at the same level. Pairing a $1,200 upper with a $100 stock lower wastes the upper’s potential.
Building a custom MKE lower receiver requires planning, the right tools, and components tested for compatibility. The process is straightforward if you follow a logical assembly sequence and avoid common mistakes. Polymer Pew’s custom MKE lower receiver parts eliminate guesswork, each component is validated for fit and performance across platform variants. Start with their documentation, verify your components against your specific lower receiver type, assemble methodically, and you’ll have a precision-engineered foundation that outperforms stock options. Get your custom parts from Polymer Pew and build the lower receiver you actually want, not the compromise that comes in a generic kit.
Frequently Asked Questions
What is included in a standard lower parts kit for custom MKE lower receiver builds?
A standard lower parts kit includes the fire control group (hammer, sear, and disconnector), trigger assembly, safety selector, magazine release button, takedown pins, pivot pins, detents, springs, and roll pins. Some kits add a buffer tube assembly, castle nut, and end plate. When you order custom MKE lower receiver parts, verify the exact contents with your supplier, as configurations vary between mil-spec and upgraded options.
How do I know if my custom lower parts kit will actually fit my MKE lower receiver without modifications?
MKE lower receivers are mil-spec compatible, meaning they accept standard AR-15 components. Before ordering, confirm your receiver's exact variant (full-size, compact, or clone-specific). Check the bolt catch assembly hole size, magazine release pocket dimensions, and safety selector detent placement. Polymer Pew tests compatibility across variants, so request documentation showing your specific build configuration. If you've had binding issues before, ask about pre-fitted options that eliminate fitment guesswork.
Are all AR-15 lower parts kit components interchangeable between different manufacturers?
Most mil-spec components are interchangeable, but tolerances vary between manufacturers. Trigger groups, safety selectors, and magazine releases from different makers usually work together, but upgraded parts (flat triggers, match-grade fire control groups) may have tighter tolerances. When ordering custom MKE lower receiver parts, stick with one manufacturer's ecosystem if you're upgrading the fire control group, or confirm cross-compatibility before purchasing individual components from multiple sources.
What warranty or guarantee should I expect when ordering custom lower receiver parts?
Quality manufacturers stand behind their components with defect warranties covering manufacturing failures, material flaws, and premature wear. Polymer Pew offers tested, precision-engineered parts designed for durability. Request warranty details before ordering, specifically coverage for trigger pull consistency, spring failures, and detent issues. Budget-conscious builders should prioritize brands that back their parts with documented testing and clear warranty terms rather than chasing the lowest price.
This article was written using GrandRanker

