

Table of Contents
- MKE Lower Receiver Compatibility Essentials
- MKE Lower Receiver Buffer Tube Compatibility
- Best Triggers for MKE Lowers
- How to Install MKE Lower Receiver
- Troubleshooting MKE Lower Receiver Fitment
- Upper Receiver and Lower Receiver Mating
- Ambidextrous Controls and Ergonomics
- Frequently Asked Questions
Last Updated: September 1, 2026
MKE Lower Receiver Compatibility Essentials
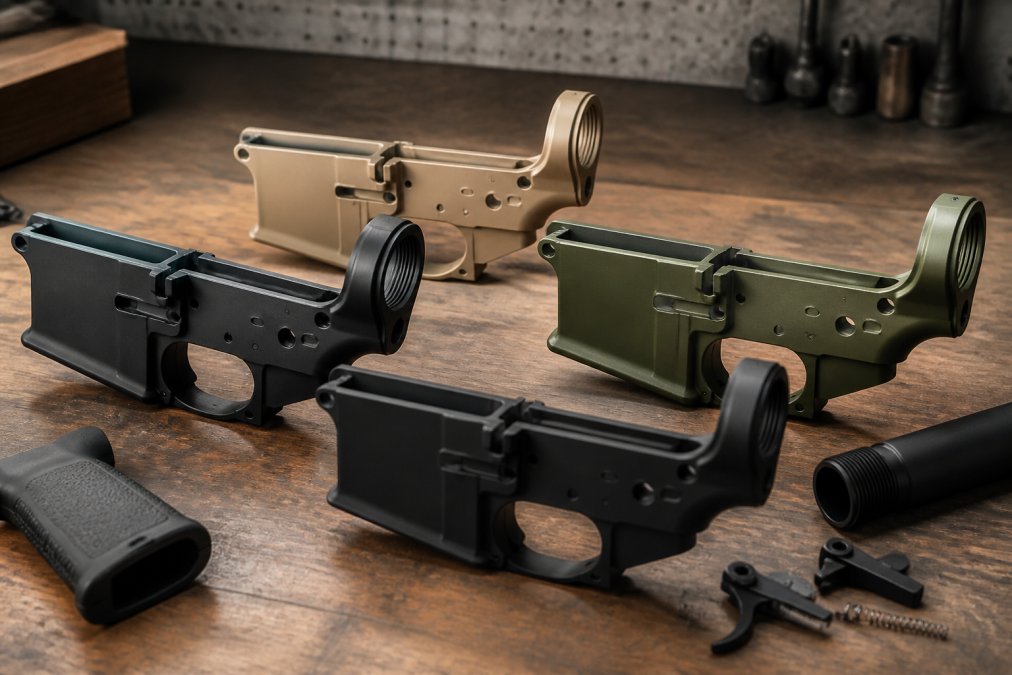
An MKE lower receiver is the serialized, regulated component that defines your firearm platform. Getting compatibility right saves hours of troubleshooting and wasted parts. The difference between a drop-in lower that works seamlessly and one requiring fitting comes down to understanding mil-spec standards, dimensional accuracy, and component interaction.
Most compatibility problems stem from tolerance stacking, small deviations in multiple parts that compound into binding, wobble, or fitment issues. This guide walks you through the critical compatibility factors that determine whether your build runs flawlessly or becomes a parts bin nightmare.
Mil-Spec vs. Proprietary Standards
The mil-spec standard (MIL-STD-1913 for rail systems and related dimensional specs) defines the baseline for receiver dimensions, buffer tube threads, and trigger group fitment. Mil-spec compliant MKE lowers should accept most standard mil-spec components without modification.
Proprietary designs use tighter tolerances, different material compositions, or non-standard receiver extension threads, creating fitment headaches. A proprietary lower may require matching proprietary buffer assemblies or trigger groups. While proprietary designs sometimes offer tighter tolerances and reduced wobble, you’re locked into that manufacturer’s ecosystem for critical parts.
When shopping for an MKE lower, confirm whether it’s mil-spec or proprietary. Mil-spec lowers offer maximum flexibility with aftermarket components. Proprietary designs demand more research upfront but can deliver superior precision if you commit to matched parts.
Material Composition and Dimensional Accuracy
MKE lowers are typically forged or billet aluminum. Forged aluminum is stronger and more cost-effective; billet aluminum allows tighter tolerances but costs more. Both deliver excellent results if dimensional accuracy is maintained throughout manufacturing.
Dimensional accuracy is critical for compatibility. Small variances in receiver extension bore diameter, trigger group pin holes, or magazine well dimensions create tolerance stacking. A lower with loose pin holes combined with an oversized trigger group results in play and binding. Anodized finishes add another layer, an undersized bore can be further restricted by anodize buildup, while an oversized bore leaves gaps affecting fit.
Polymer Pew’s aluminum MKE lowers are tested for dimensional consistency. Your lower should mate cleanly with standard mil-spec buffer tubes, trigger groups, and upper receivers without requiring hand-fitting or modification.
MKE Lower Receiver Buffer Tube Compatibility
The buffer tube, also called a receiver extension, is where many compatibility issues emerge. Your MKE lower must accept the buffer tube’s threaded shank, castle nut, and end plate without binding or excessive wobble.
Receiver Extension and Castle Nut Fitment
The receiver extension threads into the rear of your lower receiver. Standard mil-spec threads are 1.125-inch diameter with a specific pitch. An undersized bore prevents full thread seating; an oversized bore creates wobble and potential safety issues.
The castle nut threads onto the receiver extension and secures the end plate. Fitment depends on the receiver extension’s threads being true and the lower receiver’s bore diameter being within tolerance. Forcing a castle nut onto a misaligned receiver extension strips threads and creates a dangerous situation.
Check your receiver extension bore before assembly. Run your finger along the interior threads, they should feel smooth and uniform with no catching. If the buffer tube doesn’t slide in smoothly under light pressure, stop. Forcing it damages both parts.
Buffer Weight and Recoil Spring Rates
Buffer weight and recoil spring rates work together to manage recoil impulse and bolt carrier group cycling. A heavier buffer (H1, H2, H3) with a stiffer spring slows the action; a lighter buffer with a lighter spring speeds it up. Your MKE lower’s buffer tube bore and assembly pocket must accommodate your chosen buffer weight without binding.
Standard carbine buffers are 0.750-inch diameter (peer-reviewed research). H-series buffers are the same diameter but heavier. An undersized buffer assembly pocket causes even a standard buffer to bind, creating unreliable cycling and potential carrier tilt issues.
The recoil spring’s guide rod must fit cleanly into the buffer. Misalignment causes the spring to bind, reducing reliability and potentially damaging the buffer retainer.
Best Triggers for MKE Lowers
Trigger group compatibility requires precision. Your fire control group, trigger, hammer, sear, and disconnector, must fit cleanly into your MKE lower’s trigger group pocket with minimal play.
Trigger Group and Lower Parts Kit Integration
A trigger group consists of the trigger, hammer, disconnector, and sear. These parts pivot on pins that fit through holes in your lower receiver. Oversized holes cause pins to rattle and the trigger to function unreliably. Undersized holes prevent pins from seating, making the trigger non-functional.
Polymer Pew’s lower parts kits are engineered for tight fitment in MKE lowers. Each component is tested to ensure pins seat without binding and the trigger breaks cleanly. Mixing components from different manufacturers increases tolerance stacking risk.
Purchase a complete lower parts kit from the same manufacturer as your lower to ensure all components were designed and tested together. If building from individual parts, verify each component meets mil-spec dimensions before assembly.
Fire Control Group Tolerances
The fire control group’s sear engagement and hammer catch must be precisely toleranced, measured in thousandths of an inch (nssf.org). A sear that’s too tight won’t reset after firing; one that’s too loose causes premature hammer drop.
When installing a trigger group into your MKE lower, the lower’s pin holes must hold everything in alignment. Out-of-spec holes cause even a precision trigger group to perform poorly. This is why dimensional accuracy in the lower receiver itself is critical.
Test trigger function before final assembly. Install the trigger group, secure the takedown pins, and manually cycle the hammer several times. The trigger should break cleanly, the hammer should reset fully, and there should be no binding or grinding.
How to Install MKE Lower Receiver
Installing an MKE lower receiver properly prevents reliability issues and ensures long-term durability.
Step 1: Inspect for Tolerance Stacking Issues
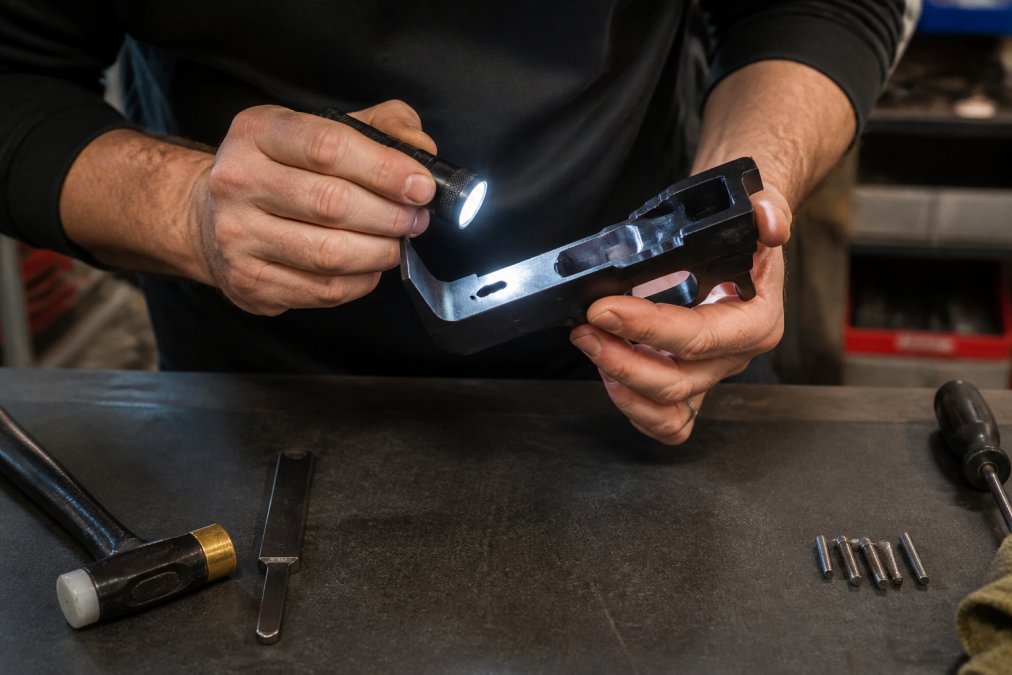
Before assembly, inspect your lower receiver for dimensional accuracy. Check the buffer tube bore by hand, it should accept a standard receiver extension without resistance. Run your finger along the interior threads; they should feel smooth and uniform.
Inspect the trigger group pocket. Pin holes should be clean and free of burrs. Use a small flashlight to confirm holes are properly drilled and aligned. Check the magazine well, it should accept your magazines smoothly without binding or excessive play.
Step 2: Assemble the Buffer Assembly and Receiver Extension
Insert the recoil spring into the buffer tube, then install the buffer. It should slide smoothly without binding. If it requires force, inspect the bore for debris or dimensional issues.
Thread the receiver extension into the lower receiver by hand. It should seat smoothly without resistance. Stop when you feel slight resistance, do not force it. Once seated, install the castle nut and tighten it snugly. The end plate should be flush against the lower receiver with no gaps. authentic military gear.
Verify the buffer assembly operates smoothly by pressing the buffer in and releasing it several times. It should move freely with no grinding or binding. Resistance indicates an undersized receiver extension bore or oversized buffer.
Step 3: Install Trigger Group and Lower Parts Kit
Install the trigger group carefully. Align the hammer with its pin holes and tap the pin through gently. Do the same with the trigger pin. Both pins should seat fully with pin retainers holding them in place.
Install the safety selector, magazine release, and bolt catch. Each component should move freely without binding. Test the safety selector, it should click smoothly between fire and safe positions. The magazine release should press and reset cleanly.
Perform a function check with an empty chamber. Cycle the action several times. The trigger should break cleanly, the hammer should reset fully, and all controls should operate smoothly. Any binding or grinding indicates a compatibility issue requiring investigation before firing.
Troubleshooting MKE Lower Receiver Fitment
Fitment problems are usually solvable once you identify the root cause. Most issues stem from tolerance stacking or incompatible components.
Common Fitment Issues and Solutions
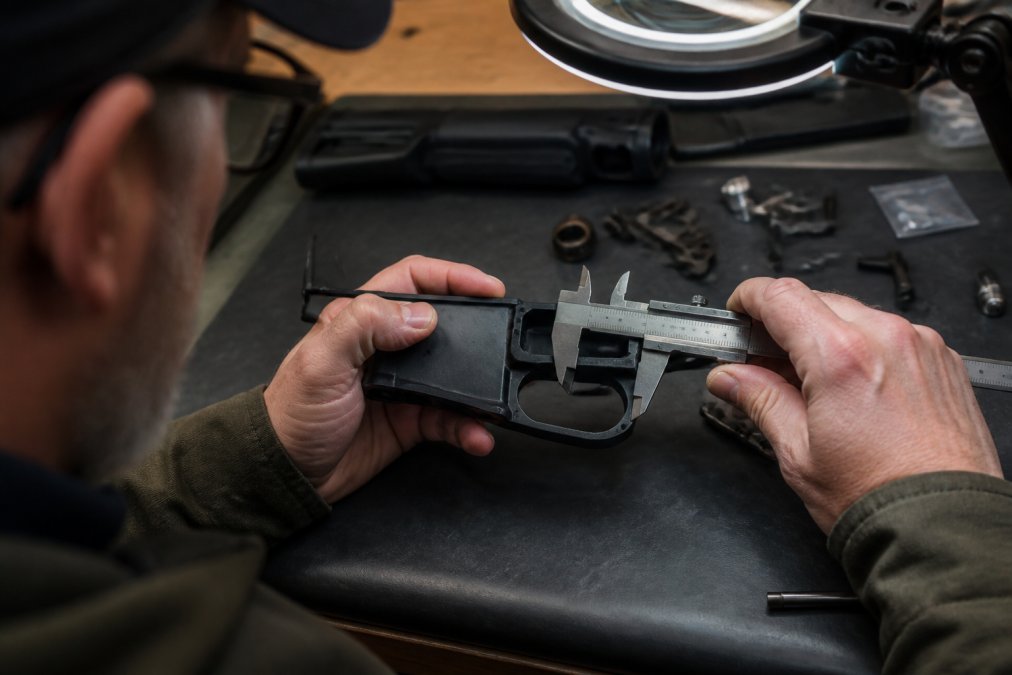
Receiver extension wobble: The castle nut is loose or the receiver extension bore is oversized. Remove the buffer tube assembly and measure the bore with calipers. If oversized, you may need a tighter-fitting receiver extension or shims. If the castle nut is loose, tighten it firmly.
Trigger binding: The trigger group pocket is undersized or the pins are oversized. Remove the trigger group and inspect the pin holes. Try a different trigger group if holes are tight. If holes are damaged, the lower receiver may be unusable.
Magazine feeding issues: The magazine well is oversized or undersized. Test with multiple magazines. If all magazines fail, the well is out of spec. If only certain magazines fail, those magazines may be out of spec.
Buffer assembly grinding: The buffer or spring is binding in the receiver extension. Remove the buffer assembly and inspect the bore for debris, burrs, or dimensional issues. Clean thoroughly. If grinding persists, the bore may be undersized.
Long-Term Wear and Durability Concerns
MKE lowers made from forged aluminum are durable under normal use. However, tolerance stacking accelerates wear. Loose pins rattle and enlarge their holes. Binding components wear faster than those with proper clearance.
Anodized finishes protect aluminum from corrosion but wear through at friction points. Binding issues cause anodize to wear away faster, exposing bare aluminum and accelerating corrosion in humid environments.
Inspect your lower receiver periodically for wear. Check pin holes for enlargement and look for bare aluminum where anodize has worn through. If you notice significant wear, replace the lower before reliability becomes an issue.
Upper Receiver and Lower Receiver Mating
Your upper receiver must mate cleanly with your lower receiver through the take-down pins and receiver extension threads.
The take-down pins (pivot pin and rear take-down pin) must fit through holes in both receivers. Misaligned holes prevent full pin seating, causing the upper and lower to separate unexpectedly or bind during operation.
The receiver extension threads into the lower receiver, serving as a pivot point for the upper. An oversized extension bore causes the upper to rock side to side; an undersized bore prevents proper mating.
Test your upper-lower fit before final assembly. Install the take-down pins and verify they seat fully. The upper should sit flush against the lower with minimal play. Rocking or binding indicates receiver extension bore or pin hole alignment issues.
Ambidextrous Controls and Ergonomics
Ambidextrous controls, safety selector, magazine release, and bolt catch, add versatility. MKE lowers designed for ambidextrous controls have additional pin holes and clearances for these features.
Standard mil-spec lowers have right-side-only controls. Confirm your MKE lower is designed for ambidextrous functionality if desired. Some lowers have holes pre-drilled; others require modification. Modifying a lower yourself risks creating dimensional errors affecting reliability.
Polymer Pew offers MKE lowers configured for ambidextrous controls, tested to ensure all controls operate smoothly without binding or play. Choose a lower designed for ambidextrous controls from the start if this feature matters to your build.
The safety selector must move smoothly between fire and safe positions. Binding indicates a dimensional issue or incompatible selector. Test this before final assembly. The magazine release and bolt catch should also operate smoothly and reset cleanly.
| Component | Compatibility Check | What to Look For |
|---|---|---|
| Receiver Extension | Threads smoothly into bore | No resistance, uniform threads |
| Buffer Assembly | Slides freely in tube | No grinding or binding |
| Trigger Group | Pins seat fully | No play, smooth trigger break |
| Take-down Pins | Seat fully in holes | No rocking, pins flush |
| Magazine Well | Accepts magazines smoothly | No binding, minimal play |
| Safety Selector | Clicks smoothly | Clear detents, no binding |
Getting your MKE lower receiver compatibility right from the start determines whether your build runs flawlessly or becomes a troubleshooting nightmare. Tolerance stacking compounds quickly, small deviations in the lower receiver, buffer tube, trigger group, and upper receiver alignment create binding, wobble, and reliability issues that worsen over time. Polymer Pew’s tested MKE lowers eliminate this guesswork by ensuring dimensional accuracy and compatibility across standard mil-spec components. Start with a lower engineered for precision, inspect it thoroughly before assembly, and test every function before firing. That foundation makes everything that follows more reliable and enjoyable.
Frequently Asked Questions
Q: What makes MKE lower receivers different from other mil-spec lowers?
A: MKE lower receivers are engineered to strict mil-spec tolerances for dimensional accuracy and interchangeability. The key difference lies in forged aluminum construction and anodized finishes that resist wear. They’re designed to work with standard upper receivers, buffer assemblies, and trigger groups without requiring modifications. Polymer Pew tests each MKE lower for fitment across multiple platform variants to ensure reliability.
Q: How do I check MKE lower receiver buffer tube compatibility before assembly?
A: Verify that your receiver extension (buffer tube) has a mil-spec diameter and threads. Install the castle nut and end plate hand-tight, then check for wobble by gripping the tube and the lower receiver body. There should be zero play. If the buffer retainer spring sits flush against the receiver, compatibility is confirmed. Test the bolt catch and magazine well for proper engagement before final assembly.
Q: What triggers work best with MKE lower receivers?
A: MKE lowers accept any mil-spec trigger group, including flat triggers and enhanced fire control groups. The trigger guard must fit without binding, and the hammer and sear pins need clearance. Polymer Pew’s flat triggers are engineered for MKE compatibility. Always test trigger function before live fire to ensure the safety selector, trigger, and hammer operate smoothly without grinding or catching.
Q: Why does my MKE lower receiver wobble after assembly?
A: Wobble typically results from loose castle nuts, worn receiver extension threads, or tolerance stacking where multiple components have tight tolerances that compound. Tighten the castle nut firmly using a receiver extension wrench, do not over-torque. If wobble persists, inspect the receiver extension threads and the lower receiver’s internal dimensions. Worn detents or springs can also cause play in the takedown and pivot pins.
Q: Can I use an MKE lower receiver with any upper receiver?
A: MKE lower receivers are mil-spec dimensioned and work with standard mil-spec upper receivers. However, caliber-specific lowers exist for certain platforms. Verify that your upper receiver’s takedown pin holes align with the lower receiver. The upper and lower should mate with zero wobble. If you’re building a clone variant, confirm that your specific upper receiver is compatible with mil-spec lower receiver dimensions before purchasing.
Q: What warranty or guarantee does Polymer Pew offer on MKE lower receivers?
A: Polymer Pew stands behind its components with quality assurance testing. For specific warranty details, current coverage terms, and guarantee information, visit Polymer Pew’s website or contact their support team directly. All MKE lowers are tested for fitment and dimensional accuracy before shipment to ensure you receive a reliable, drop-in component.
Q: How long will an MKE lower receiver last with regular use?
A: MKE lower receivers built from forged aluminum and anodized finishes are engineered for durability across thousands of rounds. The receiver itself is non-wear component; wear occurs in the trigger group, bolt catch, and magazine release detents. These are easily replaced. Proper maintenance, cleaning debris from the magazine well and checking pin tightness, extends service life indefinitely.
This article was written using GrandRanker

