

Table of Contents
- Understanding Firearm Clone Builds vs. Custom Builds
- Essential Tools for Firearm Assembly
- Parts Selection and Compatibility for Your Clone
- ATF Firearm Build Regulations 2026
- Step-by-Step Assembly Process
- Firearm Assembly Safety Best Practices
- Cost Breakdown of DIY Rifle Builds
- Post-Build Maintenance and Long-Term Reliability
Last Updated: August 14, 2026
Understanding Firearm Clone Builds vs. Custom Builds
Afirearm clone build is a DIY project where you assemble a rifle by combining individual components, typically a stripped lower receiver, upper assembly, and internal parts, to create a functional firearm matching a specific manufacturer’s design or your own specifications.
Clone builds replicate existing platforms with high fidelity, matching mil-spec tolerances and following established assembly procedures. Custom builds prioritize your preferences over factory specifications, mixing components from different manufacturers or modifying geometry to suit your shooting style.
The practical difference is risk. Clone builds follow a proven path where parts fit reliably and troubleshooting is straightforward because thousands of builders have succeeded. Custom builds demand deeper knowledge and surface incompatibilities faster. Most builders start with a clone, learning assembly fundamentals and building confidence before customization becomes intuitive.
Essential Tools for Firearm Assembly
Assembling a firearm clone build requires specific tools. Some you’ll use repeatedly and should own; others you’ll touch once or twice and can rent affordably.
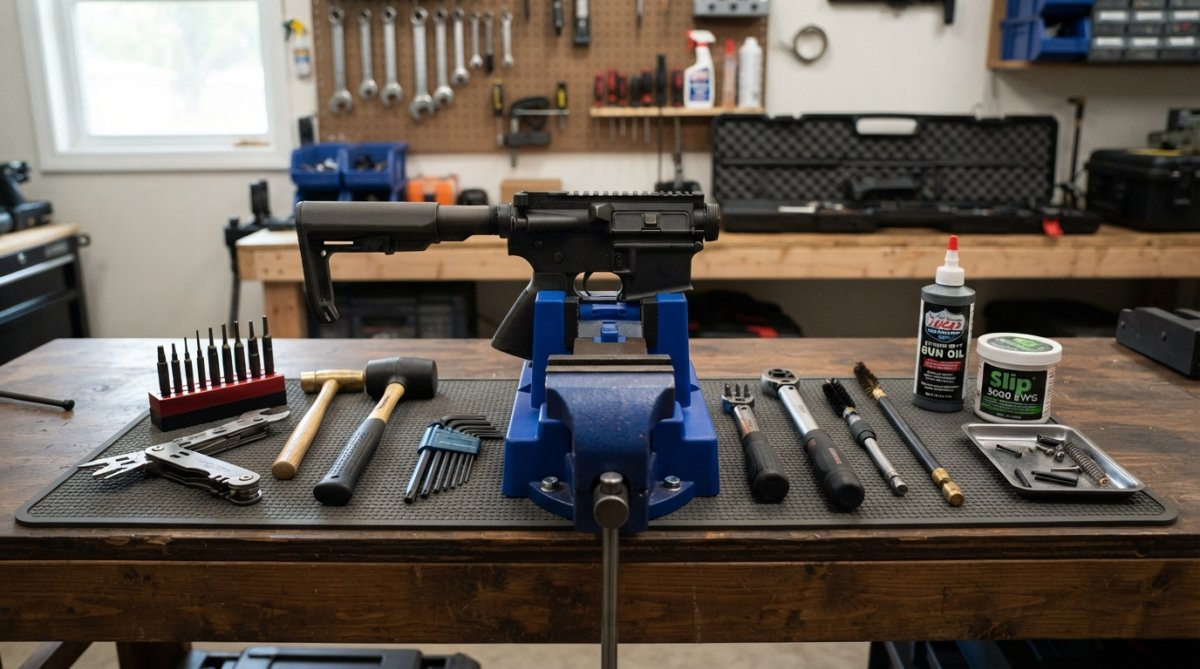
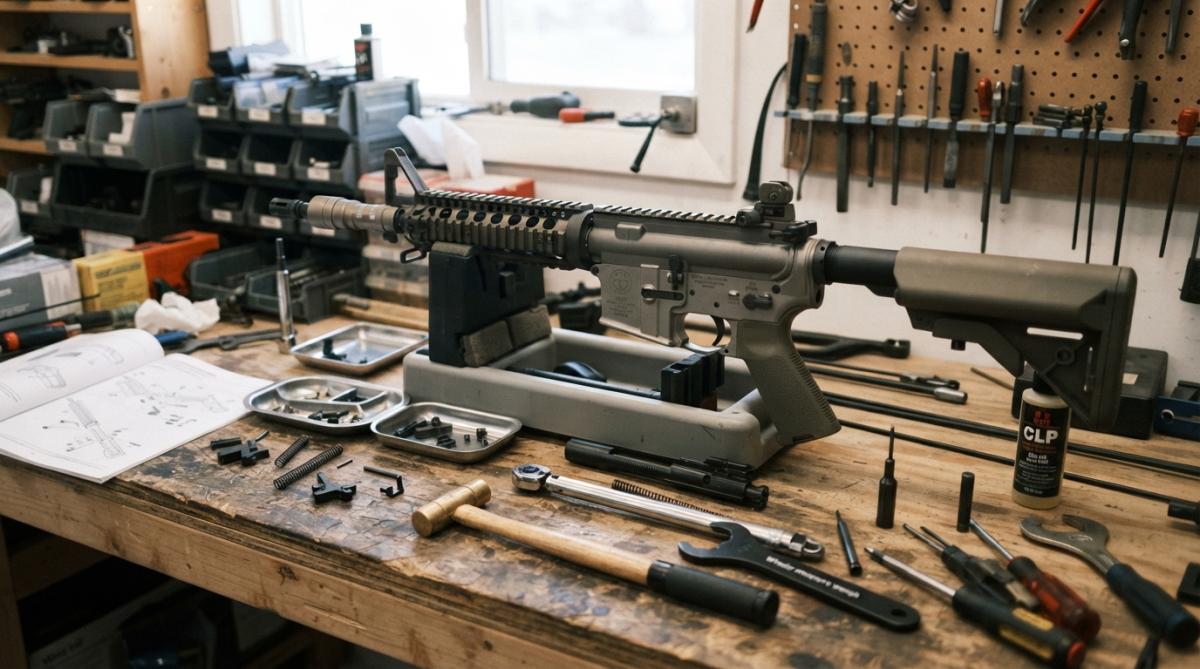
The core toolkit includes an armorer’s wrench, vice block, roll pin punches, torque wrench, and function testing block. An armorer’s wrench installs barrel nuts and removes components requiring precise pressure. A vice block holds your lower receiver securely without marring the finish. Roll pin punches drift out trigger groups and safety levers without damaging the receiver. A torque wrench ensures exact pressure on critical fasteners, under-torquing causes function failures; over-torquing strips threads. A function testing block verifies that your bolt carrier group cycles smoothly and your trigger breaks cleanly before investing in ammunition.
Tools You Can Rent vs. Tools Worth Buying
Ownership makes sense for tools you’ll use on multiple builds. A vice block and armorer’s wrench pay for themselves after two builds.
Rental works for specialized tools you’ll use once. A headspace gauge costs significant money but you’ll only need it during final assembly verification. Many ranges and gunsmith shops rent these tools affordably.
A quality torque wrench is worth owning if you’re serious about precision. Mid-range models run $50-$100 and maintain accuracy across dozens of builds.
Cleaning supplies, patches, rods, solvents, and lubricants are consumables. Buy in bulk to reduce per-use cost.
Parts Selection and Compatibility for Your Clone
Selecting parts hinges on one principle: mil-spec compatibility. Mil-spec means military specification, standardized dimensions and tolerances ensuring parts from different manufacturers work together reliably.
Most common clone platforms follow mil-spec. Your stripped lower receiver, upper assembly, barrel nut, bolt carrier group, and trigger group should all meet mil-spec dimensions. Mixing mil-spec and non-mil-spec components causes binding issues, function failures, and wasted money.
Polymer Pew specializes in aluminum MKE lower receivers tested for variant compatibility across multiple clone platforms. Our full metal kits feature anodized aluminum housings and stainless steel internals. When selecting parts, prioritize suppliers who publish compatibility testing results. Vague claims about "universal fit" are red flags.
Lower Receiver and Trigger Group Compatibility
The lower receiver is the legally regulated component defining the firearm. Your trigger group must fit the lower receiver’s internal dimensions without binding or excessive play.
Mil-spec tolerances ensure trigger groups fit snugly. Non-mil-spec triggers sometimes require filing or modification. Flat triggers and super safety kits from reputable manufacturers fit mil-spec lowers reliably. Polymer Pew’s specialized super safety kits are tested to ensure smooth operation without binding. Ask suppliers for compatibility documentation, real manufacturers provide it.
Pull weight consistency matters for precision shooting. A trigger should break at consistent weight every time. Budget triggers often vary 2-3 pounds between shots, ruining accuracy. Premium triggers hold pull weight within 0.5 pounds across hundreds of cycles.
Upper Assembly and Barrel Nut Specifications
Your upper assembly consists of the upper receiver, barrel, barrel nut, bolt carrier group, and gas system components. Barrel nut torque specification is critical. Mil-spec barrel nuts require 80-100 foot-pounds of torque. A calibrated torque wrench is essential, you cannot eyeball this.
Headspace, the distance between the bolt face and chamber, must fall within specific tolerances. Go-no-go gauges verify headspace during final assembly. Out-of-spec headspace prevents proper chambering or bolt locking.
Gas block installation requires precision. The gas block must align with the gas tube and bolt carrier group. Most builders use a gas block alignment tool to ensure proper geometry.
ATF Firearm Build Regulations 2026
Federal law regulates firearm manufacturing and assembly. The ATF (Bureau of Alcohol, Tobacco, Firearms and Explosives) enforces these regulations.
As of 2026, building a firearm for personal use remains legal under federal law. You can assemble a clone build for yourself without a Federal Firearms License (FFL) as long as the firearm is not intended for sale and you comply with all applicable regulations.
State and local laws vary significantly. Before starting your build, research your state’s regulations. Contact your state’s attorney general’s office or a firearms attorney if uncertain. Compliance is your responsibility.
Keep records of where you sourced components and when you completed your build. The ATF may inspect your records if questions arise about your build’s legality.
Serial numbers are required on the lower receiver. Most commercially manufactured stripped lowers come with serial numbers already applied. If using a lower without a serial number, federal law requires you to apply one before assembly. The serial number must be at least 0.003 inches deep and clearly legible.
Step-by-Step Assembly Process
Assembly follows a logical sequence: start with the lower receiver, install the fire control group, build the upper assembly separately, then unite them. This modular approach lets you verify each section before final assembly.
Installing the Lower Receiver Components
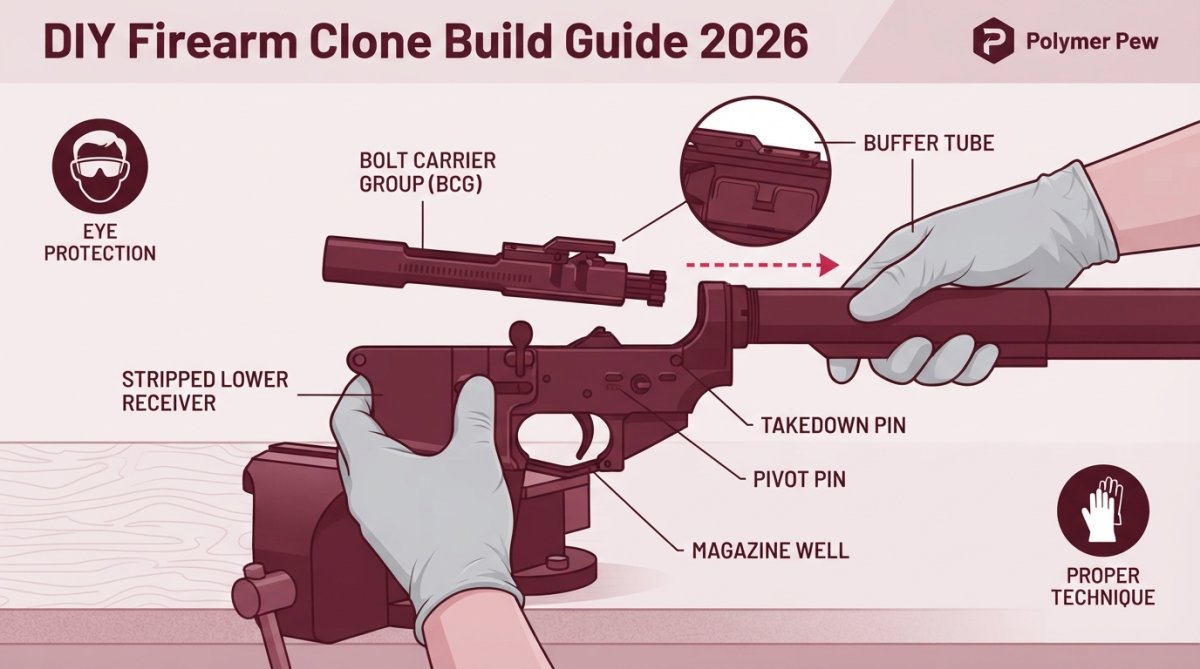
Secure your stripped lower receiver in a vice block. Install the trigger group first, the trigger, hammer, sear, and disconnector work together to control firing. Slide the trigger group into the fire control group pocket, ensuring it seats fully with no binding.
Install the safety lever next. The safety lever rotates to block the trigger. Proper installation means smooth movement between fire and safe positions without grinding.
Roll pins hold components in place. A roll pin punch drifts the pin into position. Strike firmly but controlled, too light and the pin won’t seat; too hard and you risk damaging the receiver.
Install the buffer tube last. The buffer tube houses the recoil spring and buffer. Torque the castle nut to specification, typically 30-40 foot-pounds. A cotter pin or safety wire passes through the castle nut’s slots to prevent rotation. Never skip this critical safety step.
Assembling the Upper Receiver and Barrel
Build the upper assembly on a separate workbench. Start with the stripped upper receiver.
Install the barrel using a barrel nut. Apply anti-seize compound to the barrel threads to prevent corrosion. Slide the barrel nut onto the barrel threads, then thread the barrel into the upper receiver. Use your armorer’s wrench to tighten the barrel nut to specification, typically 80-100 foot-pounds.
Install the gas block next, ensuring it aligns with the gas tube and bolt carrier group. Use a gas block alignment tool if available.
Install the bolt carrier group into the upper receiver. Cycle it by hand, it should move smoothly from full rearward to full forward position without binding.
Install the charging handle with a roll pin. Install the handguard, ensuring it doesn’t interfere with the bolt carrier group’s cycling.
Installing Optics and Accessories
Mount your optic on the upper receiver’s Picatinny rail system. Scope rings attach to the rail and hold your optic securely. Torque scope ring fasteners to specification, typically 25-30 foot-pounds.
Zero your optic by firing three-shot groups at 25 yards and adjusting windage and elevation turrets based on where shots land relative to your aiming point.
Install backup iron sights if using them. Install a muzzle device if your build includes one, torquing to specification.
Firearm Assembly Safety Best Practices
Safety during assembly prevents injuries and ensures reliable function. Treat every component as if it’s part of a loaded firearm.
Never point a partially assembled firearm at anyone. Keep the muzzle pointed downrange or into a safe direction at all times.
Keep your workspace organized. Use parts trays or small containers to organize components by assembly stage, preventing lost parts and mistakes.
Verify component compatibility before assembly. Cross-reference your parts against compatibility matrices.
Headspace and Function Testing
Headspace verification separates safe builds from unsafe ones. Use go-no-go gauges to verify headspace. The go gauge should chamber easily; the no-go gauge should not. If the no-go gauge chambers, headspace is excessive and the firearm is unsafe.
Function testing verifies that all components work together. Use a function testing block, cycling your bolt carrier group repeatedly. The bolt should lock and unlock smoothly; the trigger should break cleanly; the safety should block the trigger reliably.
Perform this test before your first range session.
Common Assembly Mistakes to Avoid
Forgetting the cotter pin in the buffer tube castle nut prevents the nut from rotating during shooting. Installing the safety lever backwards prevents proper trigger blocking. Over-torquing fasteners strips threads and cracks receivers; under-torquing causes components to work loose. Misaligning the gas block causes cycling problems. Neglecting lubrication causes friction and premature wear.
Test your firearm clone build with a function testing block before ammunition ever enters your workspace. This single step catches 90% of assembly errors and prevents range surprises.
Cost Breakdown of DIY Rifle Builds
Understanding costs helps you budget appropriately and make informed component choices.
Budget Build vs. Premium Build Comparison
A budget build prioritizes function over aesthetics, selecting mil-spec components that work reliably without premium pricing. A premium build invests in higher-quality components and specialized features, delivering better performance and longevity.
| Build Type | Lower Receiver | Upper Assembly | Trigger Group | Barrel | Accessories |
|---|---|---|---|---|---|
| Budget | Mil-spec stripped | Standard | Standard mil-spec | Quality mil-spec | Basic furniture |
| Mid-range | Quality mil-spec | Enhanced | Improved trigger | Premium barrel | Standard optics |
| Premium | Precision-engineered | High-spec | Match-grade trigger | Match-grade barrel | Quality optics, upgrades |
The stripped lower receiver is your starting point. Aluminum receivers from reputable manufacturers offer excellent value. Polymer Pew’s aluminum MKE lower receivers provide tested compatibility across multiple platforms.
Your upper assembly choice significantly impacts cost. A basic upper with a mil-spec barrel costs less than a premium upper with a match-grade barrel. Both function reliably.
Trigger group costs vary dramatically. Budget mil-spec triggers break cleanly but may have wider pull weight variation. Premium triggers deliver match-grade performance with tight tolerances. For competition shooting, a premium trigger justifies the investment.
Barrel quality directly affects accuracy. A quality mil-spec barrel shoots accurately for most purposes. A premium, match-grade barrel offers tighter tolerances and superior accuracy potential, mattering most at distance or in competition.
A functional, accurate firearm clone build doesn’t require premium pricing on every component. Strategic investment in barrels, triggers, and optics yields better results than spreading your budget evenly across all parts.
Post-Build Maintenance and Long-Term Reliability
Your firearm clone build’s longevity depends on maintenance. A well-maintained rifle functions reliably for decades.
Clean your firearm after every shooting session. Powder residue and debris accumulate in the bolt carrier group and gas system. Use quality solvent and patches to clean the bore, then apply a thin coat of lubricant. Don’t over-lubricate.
Inspect your firearm regularly. Check that all fasteners remain tight. Recoil causes minor loosening over time. Verify that your optic hasn’t shifted.
Replace worn components before they fail. Recoil springs weaken over time. After several thousand rounds, replace the spring to prevent potential bolt carrier group damage. Extractor springs also wear, a weak extractor spring causes feeding failures.
Lubrication schedules depend on usage. Firearms used frequently need more frequent lubrication. Firearms stored for extended periods need light lubrication to prevent rust.
Record when you perform cleaning, inspection, and component replacement. This history helps identify patterns and understand underlying causes if components fail repeatedly.
Test your firearm periodically by firing a few rounds through your function testing block to verify smooth operation. If cycling feels different or the trigger breaks differently, investigate before assuming it’s normal variation.
Building a firearm clone requires patience, precision, and respect for the process. The satisfaction of assembling a functional, accurate rifle yourself is significant. At Polymer Pew, we understand that builders need components they can trust, which is why our aluminum MKE lower receivers, specialized super safety kits, and flat triggers are tested for compatibility and reliability. Start with quality components, follow established procedures, and your clone build will reward you with years of accurate, dependable performance. Get your Flatties here and begin building with confidence.
Frequently Asked Questions
Is it cheaper to build your own firearm clone or buy a factory model?
Building a clone can cost less than factory models when you prioritize essential components and avoid premium upgrades. Budget builds typically range from $400-$800, while factory equivalents cost $600-$1,200. The savings depend on your parts selection, labor costs (if outsourced), and tooling investment. Factor in whether you'll reuse tools for future builds, that spreads costs across multiple projects and improves the value proposition significantly.
What are the essential tools required for a DIY firearm build?
Core tools include a vice block, armorer's wrench, roll pin punch set, torque wrench (calibrated to mil-spec), headspace gauge, and a quality cleaning kit. You'll also need safety glasses, hearing protection, and a well-lit workspace. Many builders rent specialized tools like a barrel vise or upper receiver vice block from tool libraries or gunsmiths rather than purchasing them outright, which reduces upfront costs while ensuring precision.
How do I ensure my DIY firearm clone build complies with current federal regulations?
Verify that your completed firearm has a serialized lower receiver registered as required by federal law. Ensure all components meet mil-spec standards for your specific platform. Check state and local regulations, as some jurisdictions impose additional restrictions on barrel length, overall length, or magazine capacity. Keep documentation of your build process and parts sources. When in doubt, consult the ATF's current guidelines or a licensed gunsmith familiar with 2026 compliance requirements.
What is the difference between a 'clone' build and a custom build?
A clone build replicates a specific factory firearm's original configuration as closely as possible, using mil-spec parts and standard dimensions for compatibility and reliability. A custom build prioritizes personal preferences and performance goals, often mixing brands, upgrading trigger groups, or modifying geometry. Clones are ideal for shooters wanting proven, battle-tested platforms; custom builds suit those seeking unique performance characteristics or specialized features tailored to competition or specialized shooting disciplines.
How do I know if parts from different manufacturers will work together in my clone?
Compatibility depends on adhering to mil-spec standards for critical dimensions: barrel nut torque specifications, gas block alignment, bolt carrier group tolerances, and trigger group geometry. Cross-reference part specifications with your upper and lower receiver manufacturer's documentation. Test-fit components before final assembly when possible. Polymer Pew's aluminum MKE lowers are tested for variant compatibility across major platforms, reducing guesswork and minimizing binding or fit issues common with untested combinations.
What should I do after assembling my firearm to ensure it's safe and reliable?
Perform a detailed function test with an empty chamber: cycle the bolt carrier group multiple times, check trigger reset, verify safety engagement, and confirm the ejection pattern. Use a headspace gauge to confirm proper dimensions. Inspect all roll pins, screws, and fasteners for tightness. Lubricate critical surfaces according to mil-spec guidelines, then conduct a live-fire safety check at an approved range with appropriate supervision. Document your build and testing results for future reference and maintenance scheduling.
Can I use non-mil-spec parts in a clone build?
Non-mil-spec parts may introduce compatibility issues, reliability concerns, or precision loss. Clone builds prioritize mil-spec standards because they ensure interchangeability and proven performance. Some aftermarket upgrades (premium triggers, optics) are non-mil-spec but widely tested and accepted. Avoid mixing unproven non-mil-spec components for critical functions like the bolt carrier group, barrel, or gas system. When deviating from mil-spec, research extensively and test thoroughly before relying on the firearm for serious use.
How often should I perform maintenance on my completed DIY clone build?
Perform basic cleaning and lubrication after every 200-400 rounds, depending on ammunition type and environmental conditions. Conduct a detailed inspection monthly if shooting regularly, checking for loose fasteners, wear patterns, and component degradation. Replace worn parts proactively: recoil springs typically last 5,000-10,000 rounds, while extractors and firing pins show wear sooner. Keep a maintenance log documenting rounds fired, cleaning dates, and any issues encountered. This schedule ensures long-term reliability and helps catch problems before they affect performance.
This article was written using GrandRanker

