

Table of Contents
- Forged vs. Billet Aluminum Lower Receivers: What You’re Paying For
- 7075-T6 vs. 6061 Aluminum Alloys: Material Breakdown for Budget Builders
- Best AR-15 Lower Parts Kit for the Money: Top Affordable Options
- Best Trigger Upgrades for AR-15 on a Budget
- How to Install AR-15 Lower Receiver Upgrades: Step-by-Step
- Performance-to-Price Ratio: Getting Real Value from Affordable Upgrades
- Long-Term Wear and Maintenance: Will Budget Aluminum Hold Up?
- Conclusion
Last Updated: August 16, 2026
Forged vs. Billet Aluminum Lower Receivers: What You’re Paying For
Forged lowers start as raw aluminum stock hammered into shape under extreme pressure, creating a denser grain structure. Billet receivers are machined from solid aluminum blocks, offering superior aesthetics at higher cost. Forged receivers dominate the budget space because manufacturing is faster and cheaper. The grain density from forging makes them incredibly durable, handling firing stresses without flexing or cracking. Most mil-spec compliant lowers are forged 7075-T6 aluminum, delivering the tensile strength needed for reliable operation across different calibers.
Billet receivers look premium because they’re precision-machined from solid blocks, allowing custom designs and sharper lines. But that precision comes at a price premium. For budget builders, billet aesthetics aren’t worth the extra cost when forged alternatives perform identically under firing conditions.
The real difference emerges in edge cases: extreme temperature swings, heavy suppressor use, or sustained rapid fire. Standard forged mil-spec lowers handle normal shooting environments without issue. For competition or precision work, marginal durability gains from billet construction may justify the cost. For general-purpose builds and plinking, forged aluminum lower receivers deliver everything you need at half the price.
Thermal stability matters more than most builders realize. Both forged and billet aluminum maintain consistent tolerances across temperature ranges, but forged receivers with proper hard coat anodizing resist corrosion better in humid environments.
7075-T6 vs. 6061 Aluminum Alloys: Material Breakdown for Budget Builders
7075-T6 is the industry standard for firearm components because it delivers superior tensile strength, the ability to resist stress without deforming. This alloy contains zinc, magnesium, and copper, creating a harder, more rigid structure. 6061 aluminum is softer, cheaper, and lighter, but lacks the structural rigidity needed for reliable fire control group seating.
Most budget aluminum lower receivers use 7075-T6 because manufacturers can achieve mil-spec dimensions without excessive machining. The alloy’s natural strength means tighter tolerances without sacrificing reliability. When you see pricing differences between budget options, the material is usually the same, 7075-T6 forged, but finishing and features vary.
Hard coat anodizing (Type III, Class 2) protects both alloys equally well. This mil-spec finish creates a ceramic-like surface resisting corrosion, scratches, and wear. Budget receivers get the same anodizing treatment as premium options.
Weight reduction becomes relevant only if obsessing over every ounce. A 7075-T6 forged lower weighs roughly the same as a 6061 billet receiver, so alloy choice doesn’t drive weight savings.
7075-T6 is the right choice for every [AR-15 build](/product-category/ar15/). It’s stronger, more affordable, and the standard every manufacturer uses. Avoid anything claiming to use 6061 for lower receivers, it’s a cost-cutting measure that sacrifices reliability.
Best AR-15 Lower Parts Kit for the Money: Top Affordable Options
A complete lower parts kit should include the fire control group, safety selector, takedown pins, detents, springs, and trigger guard. Budget kits trim cosmetic features but maintain critical function.
Polymer Pew Full Metal Kit with Stainless Steel Internals
Polymer Pew’s full metal kit combines anodized aluminum housings with stainless steel internals, delivering corrosion resistance and durability at a practical price point. Stainless steel internals resist rust and wear better than standard steel, extending component life across different shooting environments.
Each component is tested for variant compatibility, meaning it works reliably with MKE-pattern lowers and standard mil-spec receivers. The flat trigger design offers a clean break without the creep common in budget options.
This kit eliminates durability compromises to hit a price target. It’s ideal for builders who understand that cheap components fail when you need reliability most.
Builders prioritizing durability and compatibility over cosmetics. If you’re running clones or non-standard lower receivers, this kit eliminates fitment headaches.
Aero Precision M4E1 Stripped Lower (Budget-Conscious Alternative)
The Aero Precision M4E1 stripped lower includes integrated features that reduce parts kit costs. The threaded bolt catch roll pin, integrated trigger guard, and upper tension screw come built-in. Starting at approximately $105 for blemished models, this forged 7075-T6 receiver offers features typically found on higher-priced options.
The increased magwell flare improves magazine insertion speed, and the threaded takedown pin detent recess simplifies assembly. For first-time builders, these features reduce installation mistakes.
You’ll still need to source the trigger group, safety selector, and springs separately, but integrated features mean fewer components overall and improved assembly quality.
Anderson Manufacturing AM-15 Stripped Lower (Extreme Budget Option)
Anderson Manufacturing’s AM-15 stripped lower is the baseline for budget builds. Forged 7075-T6 aluminum, mil-spec dimensions, and Type III black hardcoat anodizing deliver functional reliability without extras. Starting around $40-$60, this receiver costs half what premium options command.
The no-frills approach means you get a bare lower with pin holes and safety selector hole. But mil-spec compliance guarantees compatibility with any standard lower parts kit. Anderson’s reputation for consistent mil-spec dimensions means fitment issues are rare.
Best Trigger Upgrades for AR-15 on a Budget
Trigger quality directly affects accuracy, consistency, and shooting comfort. Budget upgrades don’t require $300 specialty triggers, practical improvements come from upgrading the fire control group to a cleaner break and lighter pull weight.
A quality trigger should offer a crisp break without creep, consistent pull weight across multiple shots, and reliable reset. Budget options deliver these fundamentals without premium pricing. The difference between a $30 mil-spec trigger and a $100 specialty trigger is refinement, not basic function.
Polymer Pew’s flat trigger design addresses a common complaint: the curved trigger of standard mil-spec fire control groups. A flat trigger face provides better mechanical advantage and reduces the likelihood of trigger finger position affecting shot placement.
When evaluating trigger upgrades, look for stainless steel components and hardened hammer and sear surfaces. These materials resist wear better than standard steel, maintaining consistent pull weight over thousands of rounds.
Avoid ultra-cheap triggers under $20 that promise “match-grade” performance. These components often have inconsistent pull weights (varying by 2-3 pounds between shots), sloppy sear engagement, and premature wear.
How to Install AR-15 Lower Receiver Upgrades: Step-by-Step
Installing lower receiver upgrades requires minimal tools and basic mechanical competency. Most upgrades are drop-in components fitting into standard mil-spec receivers without modification.
What You’ll Need Before Starting
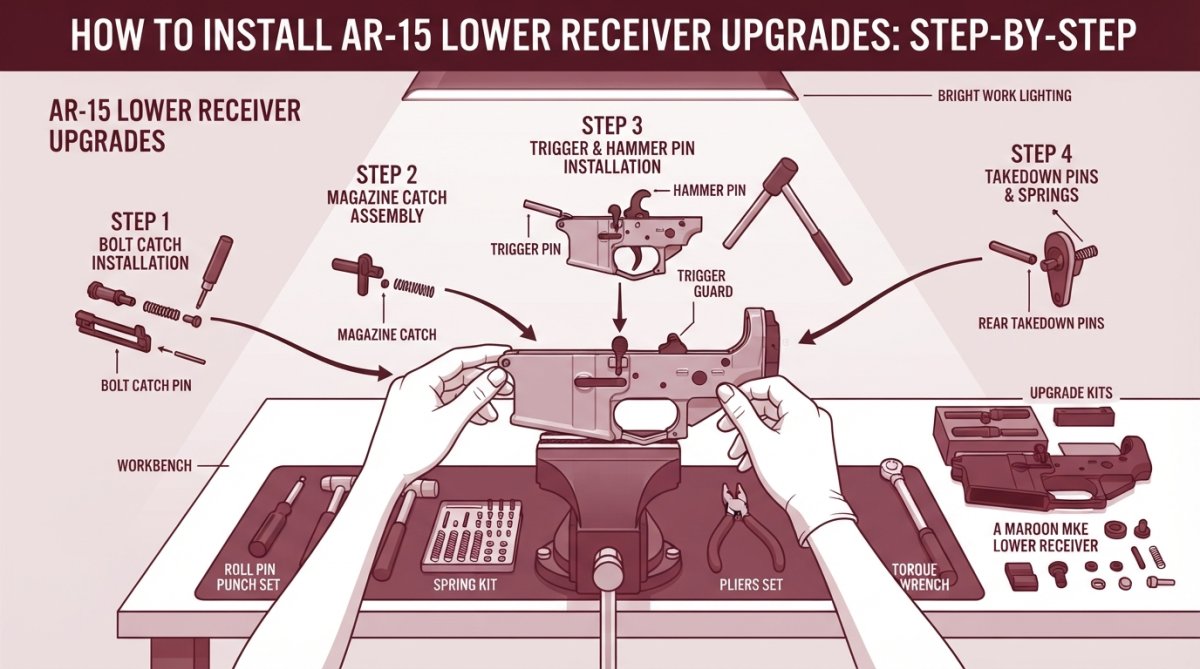
Gather these tools: a roll pin punch set (essential for removing and installing takedown pins and detents), a small hammer or mallet, a screwdriver, and a clean workbench with adequate lighting. A vise or lower receiver vise block stabilizes the receiver during work.
Wear eye protection when driving pins, as detent springs can launch small components. Keep a small container nearby to organize pins, springs, and detents.
Installation Process for Drop-In Kits
Start by removing the original fire control group. Drive out the hammer pin and trigger pin using your roll pin punch. Support the receiver in a vise block to prevent rocking. Once pins are removed, the entire fire control group lifts away as a unit.
Install the new trigger group in reverse order. Position the hammer first, then the trigger, ensuring both components seat fully in their pin holes. Drive the hammer pin through first, this pin bears more stress during firing. Follow with the trigger pin. Both pins should seat flush with the receiver walls.
Install the safety selector by rotating the existing selector 90 degrees and sliding it out. The new selector slides in along the same path. Ensure the selector moves smoothly through all positions and clicks audibly at each position.
Test the entire assembly before firing. Cycle the charging handle multiple times to ensure the bolt carrier group moves freely. Verify the safety selector clicks between positions and the trigger breaks cleanly without creep.
Common Installation Mistakes to Avoid
The most frequent error is installing the hammer pin before the trigger pin, which binds the trigger mechanism. Always install the hammer first, then the trigger.
Overtightening the safety selector causes binding. The selector should move smoothly with light finger pressure.
Forgetting to install the trigger guard before final assembly wastes time. Install it early while the lower is accessible.
Failing to support the receiver during pin installation is costly. Unsupported receivers can crack when you strike the punch. A vise block prevents this damage.
Performance-to-Price Ratio: Getting Real Value from Affordable Upgrades
Value isn’t the lowest price, it’s the best outcome for your budget. A $40 receiver paired with a $15 lower parts kit delivers worse results than a $60 receiver with a $50 quality trigger group.
Budget builders should prioritize the fire control group and trigger. These components directly affect accuracy and consistency. A quality trigger upgrade transforms shooting performance more noticeably than cosmetic receiver features.
Aluminum lower receiver upgrades offer consistent performance regardless of price point because mil-spec compliance ensures compatibility and durability. The performance ceiling is the same, 7075-T6 forged aluminum with hard coat anodizing handles any shooting scenario. Where budget options differ is in finish quality, integrated features, and trigger consistency.
Mid-range options deliver the best value. A $60-$80 forged lower with an integrated trigger guard and upper tension screw, paired with a quality lower parts kit, outperforms a $40 receiver with a cheap fire control group.
The real value play: buy a stripped receiver from a reputable manufacturer (Aero Precision, Anderson Manufacturing, or Polymer Pew) and invest in a quality lower parts kit with stainless steel internals. This approach costs $100-$150 total and delivers reliability across thousands of rounds.
| Receiver Type | Typical Price Range | Best For | Key Advantage |
|---|---|---|---|
| Budget Forged (Anderson AM-15) | $40-$60 | First-time builders | Lowest cost entry point |
| Mid-Range Forged (Aero M4E1) | $80-$110 | Builders wanting features | Integrated components reduce total cost |
| Premium Forged (Spike’s Tactical) | $100-$135 | Aesthetic preference | Brand reputation and finish quality |
| Polymer Pew Full Metal Kit | Variable | Compatibility-focused builds | Tested for clone compatibility |
Long-Term Wear and Maintenance: Will Budget Aluminum Hold Up?
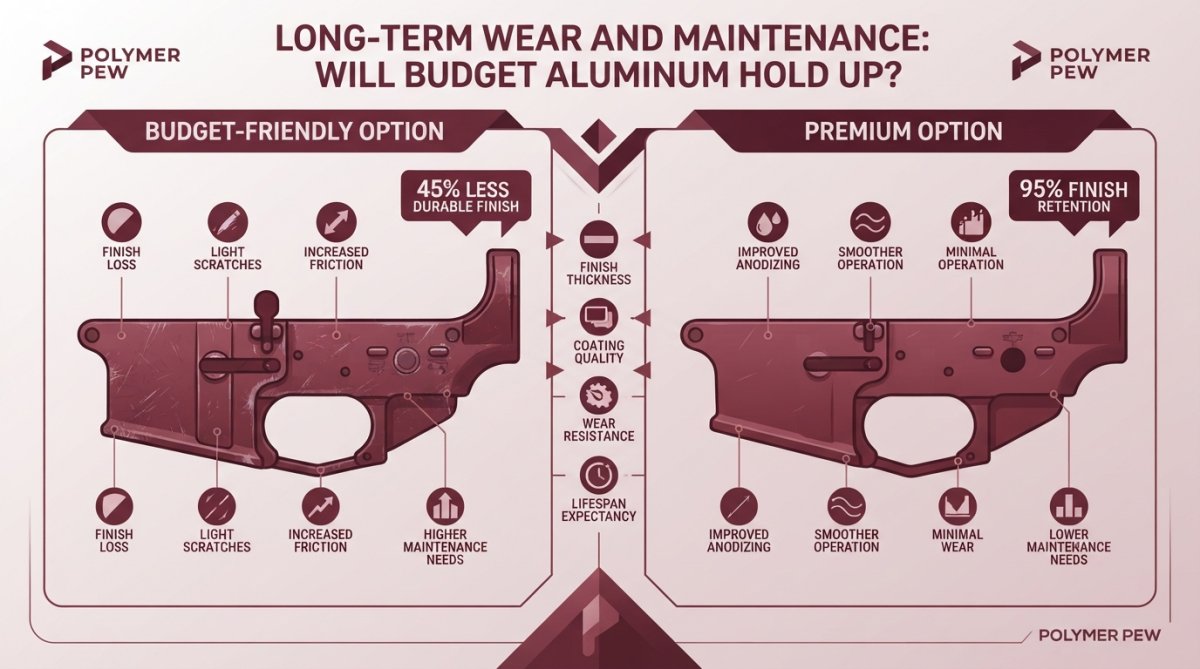
Budget aluminum lower receivers maintain their integrity across thousands of rounds when properly maintained. Real-world testing shows that budget receivers from reputable manufacturers perform identically to premium options after 5,000+ rounds.
Wear patterns emerge predictably: takedown pin holes show minor enlargement from repeated assembly and disassembly, the fire control group develops light wear marks, and the safety selector detent may loosen slightly. None of these issues affect reliability or accuracy.
Hard coat anodizing protects against corrosion in humid environments and saltwater exposure. Budget receivers receive the same mil-spec anodizing (Type III, Class 2) as premium options, so corrosion resistance is identical.
Maintenance is straightforward: clean the receiver periodically with a solvent-dampened cloth and dry thoroughly. Avoid aggressive scrubbing that damages the anodizing. Lubricate the fire control group components lightly, excessive oil attracts debris.
The takedown pins and detent springs require replacement occasionally. These components experience the most stress and wear fastest. Budget-friendly replacement springs cost $5-$15 and install in minutes. Planning for spring replacement every 2-3 years of regular shooting keeps your build reliable.
Budget aluminum lower receiver upgrades outlast the shooter’s interest in the platform. The receiver itself is the last component to fail. Fire control groups, springs, and pins wear out first.
Affordable aluminum lower receiver upgrades don’t require compromise. Polymer Pew’s full metal kits deliver tested compatibility and durable construction at prices that let you invest in quality triggers and fire control groups. The best builds prioritize the components that affect accuracy and reliability, the receiver is the foundation, but the trigger group is what you feel when you shoot. Start with a solid mil-spec receiver from a reputable manufacturer, pair it with a quality lower parts kit featuring stainless steel internals, and you’ll have a platform that performs reliably for years. Get your upgrades from Polymer Pew and build with confidence knowing your components are tested for variant compatibility and built to last.
Frequently Asked Questions
What is the difference between forged and billet aluminum lower receivers?
Forged aluminum lower receivers are created by hammering hot aluminum into shape, resulting in superior tensile strength and durability at a lower cost. Billet receivers are machined from solid aluminum blocks, offering aesthetic advantages and tighter tolerances but at higher expense. For budget-conscious builders, forged 7075-T6 aluminum receivers deliver excellent performance without the premium price of billet options. Both meet mil-spec standards when properly manufactured.
Is it worth upgrading a budget aluminum lower receiver?
Yes, if you're starting with a stripped lower. Adding a quality lower parts kit with stainless steel internals, a reliability-tested trigger, and a super safety kit significantly improves function and longevity without breaking the bank. Budget upgrades from reputable manufacturers like Polymer Pew deliver measurable gains in trigger consistency, safety reliability, and component durability. The performance-to-price ratio is excellent when you prioritize tested components over premium branding.
Can I install lower receiver upgrades myself?
Yes, most drop-in kits and trigger upgrades are designed for DIY installation with basic tools: a punch set, spring tool, and Allen wrenches. Polymer Pew's flat triggers and super safety kits are engineered for straightforward assembly without binding issues. Start by reviewing the manufacturer's documentation, take your time with pin placement, and verify all detents and springs seat properly. Common mistakes include forcing components or misaligning the safety selector, both easily avoided by following step-by-step guides.
What makes a lower parts kit reliable for competition or regular shooting?
Reliable lower parts kits use hardened stainless steel internals, precision-machined fire control groups, and springs tested for consistent pull weight across thousands of cycles. Polymer Pew's kits feature anodized aluminum housings paired with stainless steel components to resist corrosion and wear. Look for manufacturers who publish pull-weight specifications and stand behind their products with warranties. Budget options that skip these details often fail under competition use, making tested kits a smarter investment long-term.
This article was written using GrandRanker

