

Table of Contents
- What Causes AR-15 Lower Receiver Fitment Issues
- How to Fix AR-15 Upper Receiver Wobble
- Installing an AR-15 Receiver Tension Screw
- Checking AR-15 Takedown Pin Fitment
- Diagnosing Pin Hole Alignment and Trigger Group Issues
- Common Assembly Mistakes That Create Fitment Problems
- Final Safety Verification Checklist
- Frequently Asked Questions
Last Updated: September 6, 2026
What Causes AR-15 Lower Receiver Fitment Issues
Troubleshooting AR-15 lower receiver fitment issues starts with understanding that most problems are not defects but the result of manufacturing tolerances. When an upper and lower receiver don’t mate cleanly, the culprit is usually the gap between what mil-spec allows and what your specific parts actually measure. Receiver wobble, sticky takedown pins, and trigger group binding all trace back to the same root causes.
Tolerance Stack-Up and Anodization Explained
AR-15 receivers are machined to mil-spec dimensions, but mil-spec includes a tolerance range, not a single exact number. One receiver might measure at the low end of spec while another sits at the high end, and when they meet, the combined variance creates fitment problems. This is called tolerance stack-up, and it explains why two receivers from different manufacturers often feel loose or tight against each other.
Anodization adds another variable. The hardcoat anodizing process grows a layer that changes surface dimensions slightly, and thickness varies between batches and manufacturers. A thicker anodized layer on the upper’s lug surfaces or the lower’s pin bosses reduces clearance, producing a tight fit that feels wrong but is actually within acceptable limits. Understanding this distinction matters because it changes your fix: a tolerance issue needs a tension device, while an anodization issue might only need careful seating.
AR-15 receiver dimension standards and mil-spec tolerance documentation
How to Fix AR-15 Upper Receiver Wobble
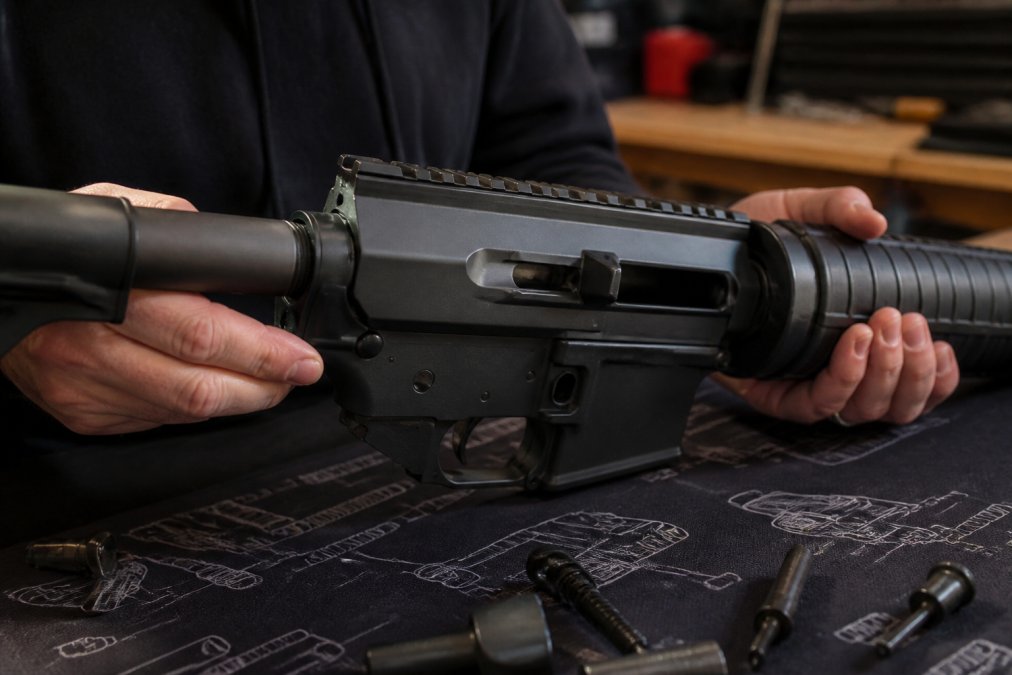
AR-15 upper receiver wobble is the most common fitment complaint, and the fix depends on where the play originates. Start by assembling the upper and lower with the takedown and pivot pins installed, then grip the upper and lower near the magazine well and apply gentle pressure. If you feel movement at the rear, the issue is clearance between the upper’s rear lug and the lower’s receiver extension area.
The standard fix for wobble is an AR-15 receiver tension screw, which applies upward pressure on the upper receiver to eliminate play. Many lowers include a threaded hole in the rear of the receiver, just below the buffer tube threads, designed for this purpose. If your lower lacks that hole, an accu-wedge that sits between the upper and lower at the rear is a drop-in alternative.
Before installing anything, verify the wobble is actually at the receiver joint and not coming from the takedown pin holes being oversized. A worn or out-of-spec pin hole creates movement that a tension screw cannot fully correct, and you will waste time chasing a fix that addresses the wrong component. Check the pins themselves for visible wear and replace them if the fit feels sloppy with the upper removed.
When testing for wobble, hold the rifle by the magazine well and the handguard, then try to twist the receivers in opposite directions. This isolates lateral play from vertical play, which tells you whether the tension screw or the pin fitment is the real problem.
Installing an AR-15 Receiver Tension Screw
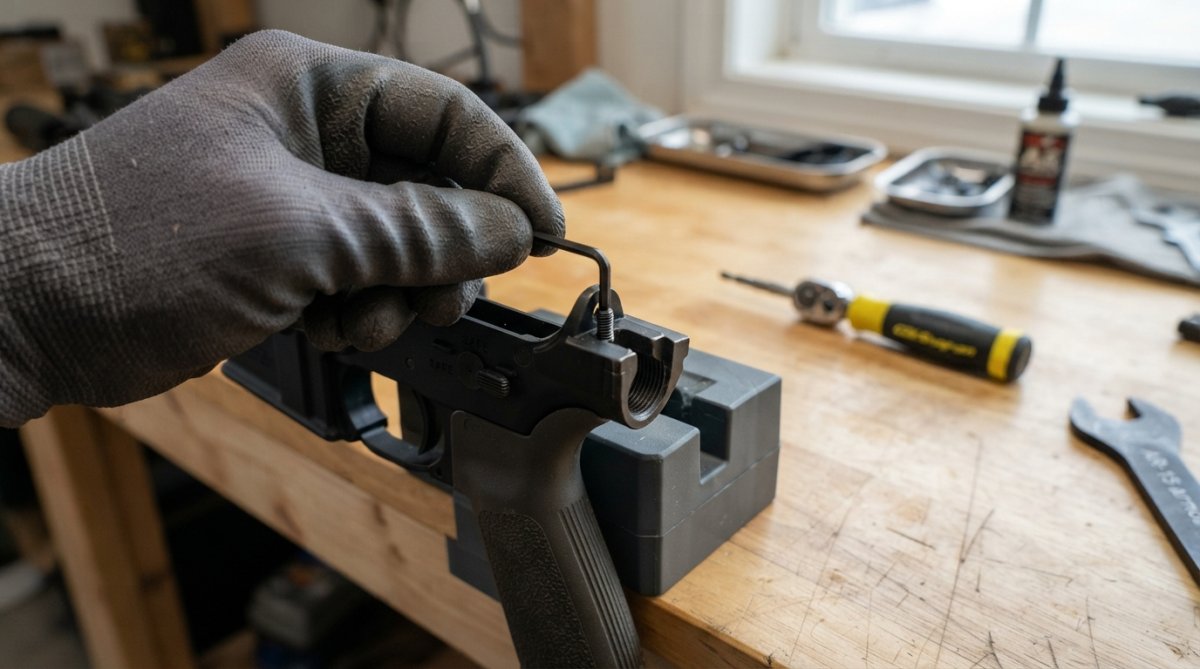
Installing an AR-15 receiver tension screw takes about five minutes and requires only an Allen wrench, but doing it wrong creates more problems than it solves. The screw threads into the lower receiver from the rear, and its tip presses against the upper receiver’s rear lug when the action is closed.
Start by removing the upper receiver and the buffer tube if it is installed. Locate the threaded hole at the rear of the lower, clean any debris from the threads, and thread the screw in by hand until it sits flush with the receiver face. Reinstall the upper and close the action, then tighten the screw in small increments, checking the fit after each quarter turn.
The goal is to remove wobble without creating binding. If the action becomes hard to close or the takedown pin requires excessive force, you have over-tightened. Back the screw out until the action cycles smoothly with zero play. A common mistake is cranking the screw down until the upper feels “solid,” which puts unnecessary stress on the receiver lug and can cause the upper to sit slightly out of alignment with the barrel.
Over-tightening a receiver tension screw can distort the lower receiver’s rear lug area, causing the trigger group to bind or the bolt carrier to drag. If the action feels stiff after installation, back the screw out immediately rather than forcing it.
Checking AR-15 Takedown Pin Fitment
Checking AR-15 takedown pin fitment requires removing the upper and testing each pin independently. The takedown pin at the rear and the pivot pin at the front serve different roles, and diagnosing them separately reveals where the tolerance problem lives.
Install the pivot pin first and close the upper onto it. If the pivot pin rotates freely but the rear of the upper sits high, the issue is the takedown pin hole alignment, not the pin itself. If the pivot pin is tight to rotate even with the upper removed, the pin hole in the lower is undersized or the pin is out of spec.
For takedown pin holes that are slightly misaligned, the fix is often simpler than it appears. With the upper and lower held together by hand, insert the takedown pin from the opposite side and use gentle pressure while wiggling the upper slightly. This seats the receivers into their natural alignment and usually allows the pin to pass. If the pin still will not seat, check for burrs or anodization buildup at the hole edges and remove them carefully with fine sandpaper.
Diagnosing Pin Hole Alignment and Trigger Group Issues
Pin hole alignment problems and trigger group issues often present with identical symptoms, which is why troubleshooting AR-15 lower receiver fitment issues requires checking one system at a time. A trigger that will not reset or a hammer that binds could mean the trigger group is installed incorrectly, or it could mean the receiver’s pin holes are drilled out of alignment, placing the trigger and hammer at an angle.
Test the trigger group function before suspecting the receiver. Remove the upper, install the trigger group, and cycle the hammer by hand. If the hammer falls and resets cleanly with the receiver empty, the trigger group is fine and the issue is receiver-related. If the hammer drags or the trigger will not reset, remove the group and check that the hammer spring is oriented correctly and the trigger pin is fully seated.
Firearm safety and maintenance guidelines from the National Shooting Sports Foundation
A misaligned trigger pin hole is rare but possible, especially with budget receivers. The pin should slide through the receiver and into the trigger with light finger pressure. If you need a hammer to seat the pin, the holes are likely out of alignment, and forcing the pin damages the trigger’s pin bore. This situation typically requires returning the receiver or having a gunsmith ream the holes, not a field fix.
Common Assembly Mistakes That Create Fitment Problems
Many fitment problems trace back to assembly errors rather than manufacturing defects. The most common mistake is installing the buffer tube incorrectly, which pulls the receiver extension out of alignment and makes the upper sit crooked. The buffer tube must be torqued to spec and the castle nut staked properly to keep everything square.
Another frequent error is cross-threading the rear takedown pin detent or losing the detent spring tension. The rear detent holds the takedown pin in place, and if the detent is installed backward or the spring is compressed incorrectly, the pin walks out during cycling. This creates the illusion of receiver wobble when the actual problem is a pin that is not staying seated.
A third assembly mistake is using the wrong pivot pin for the receiver. Some lowers use a screw-in pivot pin instead of a push-button style, and swapping parts between builds creates fitment issues that look like tolerance problems. Always verify that your pins match the receiver’s design before troubleshooting other causes.
| Mistake | Symptom | Fix |
|---|---|---|
| Buffer tube not torqued to spec | Upper sits crooked, bolt carrier drags | Remove, reinstall, torque to spec |
| Rear detent installed backward | Takedown pin walks out during cycling | Remove detent, reinstall correctly |
| Wrong pivot pin for receiver | Pin will not seat or rotates loosely | Replace with correct pin type |
Final Safety Verification Checklist
Before you load a single round, run through a final safety verification to confirm your troubleshooting AR-15 lower receiver fitment issues work did not introduce new problems. A receiver that fits perfectly but has a compromised safety selector is a dangerous combination.
Start with the function check. With the upper removed and the hammer down, verify the safety selector engages in both the safe and fire positions. The selector should click positively into each position, and with the safety on, the trigger should not move when pulled. With the safety off, the trigger should release the hammer with a clean break.
Next, verify the bolt carrier group cycles freely. Reinstall the upper and charge the rifle several times with the bolt catch engaged. The bolt should lock back reliably, and the charging handle should move without binding. Finally, confirm the takedown and pivot pins are fully seated and the receivers show no movement when you apply pressure. If everything passes, your fitment work is complete.
NRA firearm safety rules and inspection guidelines
A properly fitted AR-15 receiver should have zero wobble, cycle the bolt carrier freely, and pass a full function check before it goes to the range. If any of these fail, the fix is not complete.
At Polymer Pew, we offer aluminum MKE lowers and trigger components. Our full metal kits use anodized aluminum housings and stainless steel internals tested for variant compatibility, and our budget-friendly drop-in options are available. Get your Flatties here!
Frequently Asked Questions
How much upper receiver wobble is too much?
A small amount of movement between the upper and lower is common, even on mil-spec rifles. If the wobble affects your zero, causes the bolt to bind during cycling, or bothers you enough to hurt confidence in the rifle, it is worth fixing. An AR-15 receiver tension screw or an Accu-wedge will usually eliminate the play. If the movement is extreme, check the takedown pin holes for wear or out-of-spec dimensions.
Will a tight fit between AR-15 receivers cause problems?
A tight fit can cause the takedown pins to bind and make field stripping difficult. It can also put structural stress on the receiver lugs over time. Before forcing components together, check for burrs or excess anodization on the mating surfaces. If the fit is only slightly snug, cycling the action a few hundred times will often wear it in. If the pins will not seat, the pin holes may be misaligned.
Do I need an Accu-wedge for my AR-15?
You only need an Accu-wedge if you have upper receiver wobble that you want to eliminate. It is a simple polymer shim that fills the gap between the receivers to remove play. It is a good quick fix, but an AR-15 receiver tension screw is a more permanent solution. If your receivers fit tightly, you do not need either. Check for excessive wobble first before adding any tension device.
How do I check if my AR-15 lower receiver is out of spec?
The most reliable way to check receiver dimensions is with a set of calipers and the mil-spec blueprints. In practice, start by checking how the upper receiver mates to the lower. Look for gaps at the rear of the receiver and check the takedown pin holes for elongation. If the trigger group installs without force and the pins seat fully, the critical holes are likely in spec. Excessive play combined with poor trigger seating points to tolerance issues.

