

Table of Contents
- Safety Precautions and Clearing the Firearm
- Required Tools and Equipment for Trigger Kit Installation
- Step-by-Step Trigger Kit Installation Process
- Common Trigger Installation Mistakes to Avoid
- Firearm Safety Checks After Trigger Installation
- Post-Installation Break-In and Function Testing
- Conclusion
Last Updated: August 15, 2026
Safety Precautions and Clearing the Firearm
Before touching a trigger kit installation, treat your firearm like it’s loaded. Always. Remove the magazine, rack the slide or charging handle multiple times, and visually confirm the chamber is empty with good lighting. Point the firearm in a safe direction, keep your finger off the trigger, and engage the manual safety if available. Work in a well-lit, clean space to prevent losing small springs and pins. Disconnect the hammer from the sear before disassembly to remove spring tension and prevent accidental dry fire.
A loaded firearm during disassembly can fire unexpectedly if a pin falls out of alignment or if you accidentally contact the trigger. Verify the chamber is empty, keep the muzzle pointed safely, and never rush this step.
Required Tools and Equipment for Trigger Kit Installation
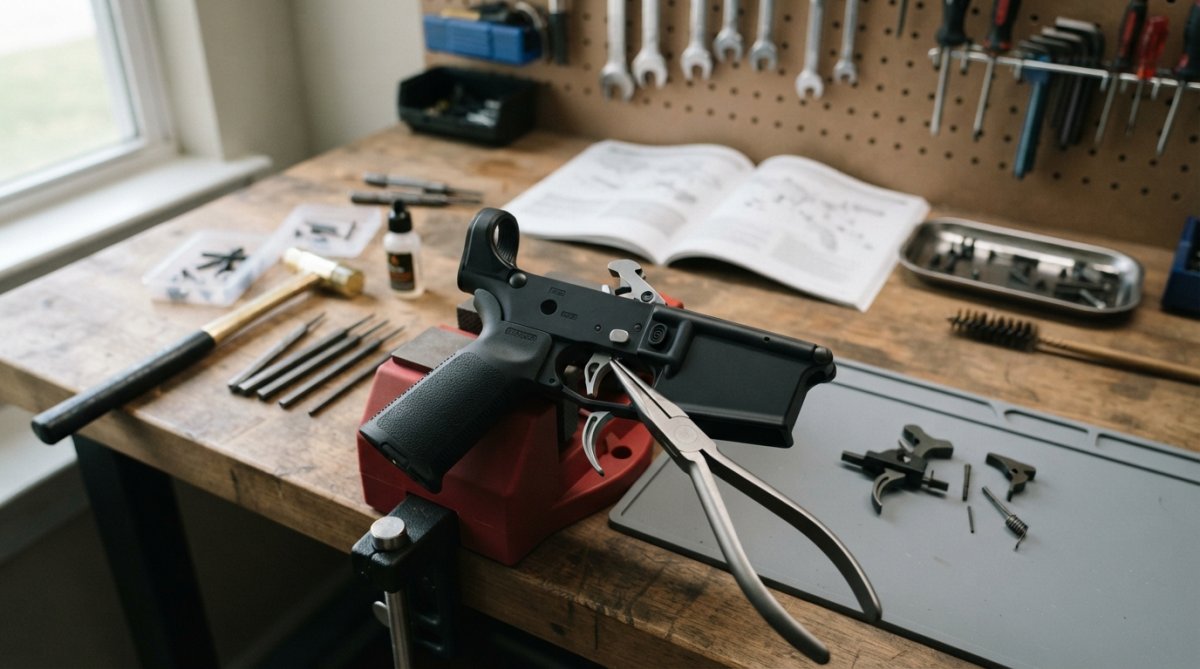
You need roll pin punches in 1/16-inch, 3/32-inch, and 1/8-inch sizes, general hammers and nails will deform pins and create binding issues. A 4-ounce ball-peen hammer provides precision without overkill. Get a spring hook or small tweezers for handling trigger springs, a magnetic parts tray for organization, and a flashlight for visibility. A torque wrench is useful if your new trigger housing uses set screws; check your kit’s documentation for specifications. Polymer Pew’s drop-in trigger kits include detailed installation guides specifying exact tool sizes and torque values.
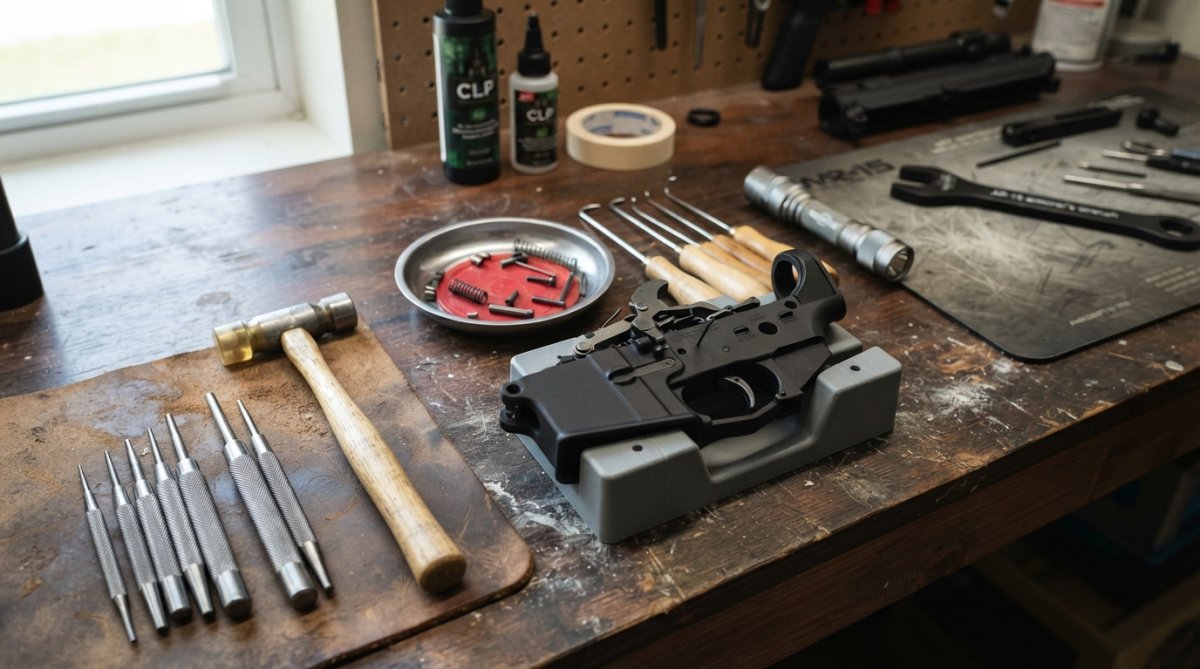
Keep a small notebook nearby to sketch the orientation of springs and pins as you remove them for reference during reassembly.
Magnetic screwdrivers and tweezers prevent small parts from disappearing into the receiver. If a detent spring falls into the lower receiver, you’re looking at partial disassembly to retrieve it.
Step-by-Step Trigger Kit Installation Process
The trigger kit installation breaks into distinct phases: removing the upper receiver, disassembling the existing trigger group, installing the new trigger housing, aligning pins, and testing function.
Removing the Upper Receiver
Separate the upper and lower receivers by pushing out the front takedown pin from left to right using a punch. The upper receiver will hinge up slightly. Push the rear takedown pin and separate the upper from the lower. Set the upper receiver aside in a safe location.
Inspect the inside of the lower receiver where the trigger group sits and wipe away dirt, carbon, or debris with a dry cloth. Check the receiver for cracks or damage around the trigger pin holes. If you see cracks, stop, a cracked receiver won’t hold pins securely.
Disassembly of the Existing Trigger Group
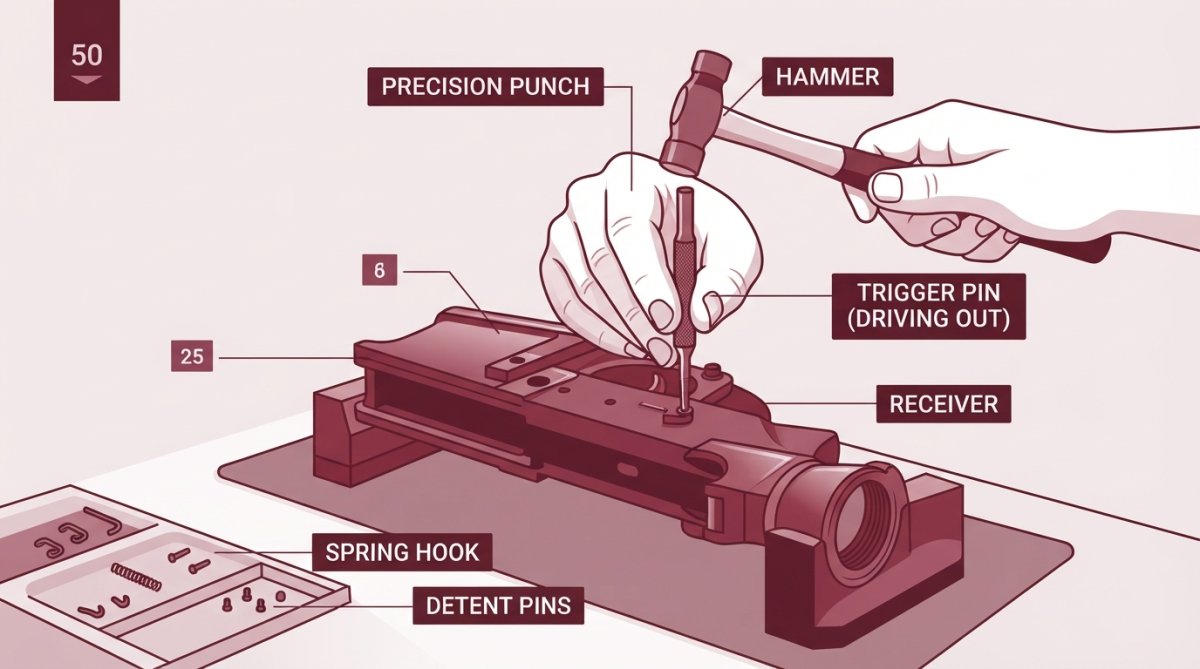
Start with the hammer pin, which runs horizontally through the hammer and receiver. Use your punch and tap it out from right to left. The hammer will drop slightly as the pin comes free. Next, remove the trigger pin positioned forward of the hammer pin. Drive it out the same way.
Remove the hammer spring behind the hammer and the trigger spring under the trigger using your spring hook. Some designs use anti-walk pins or detent pins to keep the main pins from shifting, document their location and orientation before removing them. Take a photo for reassembly reference.
Installing the New Trigger Housing
Place the entire trigger group into the receiver and align the pin holes. If installing individual components, follow the kit’s documentation exactly, the order matters. Springs go in first, then the trigger, then the hammer.
Insert the trigger pin first to stabilize the group, tapping it through gently until it seats flush with the receiver. Then insert the hammer pin using the same process. Check the hammer and trigger for movement, they should pivot freely without binding. If either feels stuck, remove the pins and inspect the sear engagement.
Pin Alignment and Retention
After both pins are seated, check their alignment by looking at the pin heads from the side. They should be flush with the receiver or slightly recessed. Protruding pins will interfere with the upper receiver during reassembly.
If your kit includes anti-walk pins, install them after the main pins are seated without over-tightening. If your trigger housing uses a retaining spring or clip, install it now. Verify that both pins are secure by gently attempting to move them with your punch, they shouldn’t budge.
The most common mistake is assuming pins are seated when they’re actually still protruding slightly. Check from multiple angles. A pin that looks flush from the front might still be proud from the side, causing binding during reassembly or function testing.
Common Trigger Installation Mistakes to Avoid
Installing springs in the wrong order. The hammer spring and trigger spring have specific positions. If reversed or installed upside down, the trigger won’t reset properly or the hammer won’t fall with enough force. Check your kit documentation for the exact sequence.
Forcing pins through misaligned holes. If a pin requires excessive pressure, the holes aren’t aligned. Forcing it damages the receiver or pin. Back out, reset the trigger group, and realign.
Leaving old springs or detents in the receiver. Remove all springs and detents when disassembling the old trigger group. Leaving components in place interferes with the new trigger housing and creates binding.
Over-tightening set screws or retaining clips. Snug is sufficient; over-tightening strips threads or deforms the clip.
Not checking sear engagement. The sear is where the hammer hooks on the trigger. If this contact point is too loose, the hammer falls unexpectedly. If too tight, the trigger won’t reset.
Installing the trigger kit with dirt or carbon in the receiver. Even small particles cause binding. A 30-second wipe with a dry cloth prevents troubleshooting.
Firearm Safety Checks After Trigger Installation
Perform a visual inspection to ensure all pins are flush and seated. Check that the trigger and hammer move freely without binding. The trigger should reset cleanly when released with a distinct click as the sear re-engages the hammer.
Perform a function test without ammunition. Keep the firearm pointed safely downrange, disengage the safety, press the trigger, and observe the hammer fall. It should fall cleanly and completely. Release the trigger and verify it resets with distinct tactile feedback. Repeat this dry fire test 10 times, the hammer should fall consistently every time.
Check the safety selector for smooth movement between positions and verify it actually blocks the trigger when engaged. If the hammer doesn’t fall during dry fire testing or falls incompletely, stop immediately and do not attempt live fire.
If the hammer doesn’t fall during dry fire testing, or if it falls but doesn’t fall completely, stop immediately. Do not attempt live fire. This indicates a sear engagement problem that requires disassembly and correction.
Post-Installation Break-In and Function Testing
Take the firearm to the range with a box of ammunition and start with 25 rounds, paying attention to the trigger’s behavior. You’re looking for consistent pull weight, clean break, and reliable reset. After 25 rounds, inspect the trigger group visually for any signs of wear, misalignment, or damage, and verify all pins remain flush and seated.
By 100 total rounds, the trigger should feel settled with a clean, predictable break and reliable reset. Check your kit’s documentation for break-in recommendations, Polymer Pew’s triggers typically stabilize after 100-150 rounds of use.
After the break-in period, perform another function test and verify that the safety still blocks the trigger properly. Document your observations, including pull weight, reset distance, and any inconsistencies noted.
Conclusion
A high-performance trigger kit installation requires understanding why each step matters and what failure looks like. You’ve covered safety, tools, disassembly, installation, verification, and break-in. The process is methodical but straightforward if you pay attention to alignment, spring orientation, and sear engagement.
Polymer Pew’s drop-in trigger kits are engineered for compatibility with multiple platforms and include detailed installation documentation specific to your build. Get your trigger upgrade from Polymer Pew and experience the difference that quality components make in your platform’s performance.
Frequently Asked Questions
Is it safe to install a high performance trigger kit myself?
Yes, if you follow proper safety protocols. Always clear the chamber, remove the magazine, and visually inspect the barrel. Work on a clean surface with proper lighting. Drop-in trigger kits are designed for DIY installation by firearm enthusiasts. However, if you're uncomfortable with disassembly, a gunsmith can handle installation. The key is taking your time, following the manufacturer's instructions, and performing function tests after installation to verify safe operation.
What tools are required for a trigger kit installation?
You'll need roll pin punches (typically 3/32-inch and 1/8-inch), a hammer or punch block, needle-nose pliers, a small flathead screwdriver, and a workspace with good lighting. Anti-walk pins (if included with your kit) help prevent pin drift. Some kits include specialized installation tools. A torque wrench is helpful for proper fastener tension. Having a parts tray or magnetic mat prevents losing small springs and pins during disassembly.
What are common trigger installation mistakes to avoid?
The most frequent errors include improper pin alignment, which causes binding and safety issues; over-tightening fasteners, which damages components; and skipping function tests after installation. Many installers also fail to properly clear the firearm before starting or neglect to verify hammer pin and trigger pin retention. Rushing the disassembly process and not organizing small parts leads to lost springs or incorrect reassembly. Taking time with each step and double-checking pin placement prevents these costly mistakes.
How long does a high performance trigger kit installation take?
A typical drop-in trigger kit installation takes 30 minutes to 2 hours, depending on your experience level and the complexity of your firearm platform. First-time installers should budget 2-3 hours to account for careful disassembly, proper pin alignment, and thorough function testing. Having all tools organized and following a step-by-step guide significantly reduces installation time. The break-in period after installation typically requires 50-100 rounds of shooting to settle in properly.
This article was written using GrandRanker

