

Table of Contents
- Stripped vs Complete Lower Receiver: Which Should Beginners Start With?
- Forged vs Billet Lower Receiver: Construction, Cost, and Real Differences
- AR-15 Lower Parts Kit Installation: Tools, Steps, and Time Estimate
- Compatibility and Fitment: Will Your Upper and Lower Work Together?
- Budget, Mid-Range, and Premium AR-15 Lower Receivers: What You Get at Each Tier
- Legal Watchpoints: 80% Lowers, Stripped Lowers, and What Beginners Must Know
- Long-Term Maintenance and Wear Points on Your AR-15 Lower Receiver
- Conclusion: Your First Lower Receiver Decision
- Frequently Asked Questions
Last Updated: September 15, 2026
Stripped vs Complete Lower Receiver: Which Should Beginners Start With?
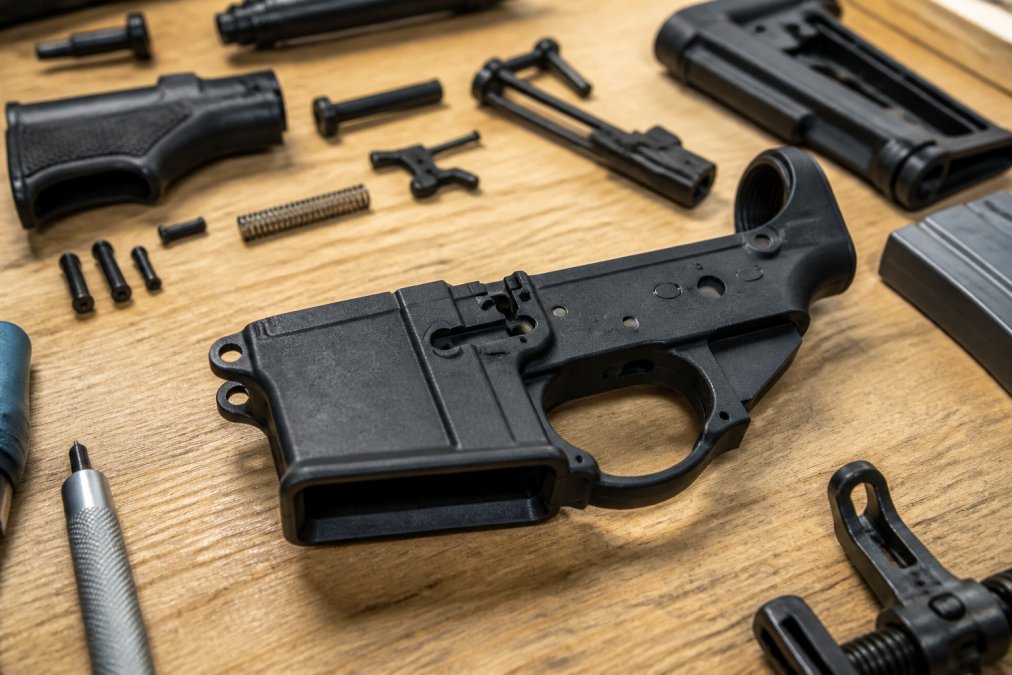
Choosing an AR-15 lower receiver for beginners starts with one fork: stripped or complete. A stripped lower is the raw, serialized receiver with no internal parts; a complete lower arrives with the fire control group, buffer assembly, and stock fitted.
Stripped costs less and teaches how every spring and detent interacts. Complete gets you shooting sooner with fewer chances to launch a takedown detent across the room.
The honest trade-off:
- Stripped: lower cost, full control over parts quality, requires assembly
- Complete: faster to a finished rifle, limited control over component brands, higher upfront cost
For a first build, start stripped to understand the platform. Buy complete if you want a working rifle this weekend.
The stripped vs complete lower receiver decision comes down to time versus control. Stripped saves money and builds knowledge; complete saves hours and reduces the risk of assembly errors.
Forged vs Billet Lower Receiver: Construction, Cost, and Real Differences
Forged receivers are pounded from heated aluminum billets, aligning the grain for a strong, consistent part. Billet receivers are machined from a solid block, usually 7075-T6, allowing sharper lines and tighter cosmetic tolerances.
The practical difference matters less than forums suggest. A mil-spec forged lower from a reputable maker handles anything a typical shooter throws at it. Billet shines for specific features: flared magazine wells, integrated trigger guards, or ambidextrous controls.
Billet falls short on price and weight: machining a block wastes material and time, so it costs more, and some designs run heavier. Anodizing is standard on both; Cerakote appears on premium builds. Neither changes the receiver’s strength.
AR-15 Lower Parts Kit Installation: Tools, Steps, and Time Estimate
Most guides say a lower parts kit takes an hour and move on. The real question: what do I need on the bench, and what does each step feel like when it’s going right versus wrong?
Realistic time estimate
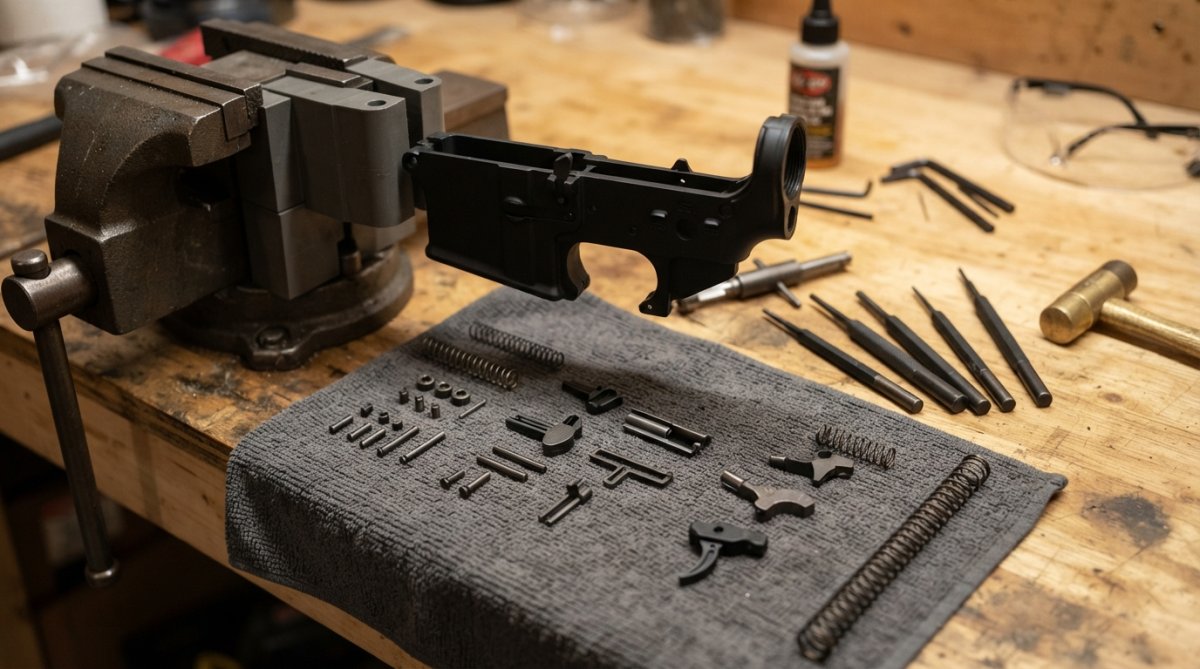
A first-timer with the right tools and no interruptions should budget 60 to 120 minutes (brownells.com). Two steps, the bolt catch roll pin and the pivot pin detent, eat most of that time. A second build lands around 45 minutes. Past two hours on your first attempt, stop and check whether you’re fighting a tolerance issue rather than your technique.
Tools that actually matter (and the ones you can skip)
- Roll pin punch set, the most important purchase. A standard punch walks off a roll pin and scratches the receiver; a roll pin punch has a nub that centers the pin.
- Pivot pin installation tool, captures the detent and spring while you slide the pivot pin through, saving the detent from launching across the room.
- Vise block or receiver block, holds the lower steady so both hands are free. A lower clamped without a block will flex and mar.
- Small brass or nylon hammer, brass won’t deform steel roll pins; nylon won’t mar anodizing.
- Needle-nose pliers, for seating springs and aligning the bolt catch roll pin.
- Masking tape, wrap finished surfaces near any pin you’re driving. Cheap insurance against a slipped punch.
- Torque wrench (inch-pound), needed for the castle nut; foot-pound wrenches are too coarse.
- Armorer’s wrench or castle nut wrench, for the castle nut and, on some stocks, the receiver extension.
Skip: a full gunsmithing kit, a drill press, and any ‘complete AR tool set’ bundling upper-receiver tools you won’t touch.
The sequence, with the failure mode at each step
- Bolt catch and roll pin. The roll pin is a press fit with the spring and plunger behind it. Failure mode: driving the pin before the plunger is seated, bending it. Start with a punch, finish with the roll pin punch.
- Magazine catch and spring. Thread the catch through, seat the spring, start the button. Failure mode: cross-threading, it should turn by hand most of the way.
- Trigger guard. Roll pin front, set screw or roll pin rear. Failure mode: driving the front roll pin at an angle and cracking the ear.
- Fire control group. Trigger, hammer, disconnector, springs. Failure mode: installing the disconnector spring upside down, wider end goes down into the trigger.
- Safety selector. Insert with the hammer cocked or it won’t clear the trigger. Failure mode: forcing it and gouging the receiver.
- Takedown and pivot pins with detents and springs. Failure mode: the detent and spring launch under tension.
- Buffer tube, castle nut, and stock. Stake or torque the castle nut to spec. Failure mode: under-torquing and letting the stock walk loose under recoil.
The pivot pin detent and spring are the single most common casualties of a first build. They launch across the room under spring tension and vanish. Work inside a clear plastic bag or use a dedicated pivot pin tool to contain them. If you lose one, most parts kits ship with a spare detent and spring, check the bag before you order a replacement.
If you’re not sure you want to buy the tooling, price it out first. A roll pin punch set, pivot pin tool, vise block, and inch-pound torque wrench together often cost more than the difference between a stripped lower and a complete one. That math is the real argument for buying complete on a first build, and the real argument for going stripped if you plan to build more than one.
Stripped-and-build vs. buy-complete: the decision in one pass
- Go stripped if: you plan to build more than one rifle, want to choose your own trigger and safety, or want to understand the platform well enough to diagnose it later.
- Go complete if: this is a one-off, you don’t want the tooling, or you want a working rifle this month rather than this weekend.
- Go stripped with a gunsmith assist if: you want parts control without the risk of a first-time mistake on a serialized receiver.
The only wrong answer is buying stripped, skipping the tools, and improvising with a screwdriver and a framing hammer.
Compatibility and Fitment: Will Your Upper and Lower Work Together?
Mil-spec dimensions exist so uppers and lowers from different manufacturers mate reliably. In practice, tolerance stacking between two makers can produce a tight fit, a rattle, or a takedown pin that needs persuasion.
Most fitment issues trace to three things:
Budget, Mid-Range, and Premium AR-15 Lower Receivers: What You Get at Each Tier
What actually changes between tiers
Four things move as you climb:
The tiers, with the trade-off spelled out
| Tier | Typical Construction | What You’re Actually Paying For | Where It Falls Short | Best For |
|---|---|---|---|---|
| Budget | Forged 7075-T6 | A functional, mil-spec receiver | Looser cosmetic tolerances, basic finish, no integrated features | First builds, tight budgets, rifles you’ll shoot hard and not baby |
| Mid-Range | Forged or billet | Better tolerance consistency, cleaner finish, sometimes ambi controls | You’re paying for refinement, not capability | Most beginners, most builds |
| Premium | Billet 7075-T6 | Tighter tolerances, integrated features, Cerakote, design work | Diminishing returns on accuracy; heavier than some forged options | Competition, custom builds, shooters who want specific ergonomics |
The thing most buyers get wrong
So the spending order for a beginner should be:
Where the money goes if you go premium
The tier that fits your build is the one whose features you’ll actually use. For most beginners, that’s mid-range: consistent tolerances, a clean finish, and money left over for the barrel and trigger that actually change how the rifle shoots.
A note on ‘mil-spec’
Legal Watchpoints: 80% Lowers, Stripped Lowers, and What Beginners Must Know
Buying an 80% lower and finishing it does not exempt you from state law. Several states require a serial number and a background check even for personally finished receivers. Ignoring this can turn a hobby build into a criminal charge.
Long-Term Maintenance and Wear Points on Your AR-15 Lower Receiver
A simple maintenance routine covers most of it:
Conclusion: Your First Lower Receiver Decision
Frequently Asked Questions
What is the difference between forged and billet AR-15 lowers?
Forged lowers are made by heating aluminum (usually 7075-T6) and pressing it into shape, creating a dense, strong part with a standard profile. Billet lowers are machined from a solid block of aluminum, allowing custom shapes and features but costing more and producing more waste. For most beginners, a forged lower offers reliable mil-spec compatibility at a lower price, while billet suits builders who want specific aesthetics or added rigidity.
Do I need a stripped or complete lower receiver for my first build?
A complete lower comes with the fire control group, buffer assembly, and stock already installed, so you just attach an upper. A stripped lower requires you to install a lower parts kit, trigger guard, and buffer tube yourself. If you want to learn how the rifle works and save money, a stripped lower plus a quality parts kit is a good path. If you prefer plug-and-play, a complete lower reduces assembly time and tool needs.
What tools are required to assemble a stripped lower receiver?
You will need roll pin punches, a small hammer, a pivot pin installation tool (or a clevis pin), a vice block or magazine well block, and a screwdriver or Allen wrench for the grip. A bench block and good lighting help. No power tools are required, but a torque wrench is useful for the castle nut. Budget two to three hours for your first assembly, and work on a clean surface to avoid losing detents and springs.
Are all AR-15 lower receivers compatible with every upper?
Most mil-spec AR-15 lowers fit most mil-spec uppers, but tolerance stacking can cause tight or loose fits. Billet lowers sometimes have non-standard takedown pin sizes or proprietary features. Always check the manufacturer’s compatibility notes, especially for caliber-specific builds like 9mm or .308. If you are building a clone or using a less common upper, test-fit before final assembly. A lower that is out of spec on the pivot pin or takedown pin holes will cause headaches.

