

Table of Contents
- What You’ll Need: Required Tools and Equipment
- Lower Receiver Inspection and Prep
- Step-by-Step AR-15 Lower Parts Kit Installation
- Lubrication Best Practices for MKE Lower Receivers
- Troubleshooting Common AR-15 Lower Build Issues
- Safety Checks for Home-Built Firearms
- Legal and Compliance Nuances for DIY Builds
- Conclusion
Last Updated: August 6, 2026
What You’ll Need: Required Tools and Equipment
Installing an MKE lower receiver requires precision tools and a clean workspace. Gather a roll pin punch set, hex key set, torque wrench, small hammer, detent spring tool, and a vise with soft jaws to hold your stripped receiver. A receiver block prevents damage during assembly.
High-quality gun oil or specialized firearm lubricant is critical for smooth operation. A small parts tray helps organize springs, detents, and pins. Wear safety glasses when driving roll pins, and use a flashlight for visibility in tight spaces.
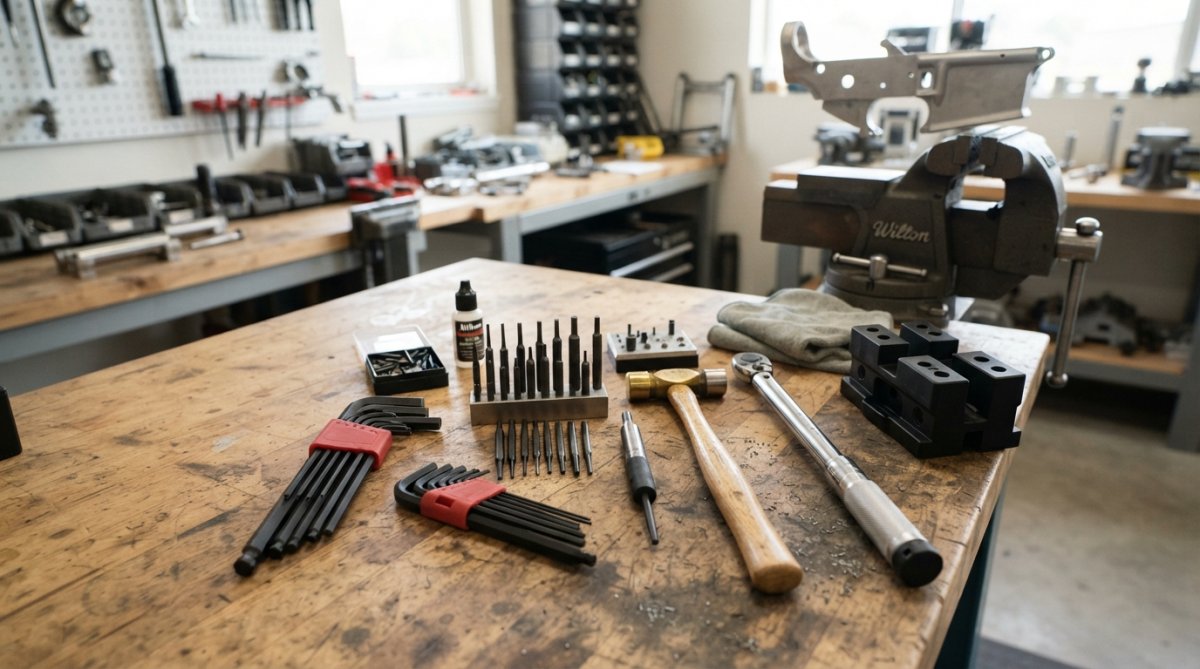
Invest in proper gunsmith-grade tools if you plan multiple builds. At Polymer Pew, we recommend starting with a basic kit that includes essentials, then upgrading as you gain experience.
Lower Receiver Inspection and Prep
A stripped receiver is your foundation. Inspect it thoroughly for defects, cracks, or machining errors. Run your fingers along interior surfaces checking for rough spots or burrs, and examine the pivot pin and takedown pin holes for proper alignment.
Clean your receiver with solvent to remove manufacturing residue and protective oils. Verify MKE lower compatibility with your upper assembly by checking pivot pin hole diameter and takedown pin hole alignment. Apply a thin coat of lubricant to interior surfaces before assembly, then wipe away excess.
Step-by-Step AR-15 Lower Parts Kit Installation
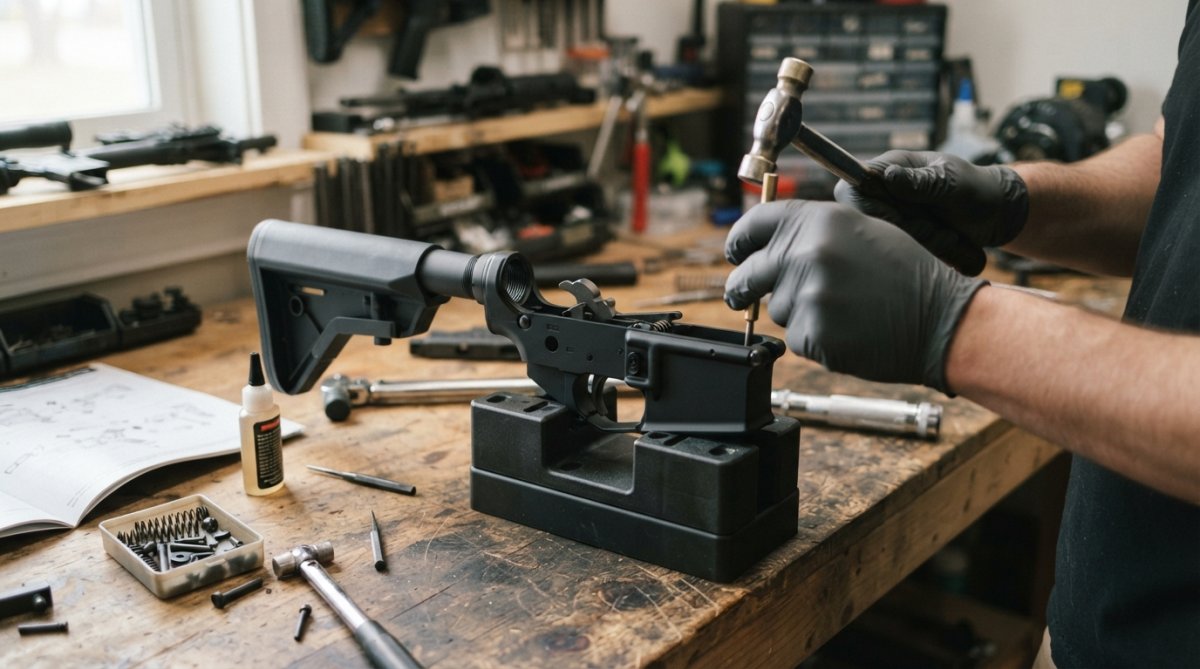
Secure your stripped receiver in a vise with soft jaws. Each component depends on proper positioning of the previous one, so patience matters more than speed.
Installing the Magazine Catch and Release
Insert the magazine catch button through the trigger guard opening from the right side. Thread the magazine catch spring and detent onto the magazine catch from inside, ensuring the spring seats properly. Push the magazine catch inward until the hole aligns, then install the magazine catch roll pin by driving it flush with the receiver surface. A common mistake is driving the pin too far, which binds the magazine catch.
Test the magazine catch movement, it should spring outward smoothly and lock magazines securely.
Installing the Bolt Catch and Takedown Pin
Insert the bolt catch spring into the receiver’s bolt catch pocket, ensuring it seats fully. Position the bolt catch lever so the spring sits behind it, then install the bolt catch roll pin flush with the receiver surface.
For the takedown pin assembly, insert the takedown pin spring into the front hole from the right side and thread the detent onto the spring. Position the takedown pin from the left side, pushing it through until it contacts the detent. Test takedown pin function by rotating it through its full range, smooth operation indicates proper installation.
Assembling the Trigger Guard and Fire Control Group
Insert the trigger guard into the receiver from the bottom, aligning the pivot pin hole. Install the trigger guard roll pin flush. The trigger guard should sit snugly without rocking.
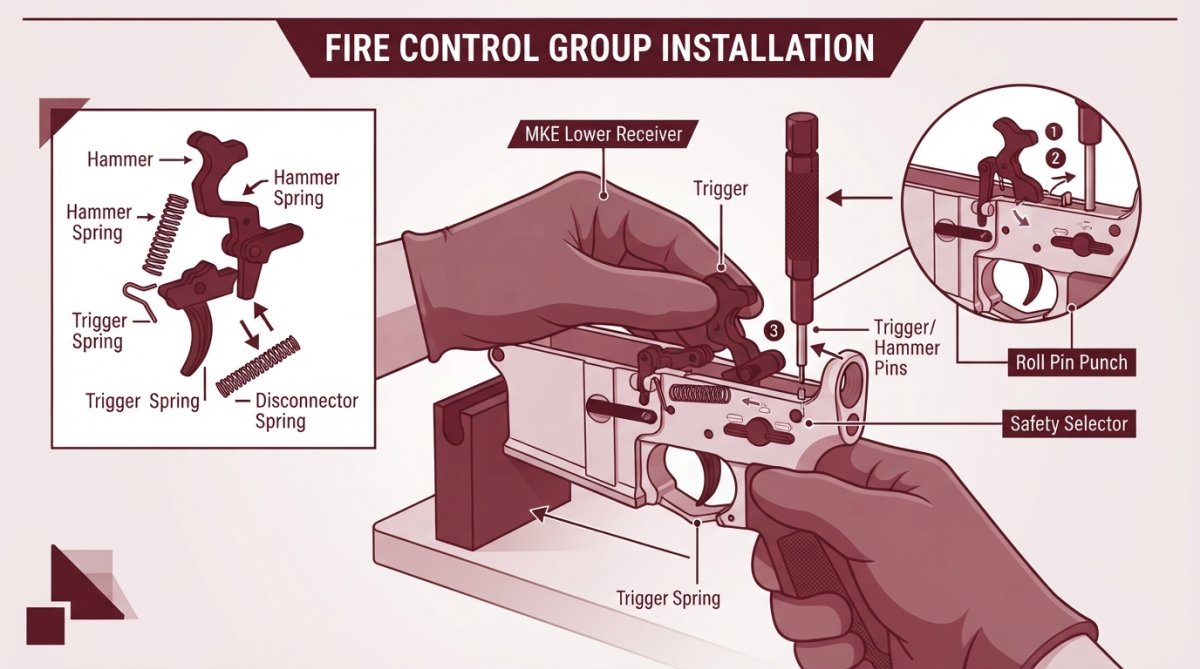
Install the hammer pin first, then position the hammer in the receiver. Install the trigger assembly carefully, ensuring the trigger aligns with the hammer’s sear engagement point. Position the disconnector spring behind the disconnector, then drive the trigger pin through the receiver. Polymer Pew’s tested lower parts kits are designed to reduce assembly errors.
Function test the trigger and hammer, pull the trigger smoothly and the hammer should fall and reset cleanly. If the trigger feels gritty or doesn’t reset, something is misaligned. Remove the trigger pin and reposition components until function improves.
Installing the Safety Selector and Detent
Insert the safety selector spring and detent into the receiver’s safety hole from the top. Position the safety selector lever, pushing it downward until it seats fully. The detent should hold the selector in both fire and safe positions with audible clicks.
Test the safety selector movement, it should click distinctly between fire and safe.
Fitting the Pistol Grip and Spring Assembly
Insert the grip spring and detent into the grip’s interior cavity. Position the grip on the receiver’s grip tang, aligning the hole, then drive the grip pin through, securing the grip firmly. Test grip security by attempting to move it by hand, a secure grip is essential for control and safety.
Lubrication Best Practices for MKE Lower Receivers
Apply lubricant sparingly to moving parts: the hammer pivot, trigger pin area, and safety selector pivot. Use a thin applicator like a toothpick to apply lubricant precisely. Excess oil attracts dust and debris, which can cause binding.
Focus lubrication on high-friction areas like the hammer pivot and trigger pin area. Avoid lubricating the disconnector excessively, it must function precisely for proper trigger reset. Allow lubricant to set for a few minutes before function testing, then wipe away excess.
Periodically reapply lubricant during the shooting season. Repeated firing generates heat and can dry out original lubrication.
Troubleshooting Common AR-15 Lower Build Issues
The most common issue is trigger binding or sluggish reset. If your trigger doesn’t reset cleanly, the disconnector is likely misaligned. Remove the trigger pin and inspect the disconnector’s position, it should sit behind the hammer’s sear. Reposition it and reinstall the trigger pin.
Magazine catch binding prevents magazine insertion or removal, typically because the roll pin is driven too deep. Remove the pin carefully and reinstall it, stopping as soon as it sits flush.
Safety selector movement that feels mushy indicates detent spring issues. Remove the safety selector and inspect the detent ball and spring, ensuring the spring provides consistent tension.
Hammer follow, where the hammer continues falling after the trigger is released, suggests disconnector problems. The disconnector should catch the hammer’s sear during the trigger’s forward motion. Reposition the disconnector and test again.
Roll pin installation is where most builders struggle. Driving pins straight requires steady hand alignment. If a pin bends, remove it carefully and replace it. Use moderate pressure when driving pins, your receiver is aluminum and excessive force can strip threads or crack material.
Safety Checks for Home-Built Firearms
Before firing any home-built firearm, conduct thorough safety checks. Function test your lower receiver without an upper assembly, pull the trigger and the hammer should fall cleanly, then reset when released. Repeat this cycle multiple times.
Verify that your safety selector functions in both fire and safe positions. In safe mode, pulling the trigger should not release the hammer. Check that your magazine catch holds magazines securely and requires deliberate force to release.
Inspect your completed lower for cracks or damage, paying special attention to the trigger guard area and magazine well. Never dry fire excessively, dry firing can damage your hammer and sear over time.
When ready to fire, start with a small number of rounds in a controlled environment. Watch for any signs of malfunction: failure to fire, failure to eject, or failure to feed. Document your assembly process with photos from multiple angles for reference if problems develop.
Legal and Compliance Nuances for DIY Builds
Federal law permits individuals to manufacture firearms for personal use without a license, provided you don’t intend to sell them. Building for profit requires a Federal Firearms License (FFL).
State laws vary significantly. Some states restrict or prohibit home firearm manufacturing entirely, while others require registration. Research your state’s specific requirements before starting your build.
Certain states require serialization of home-built firearms. If your state requires this, you must engrave or stamp a serial number on your receiver before assembly. Some jurisdictions have banned specific features like adjustable stocks or certain trigger types, ensure your completed build complies with local regulations.
At Polymer Pew, we emphasize that legal compliance is your responsibility. Keep documentation of your build, including where you sourced components and when you completed assembly.
Building an MKE lower receiver requires attention to detail, proper tools, and patience. Polymer Pew’s aluminum MKE lowers are engineered for reliable AR-15 platform compatibility, and our tested lower parts kits reduce assembly errors. Start with a methodical approach, function test thoroughly, and verify legal compliance in your jurisdiction. Get your Flatties here and begin your build with confidence.
Frequently Asked Questions
What specific tools are required to assemble an MKE lower receiver?
You'll need a hex key set, punch set (roll pin punches especially), a torque wrench for precise tightening, needle-nose pliers, and a small screwdriver. A lower receiver vise block or dedicated assembly jig is highly recommended to secure the stripped receiver during installation. Many builders also use specialized roll pin removal tools to avoid damaging the receiver or components during disassembly later.
Are MKE lower receivers compatible with standard AR-15 parts kits?
Yes, MKE lower receivers are engineered for compatibility with standard AR-15 lower parts kits. They accept all common fire control group components, safety selectors, pistol grips, and buffer tube assemblies without modification. However, verify that your specific parts kit matches the MKE variant you're building, some clones have minor dimensional differences that can affect fit.
How do I know if my MKE lower receiver assembly will function correctly before firing?
Perform a function test by cycling the bolt carrier group manually through the receiver. Check that the trigger breaks cleanly, the safety selector engages both positions without binding, the bolt catch holds and releases the carrier properly, and all springs return to their resting position. Verify that the magazine catch releases smoothly and the takedown pins rotate freely without excessive play or grinding.
Do I need a gunsmith or FFL to install an MKE lower receiver?
No gunsmith is required for assembly, this is a DIY-friendly process with the right tools and patience. However, the lower receiver itself is legally classified as a firearm under federal law, so you must purchase it through a licensed firearms dealer (FFL). Once you own it legally, assembly and installation are permitted for personal use in most states, but verify your local and state regulations before starting.
This article was written using GrandRanker

