

Table of Contents
- Understanding Trigger Creep and Why It Matters
- Tools and Safety Gear for Your AR-15 Trigger Job DIY
- Step 1: Disassembly and Inspection of the Fire Control Group
- Step 2: Polishing Sear Engagement Surfaces
- Step 3: Installing a Set Screw Adjuster for Overtravel and Creep
- AR-15 Trigger Pull Weight Reduction and Spring Tension
- TriggerTech vs Apex Tactical Comparison: Drop-In vs Tuned Mil-Spec
- Compatibility Matrix: Milspec vs Drop-In Cassette Triggers
- Frequently Asked Questions
Last Updated: September 10, 2026
Understanding Trigger Creep and Why It Matters
Trigger creep is the gritty, uneven movement you feel in an AR-15 trigger after the initial takeup but before the hammer drops. Learning how to reduce AR-15 trigger creep is one of the highest-value upgrades a builder can make, because creep is the single biggest obstacle to a clean, predictable break. Shooters spend hundreds on optics while ignoring the one component their finger touches on every shot.
A milspec trigger is designed to a price, not a standard of feel. The sear surfaces are machined, not honed, and the springs are stiff enough to pass a drop test, not to reward a precision shooter.
Takeup vs. Creep: Know the Difference
Takeup is the slack travel before the sear surfaces even touch. It’s light, intentional, and not your problem.
Creep is what happens next: the slow, grinding travel as the sear engagement surfaces slide against each other under spring tension. It’s the difference between a trigger that breaks like a glass rod and one that feels like it’s full of sand.
Here’s the practical distinction:
- Takeup: free movement, no resistance, resets the trigger
- Creep: resistance under load, gritty or spongy, happens right before the break
- Overtravel: the extra travel after the hammer drops, before the trigger bottoms out
Most shooters blame creep when the real culprit is all three. Fixing only one usually disappoints.
Creep lives in the sear engagement surfaces. Everything else, takeup, overtravel, spring weight, is a supporting actor. If you polish the sear and leave the rest alone, you’ll feel maybe 40% of the improvement available.
Tools and Safety Gear for Your AR-15 Trigger Job DIY
An AR-15 trigger job DIY project needs surprisingly few tools, but the ones you do need matter.
What you’ll need:
- Fine Arkansas stone or ceramic stone (600-1200 grit)
- Chromium polish compound or similar fine abrasive
- Surface plate or thick glass pane for flattening the stone
- Set screw tap and die set matching your grip screw thread
- Brass or nylon punch set
- Roll pin punch set
- Bench vise with soft jaws
- Trigger pull gauge
- Safety glasses and nitrile gloves
- Cleaning solvent and light gun oil
What you don’t need: a Dremel. A rotary tool removes material faster than you can measure it, and once you’ve cut through a hardened sear surface, the trigger is scrap. It’s the mistake beginners make most often.
Safety gear isn’t optional: small metal particles and polishing compound get airborne, and you’re working around springs under tension.
Never test function with live ammunition while the rifle is partially disassembled. A trigger that passes a bench function test can still behave differently under recoil. Always do a full reassembly and use snap caps for the first dry-fire cycle.
Step 1: Disassembly and Inspection of the Fire Control Group
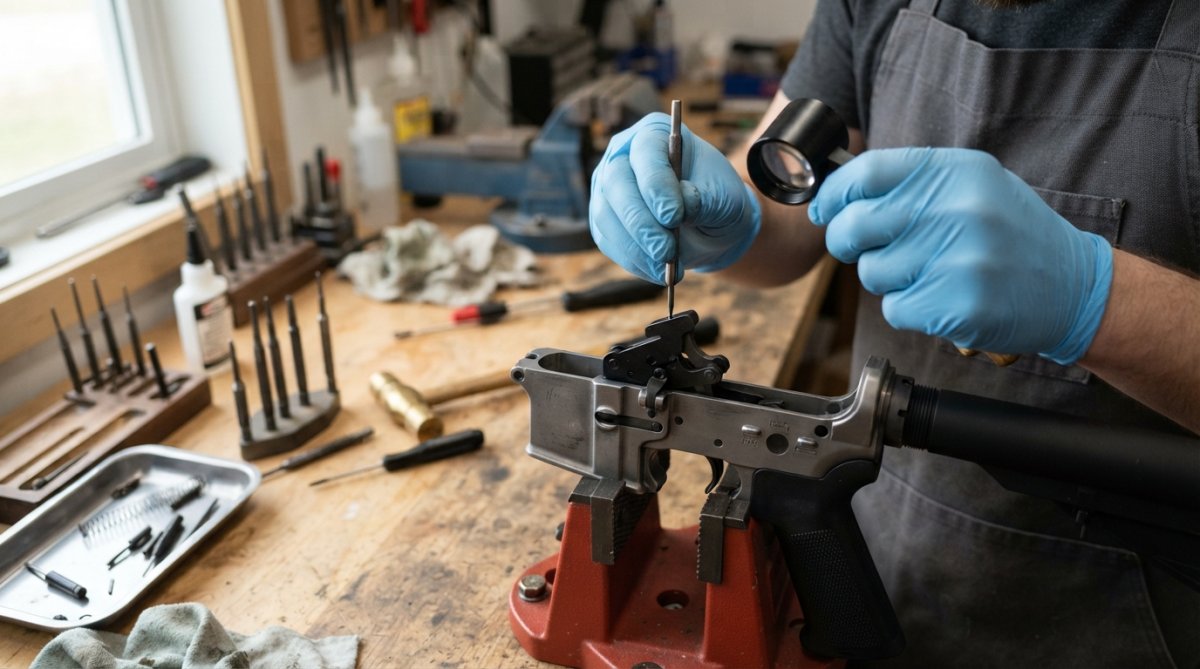
Disassembly takes about ten minutes with the right punches. Work on a clean surface with a magnetic tray, because springs and detents launch across the room if you’re careless.
Total Time: 15 minutes
Difficulty: Beginner
- Verify the rifle is unloaded and the chamber is clear. Remove the magazine.
- Push out the takedown and pivot pins, then separate the upper from the lower receiver.
- Remove the safety selector by rotating it to the fire position and pulling it free.
- Drive out the hammer pin, then the trigger pin, using a roll pin punch.
- Lift out the hammer, trigger, disconnector, and springs as a group.
Once the fire control group is out, inspect every surface: burrs on the sear engagement, wear on the hammer and trigger pins, and any sign of previous stoning that went too far. A milspec trigger “improved” by someone else is often worse than a factory one.
Removing the Pistol Grip and Trigger Pins
The pistol grip has to come off before you can address the grip screw hole, and it’s where a set screw adjuster will eventually live. Remove the grip screw with a long hex key, then slide the grip off. Check the grip screw hole for thread damage; cross-threaded holes are common on budget lowers and complicate the set screw step later.
Set the pins aside in labeled order. Hammer and trigger pins are not interchangeable, and mixing them up introduces a new problem.
Step 2: Polishing Sear Engagement Surfaces
Polishing is where the actual creep reduction happens. You are not removing material to change geometry; you are smoothing the microscopic ridges that create that gritty feel. The goal is a mirror finish on the sear surfaces while keeping every angle exactly where the factory put it.
Total Time: 30-45 minutes
Difficulty: Intermediate
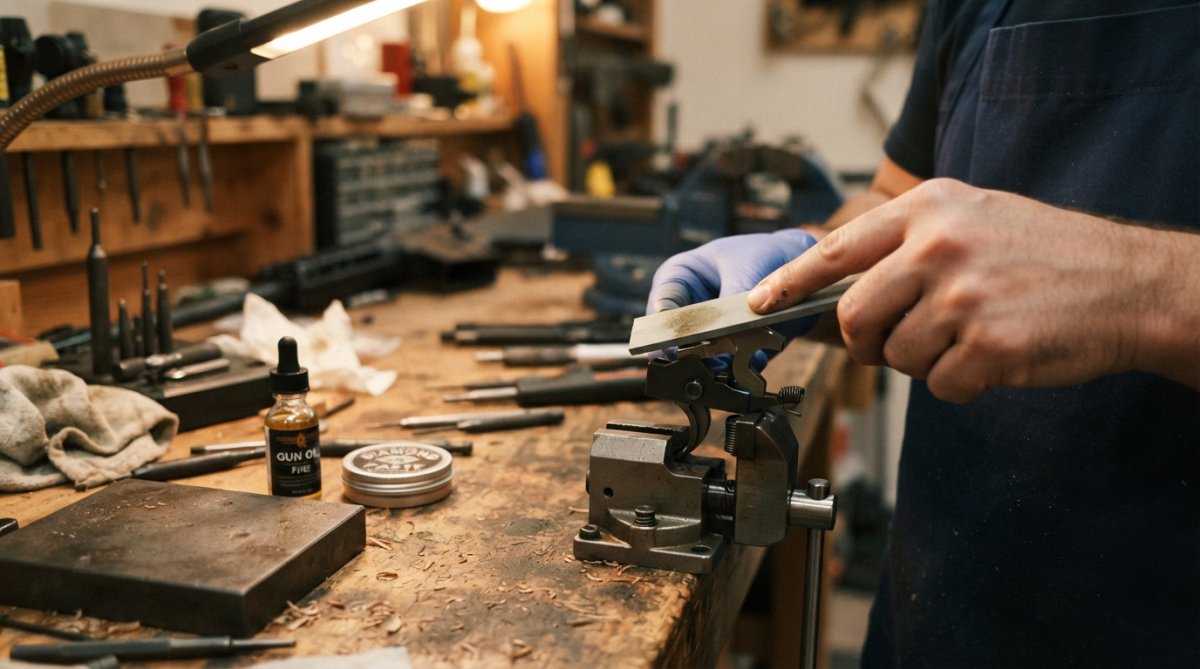
- Flatten your stone on the surface plate first. A dished stone will round the sear edge and ruin the trigger.
- Apply light oil to the stone and the sear surface.
- Lay the trigger flat and draw the sear surface across the stone in one direction, using light pressure.
- Count strokes. Ten passes, inspect, ten more. Stop the moment the surface looks uniform.
- Repeat on the hammer’s sear engagement surface with the same discipline.
The trigger bow and disconnector also benefit from a light polish, but they don’t affect creep. Focus on the two surfaces that touch under load.
Stoning and Chromium Polish Techniques
Stoning removes the high spots; chromium polish finishes the job. After your last stone pass, switch to a felt bob or leather strop loaded with chromium polish compound and work the sear surface in the same direction. Twenty to thirty light strokes usually brings it to a mirror.
Less is more here. An over-polished sear loses its crisp edge, and the trigger will feel mushy or, worse, fail to hold the hammer under load. If you can see a rounded edge under magnification, you’ve gone too far.
Check your work with a 10x jeweler’s loupe between every polishing cycle. The difference between a mirror finish and a ruined sear is often invisible to the naked eye.
Step 3: Installing a Set Screw Adjuster for Overtravel and Creep
A set screw adjuster is the cheapest way to eliminate the last bit of creep and overtravel without touching the sear geometry again. It limits how far the trigger travels after the break, reducing perceived creep at the end of the pull.
Total Time: 20 minutes
Difficulty: Intermediate
- Drill and tap the pistol grip screw hole to accept a fine-thread set screw. A 8-32 or 10-32 thread is common.
- Thread the set screw in from the bottom of the grip.
- Reinstall the grip and trigger group.
- Adjust the set screw in quarter-turn increments, testing trigger reset after each change.
- Lock the screw in place with a small amount of medium-strength thread locker once you’ve found the sweet spot.
The set screw sits behind the trigger and limits rearward travel. Turn it in too far and the trigger won’t reset; back it off until reset is reliable, then go a quarter turn further for margin.
Tapping the Grip Screw Hole
Tapping requires the right bit for your thread pitch, and a tap guide keeps the hole straight. Start by hand, keep the tap perpendicular to the lower receiver, and back it out every half turn to clear chips. Cutting oil prevents galling in aluminum.
A common mistake is tapping too deep. The set screw only needs a few threads of engagement, and a hole that runs into the trigger pocket creates a new set of problems. Mark your tap with tape at the depth you need.
AR-15 Trigger Pull Weight Reduction and Spring Tension
Pull weight and creep are related but separate. A lighter spring doesn’t fix creep, but reducing pull weight makes remaining creep feel less pronounced because less force drives the sear surfaces together.
The standard approach is swapping the hammer spring for a reduced-power version; JP Enterprises and similar manufacturers sell kits for this. The tradeoff is reliability: too light a spring causes light primer strikes, especially with hard military primers. A modest reduction into the 4-4.5 pound range is the sweet spot for a range rifle (nra.org).
Spring tension also affects trigger reset. A lighter disconnector spring can speed reset, but go too light and the disconnector may not reliably catch the hammer (PubMed). Test with snap caps after every change.
| Adjustment | Effect on Creep | Effect on Pull Weight | Risk |
|---|---|---|---|
| Sear polishing | High | None | Over-polishing ruins sear |
| Set screw adjuster | Medium | None | Too far in, no reset |
| Reduced hammer spring | None | High | Light primer strikes |
| Reduced disconnector spring | None | Low | Failure to reset |
TriggerTech vs Apex Tactical Comparison: Drop-In vs Tuned Mil-Spec
The triggertech vs apex tactical comparison is the question every builder eventually asks, and the honest answer is that they solve different problems. A properly tuned milspec trigger delivers a noticeable improvement for very little money, while a drop-in cassette delivers a factory-engineered feel no amount of home polishing will match.
TriggerTech builds drop-in cassette triggers with a proprietary friction-reducing design. The break is clean, the reset is short, and pull weight is consistent unit to unit. Coming from a milspec trigger, the difference is immediate.
Apex Tactical focuses on improving the existing fire control group with upgraded components rather than replacing it wholesale. Their kits are a middle path: more refined than a factory trigger, less expensive than a full cassette.
Neither option is right for everyone. If you enjoy the process and want to understand your rifle, tuning the milspec trigger yourself is rewarding. If you want a guaranteed result without risking a sear surface, drop-in is safer.
Apex Tactical’s official trigger product documentation
Compatibility Matrix: Milspec vs Drop-In Cassette Triggers
Not every trigger fits every lower. Before you buy, confirm which category your lower falls into.
| Lower Type | Milspec Trigger | Drop-In Cassette | Notes |
|---|---|---|---|
| Standard forged | Yes | Yes | Widest compatibility |
| Billet 80% | Yes | Sometimes | Check pin hole diameter |
| Polymer | Yes | Limited | Cassette may not clear walls |
| MKE aluminum | Yes | Yes | Tested for variant fit |
| Clone receivers | Varies | Varies | Verify before purchase |
“Milspec” describes a pin pattern, not a guarantee of internal clearance. Always verify with the manufacturer before ordering.
Builders who want a reliable, tested drop-in solution without the guesswork of tuning their own sear surfaces. Polymer Pew’s flat triggers and full metal kits are built around hardened stainless internals and anodized aluminum housings.
Frequently Asked Questions
Can you safely adjust a mil-spec AR-15 trigger?
Yes, you can safely adjust a mil-spec trigger, but it requires careful work. Polishing sear surfaces and installing a set screw adjuster are common methods to reduce trigger creep. However, removing too much material can compromise the sear engagement, leading to an unsafe firearm. Always perform a function test after any modification and consult a professional gunsmith if you are unsure.
What tools are needed for a basic AR-15 trigger job?
A basic AR-15 trigger job requires a punch set for removing trigger pins, a fine stone or polishing compound for sear surfaces, a tap and die set if you plan to install a set screw, and a surface plate for flat sanding. Safety glasses and a bench block are also essential. For a drop-in cassette, you may only need basic hand tools.
Does polishing the sear reduce trigger creep?
Polishing the sear engagement surfaces can reduce trigger creep by smoothing the contact points between the trigger and hammer. This creates a more consistent and predictable break. However, polishing alone may not eliminate creep entirely; combining it with a set screw adjuster or a drop-in trigger often yields better results. Always use a fine stone and avoid removing too much material.
How does a drop-in trigger compare to a tuned mil-spec trigger?
A drop-in trigger, like a cassette-style unit, offers a self-contained assembly that is easy to install and often provides a consistent pull weight and reduced creep out of the box. A tuned mil-spec trigger, when properly polished and adjusted, can achieve similar performance at a lower cost but requires more labor. Drop-in triggers are ideal for those who want reliability without gunsmithing, while a DIY trigger job suits tinkerers.

